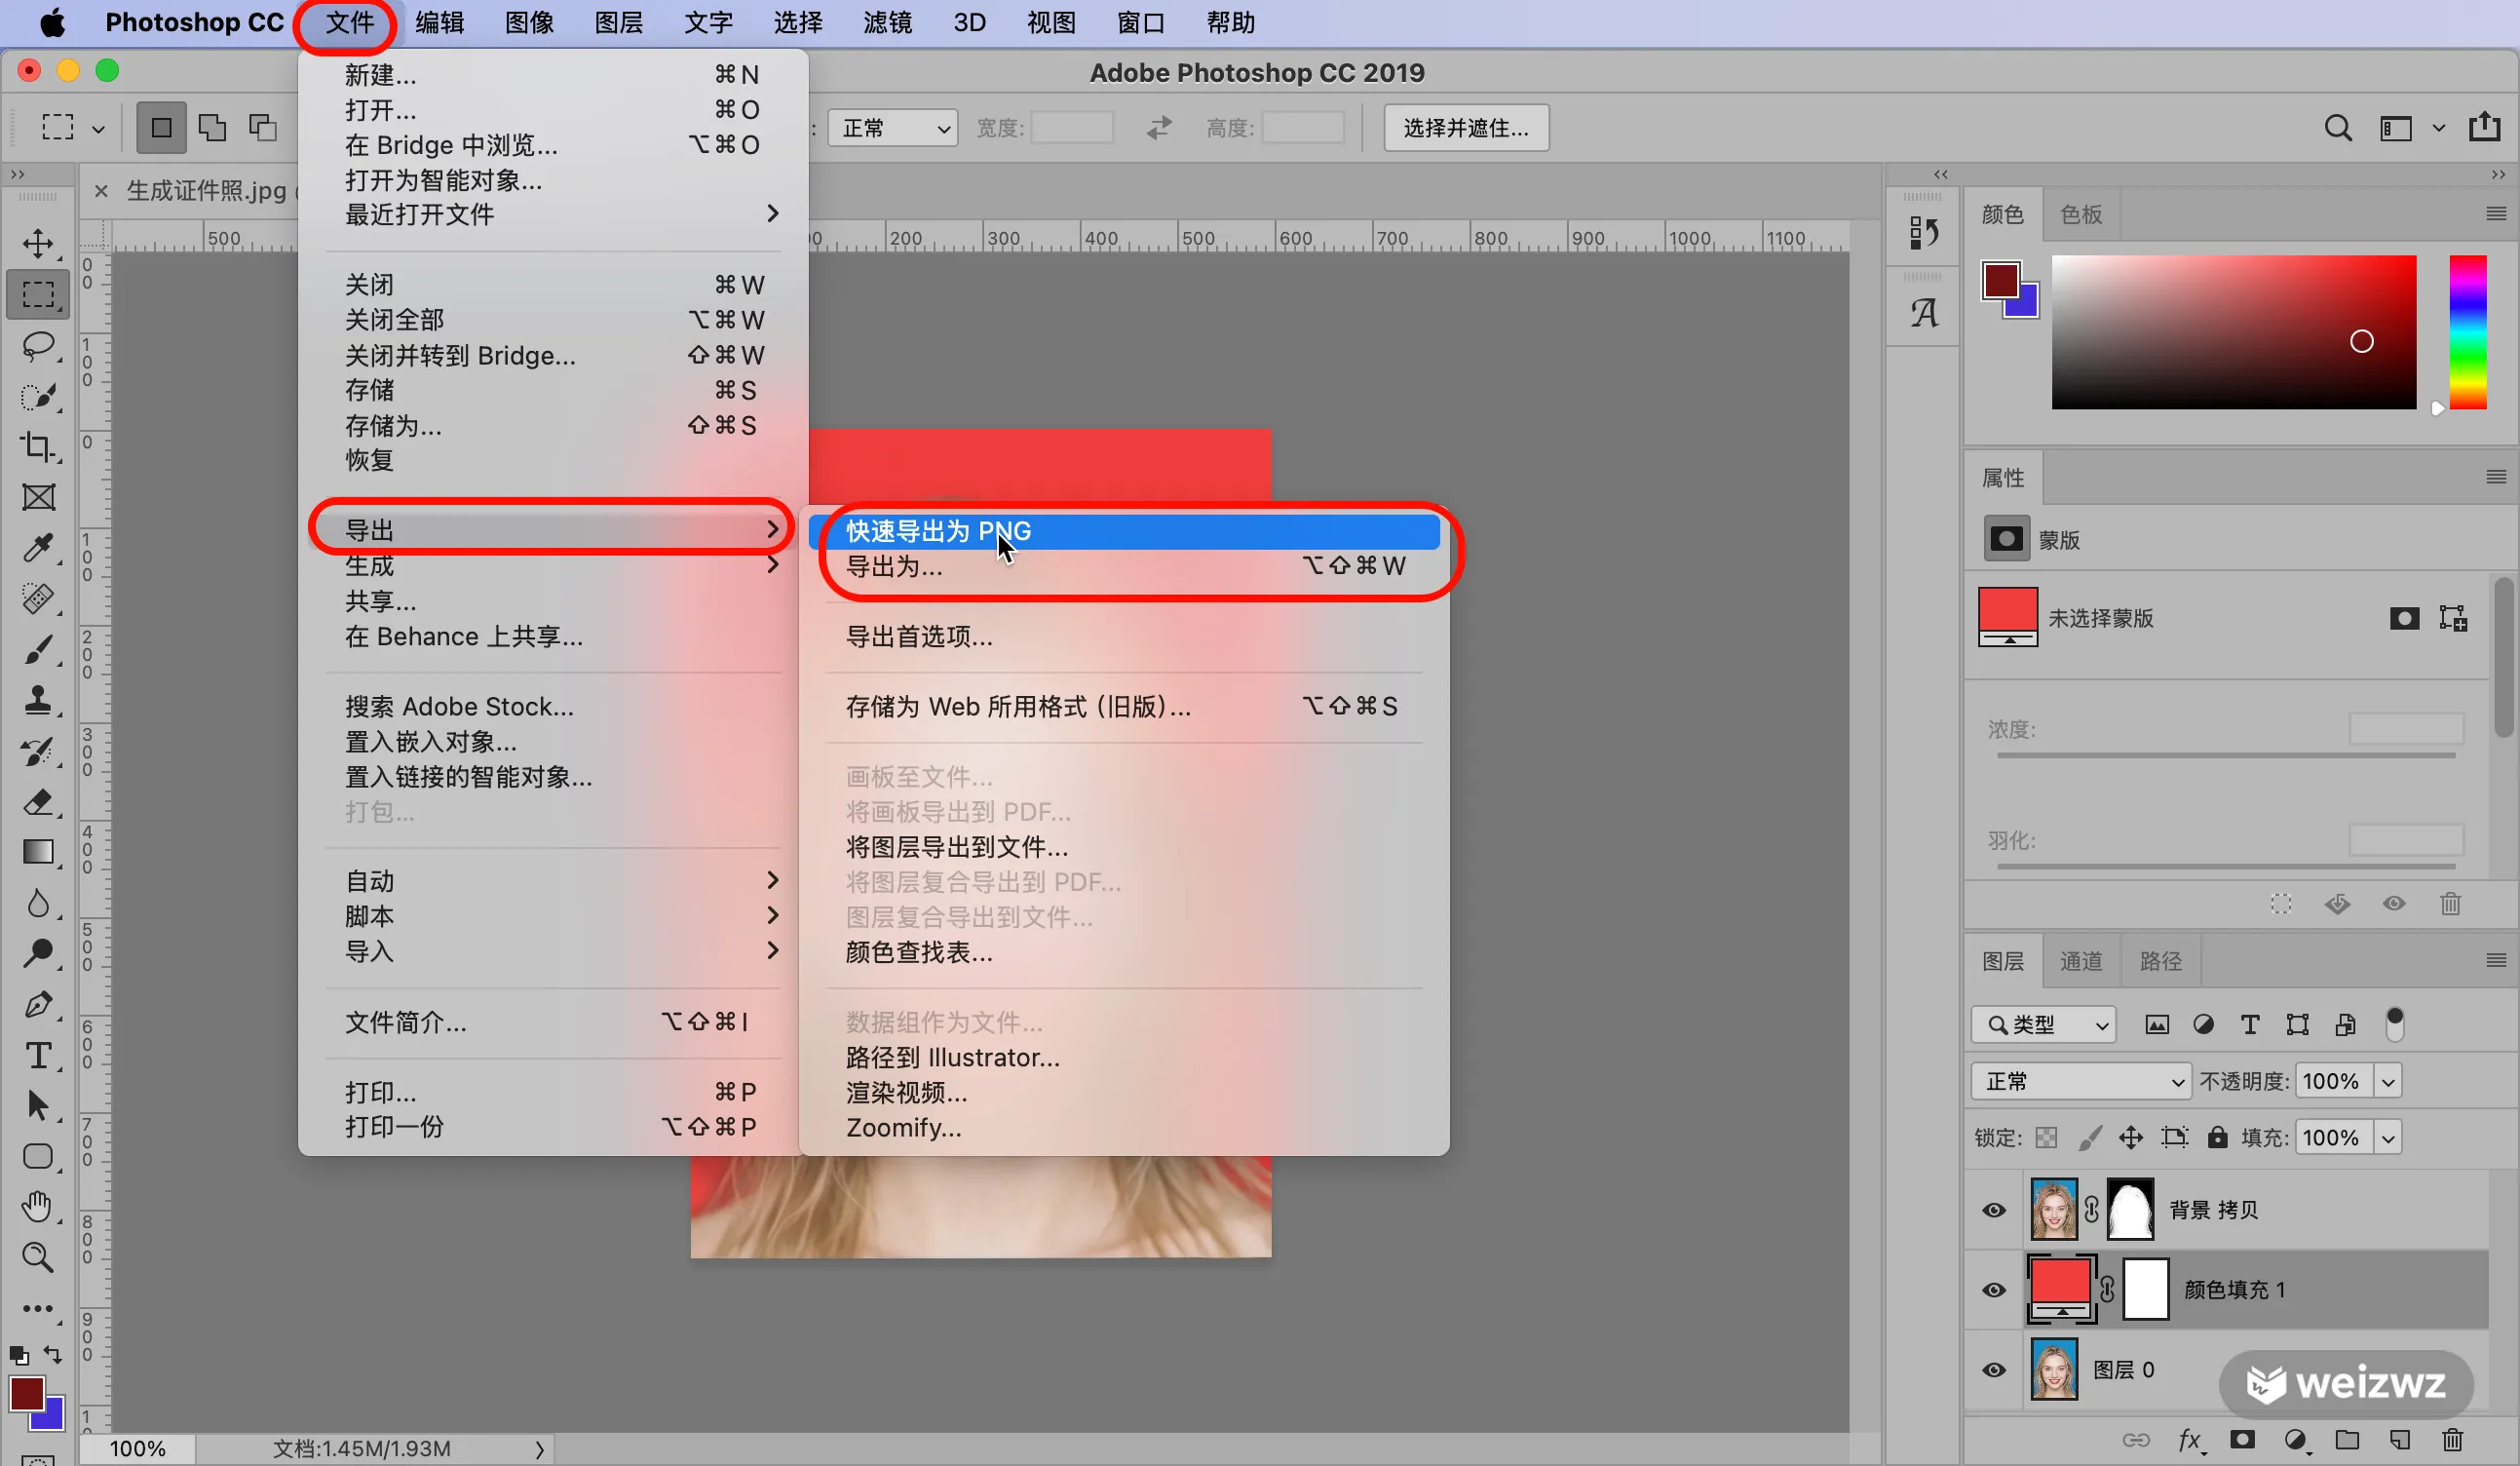
Changing the background on an ID photo is one of those jobs that looks trivial until you zoom in. Hair, shoulders, and the gap between an arm and the body often keep bits of the old background, and a hard-edged cutout immediately looks fake. This Photoshop route uses Select and Mask to keep the fine edges intact, and it is simple enough to follow without much retouching experience.
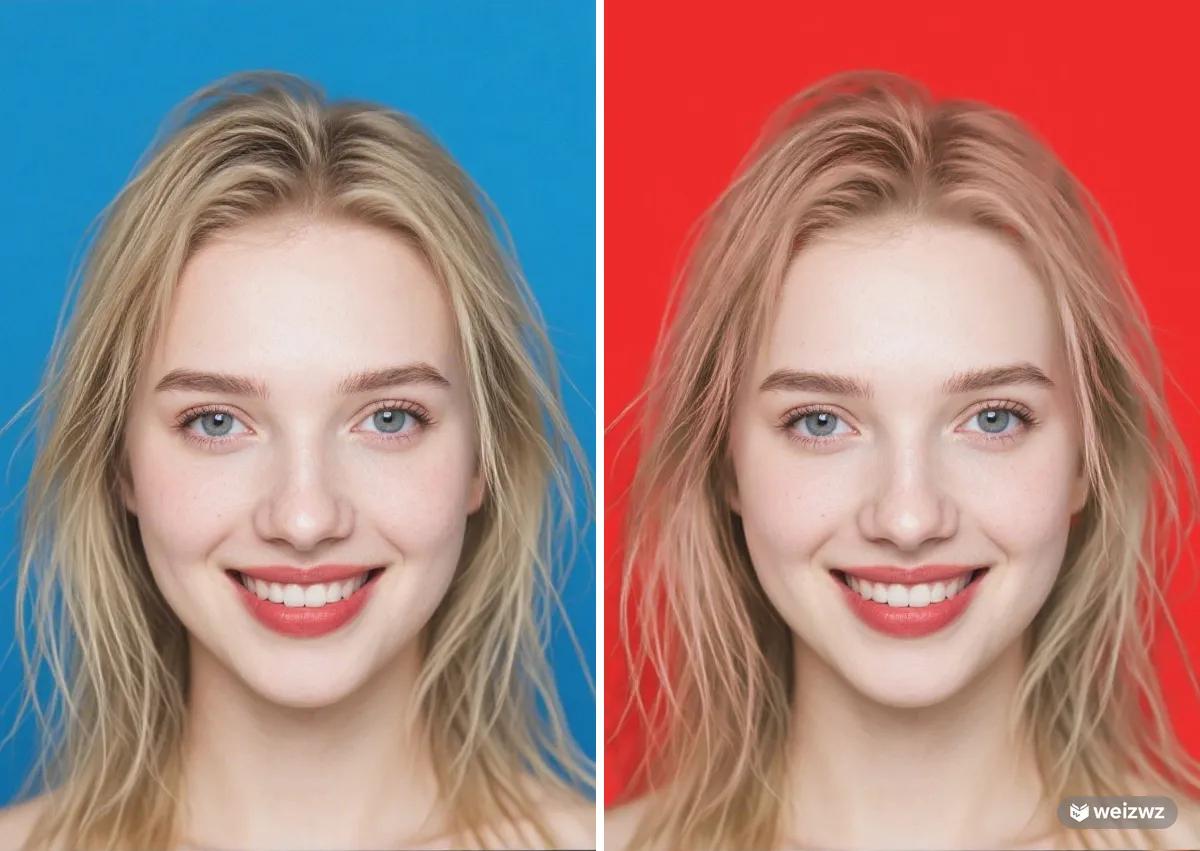
Open the image and unlock the layer
Open your photo in Photoshop. If the layer is locked, unlock it first so you can work on it.
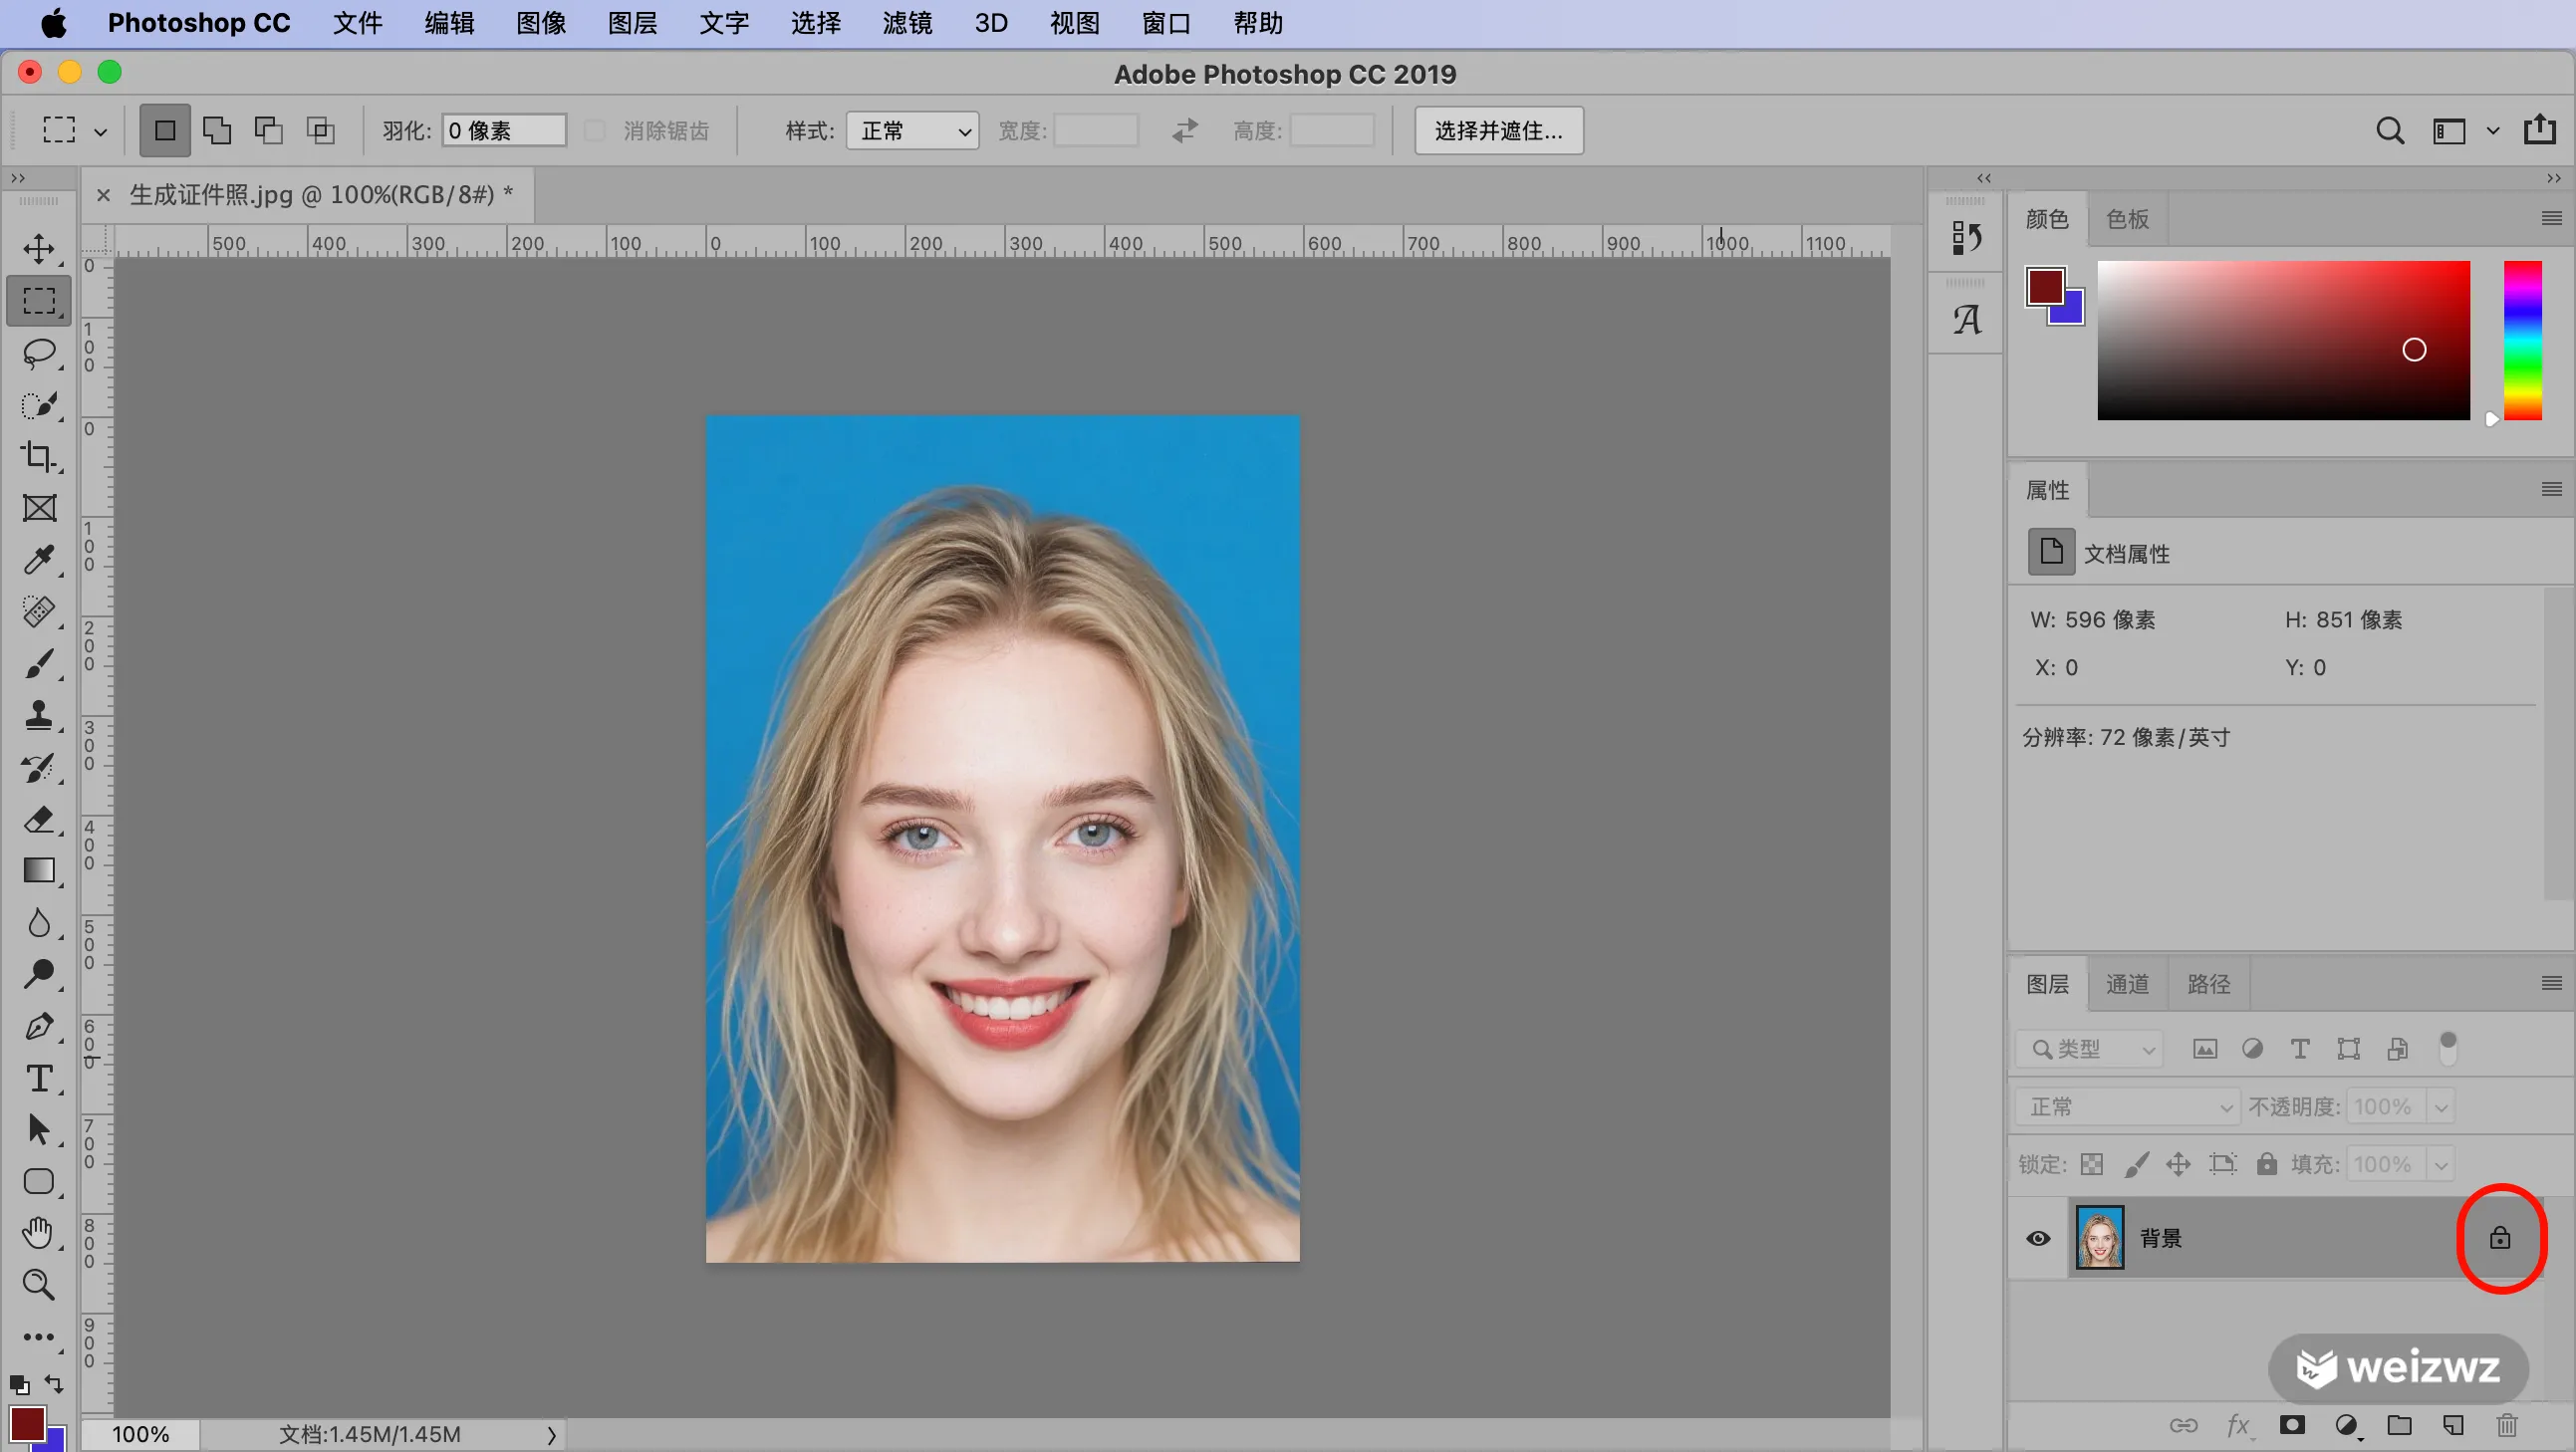
Select the subject
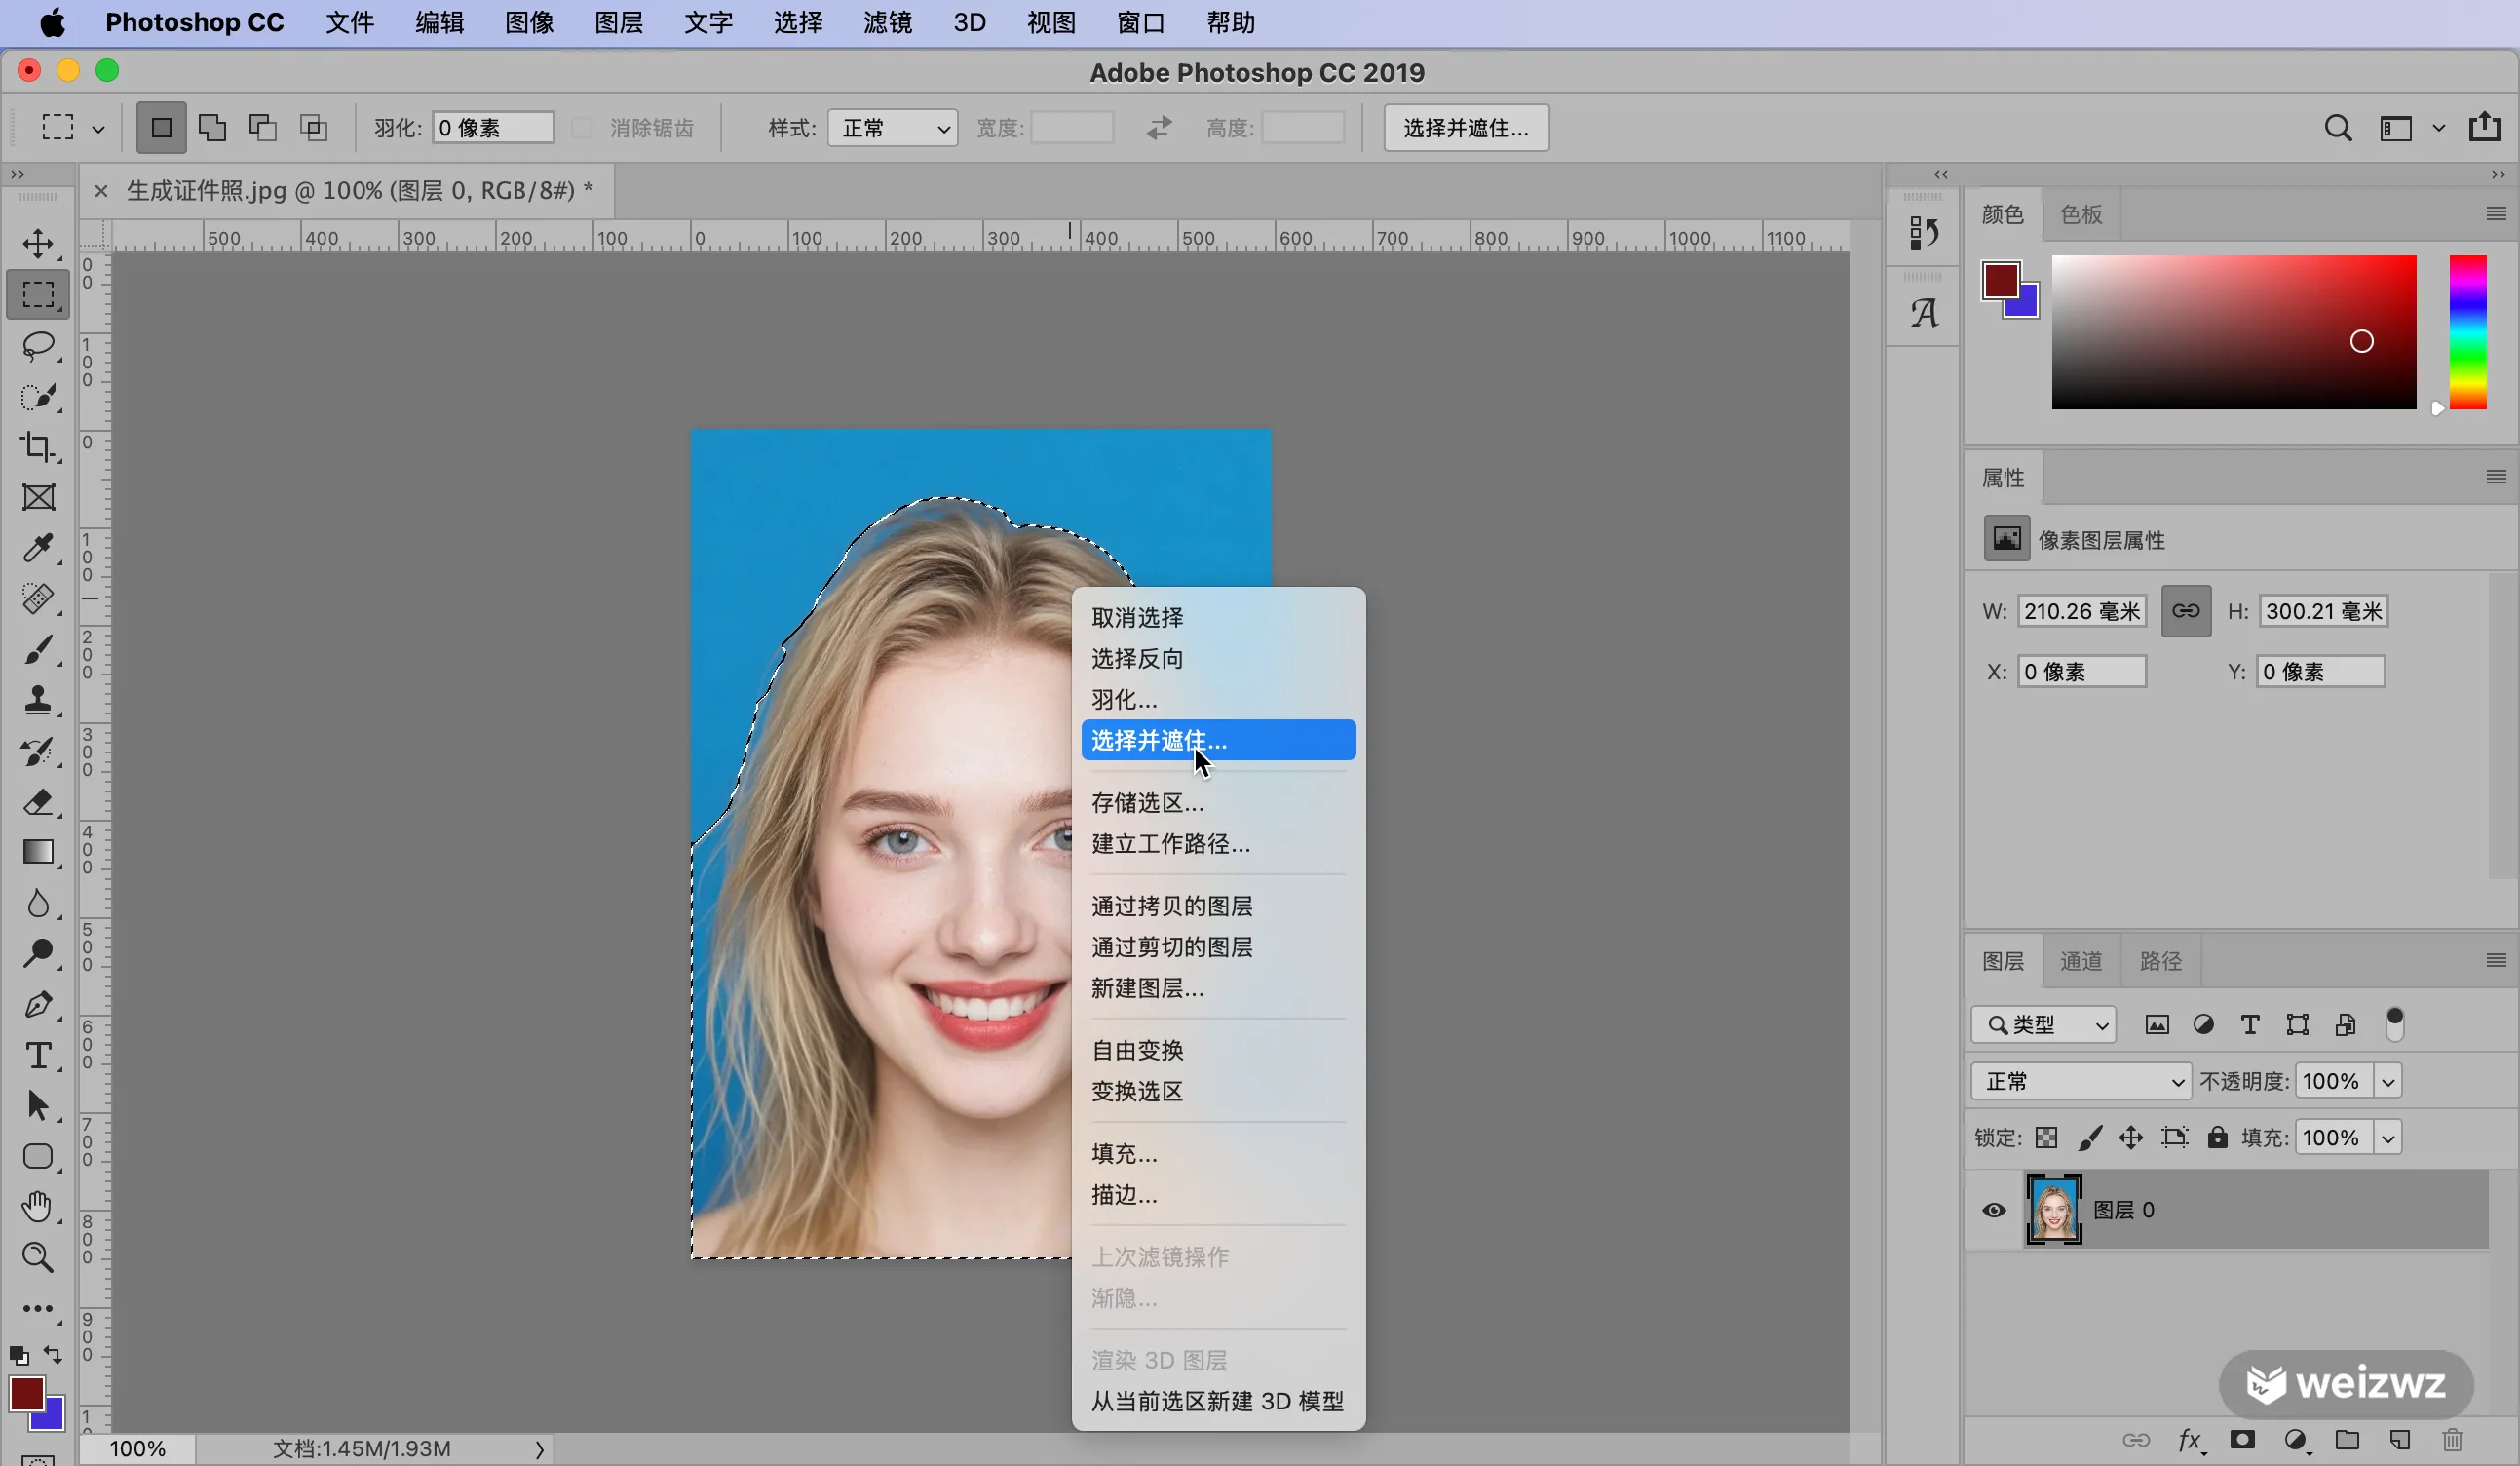
Choose Select > Subject. Photoshop will make a selection around the person in the photo.
Open Select and Mask
Right-click inside the selection and choose Select and Mask. A separate window opens. At this point the person may still have bits of background around the edges.
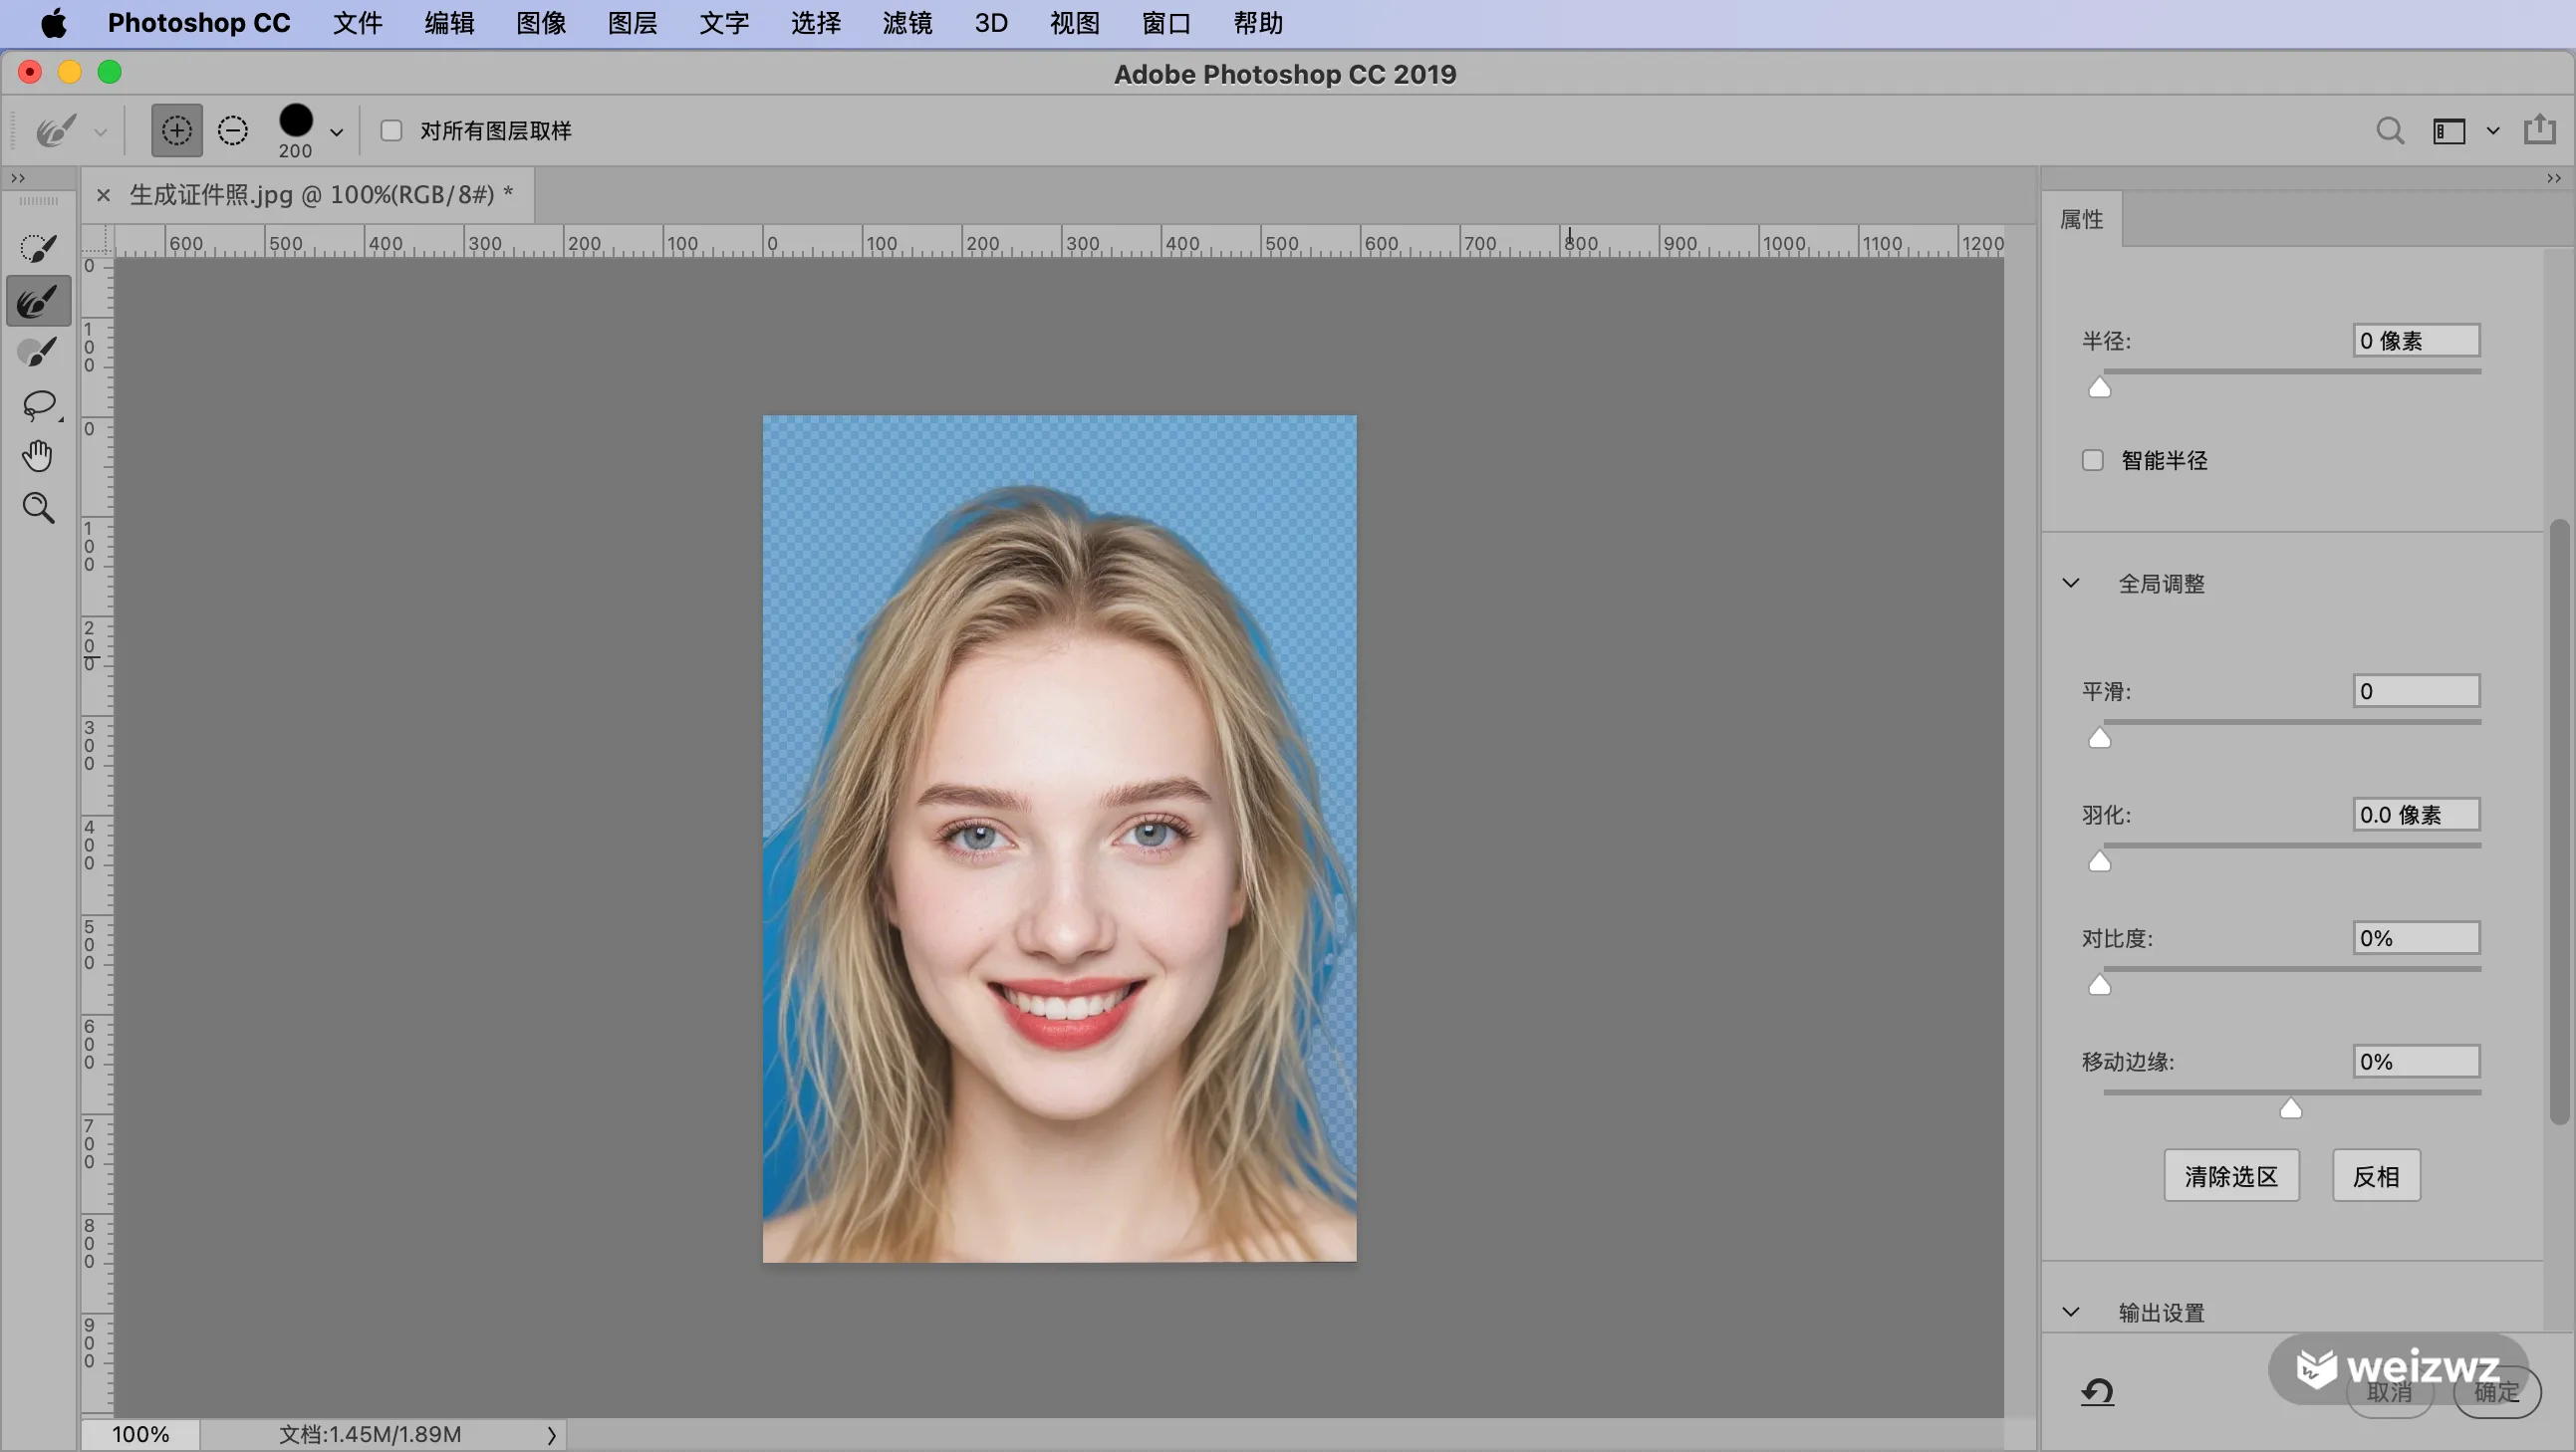
Refine the edges
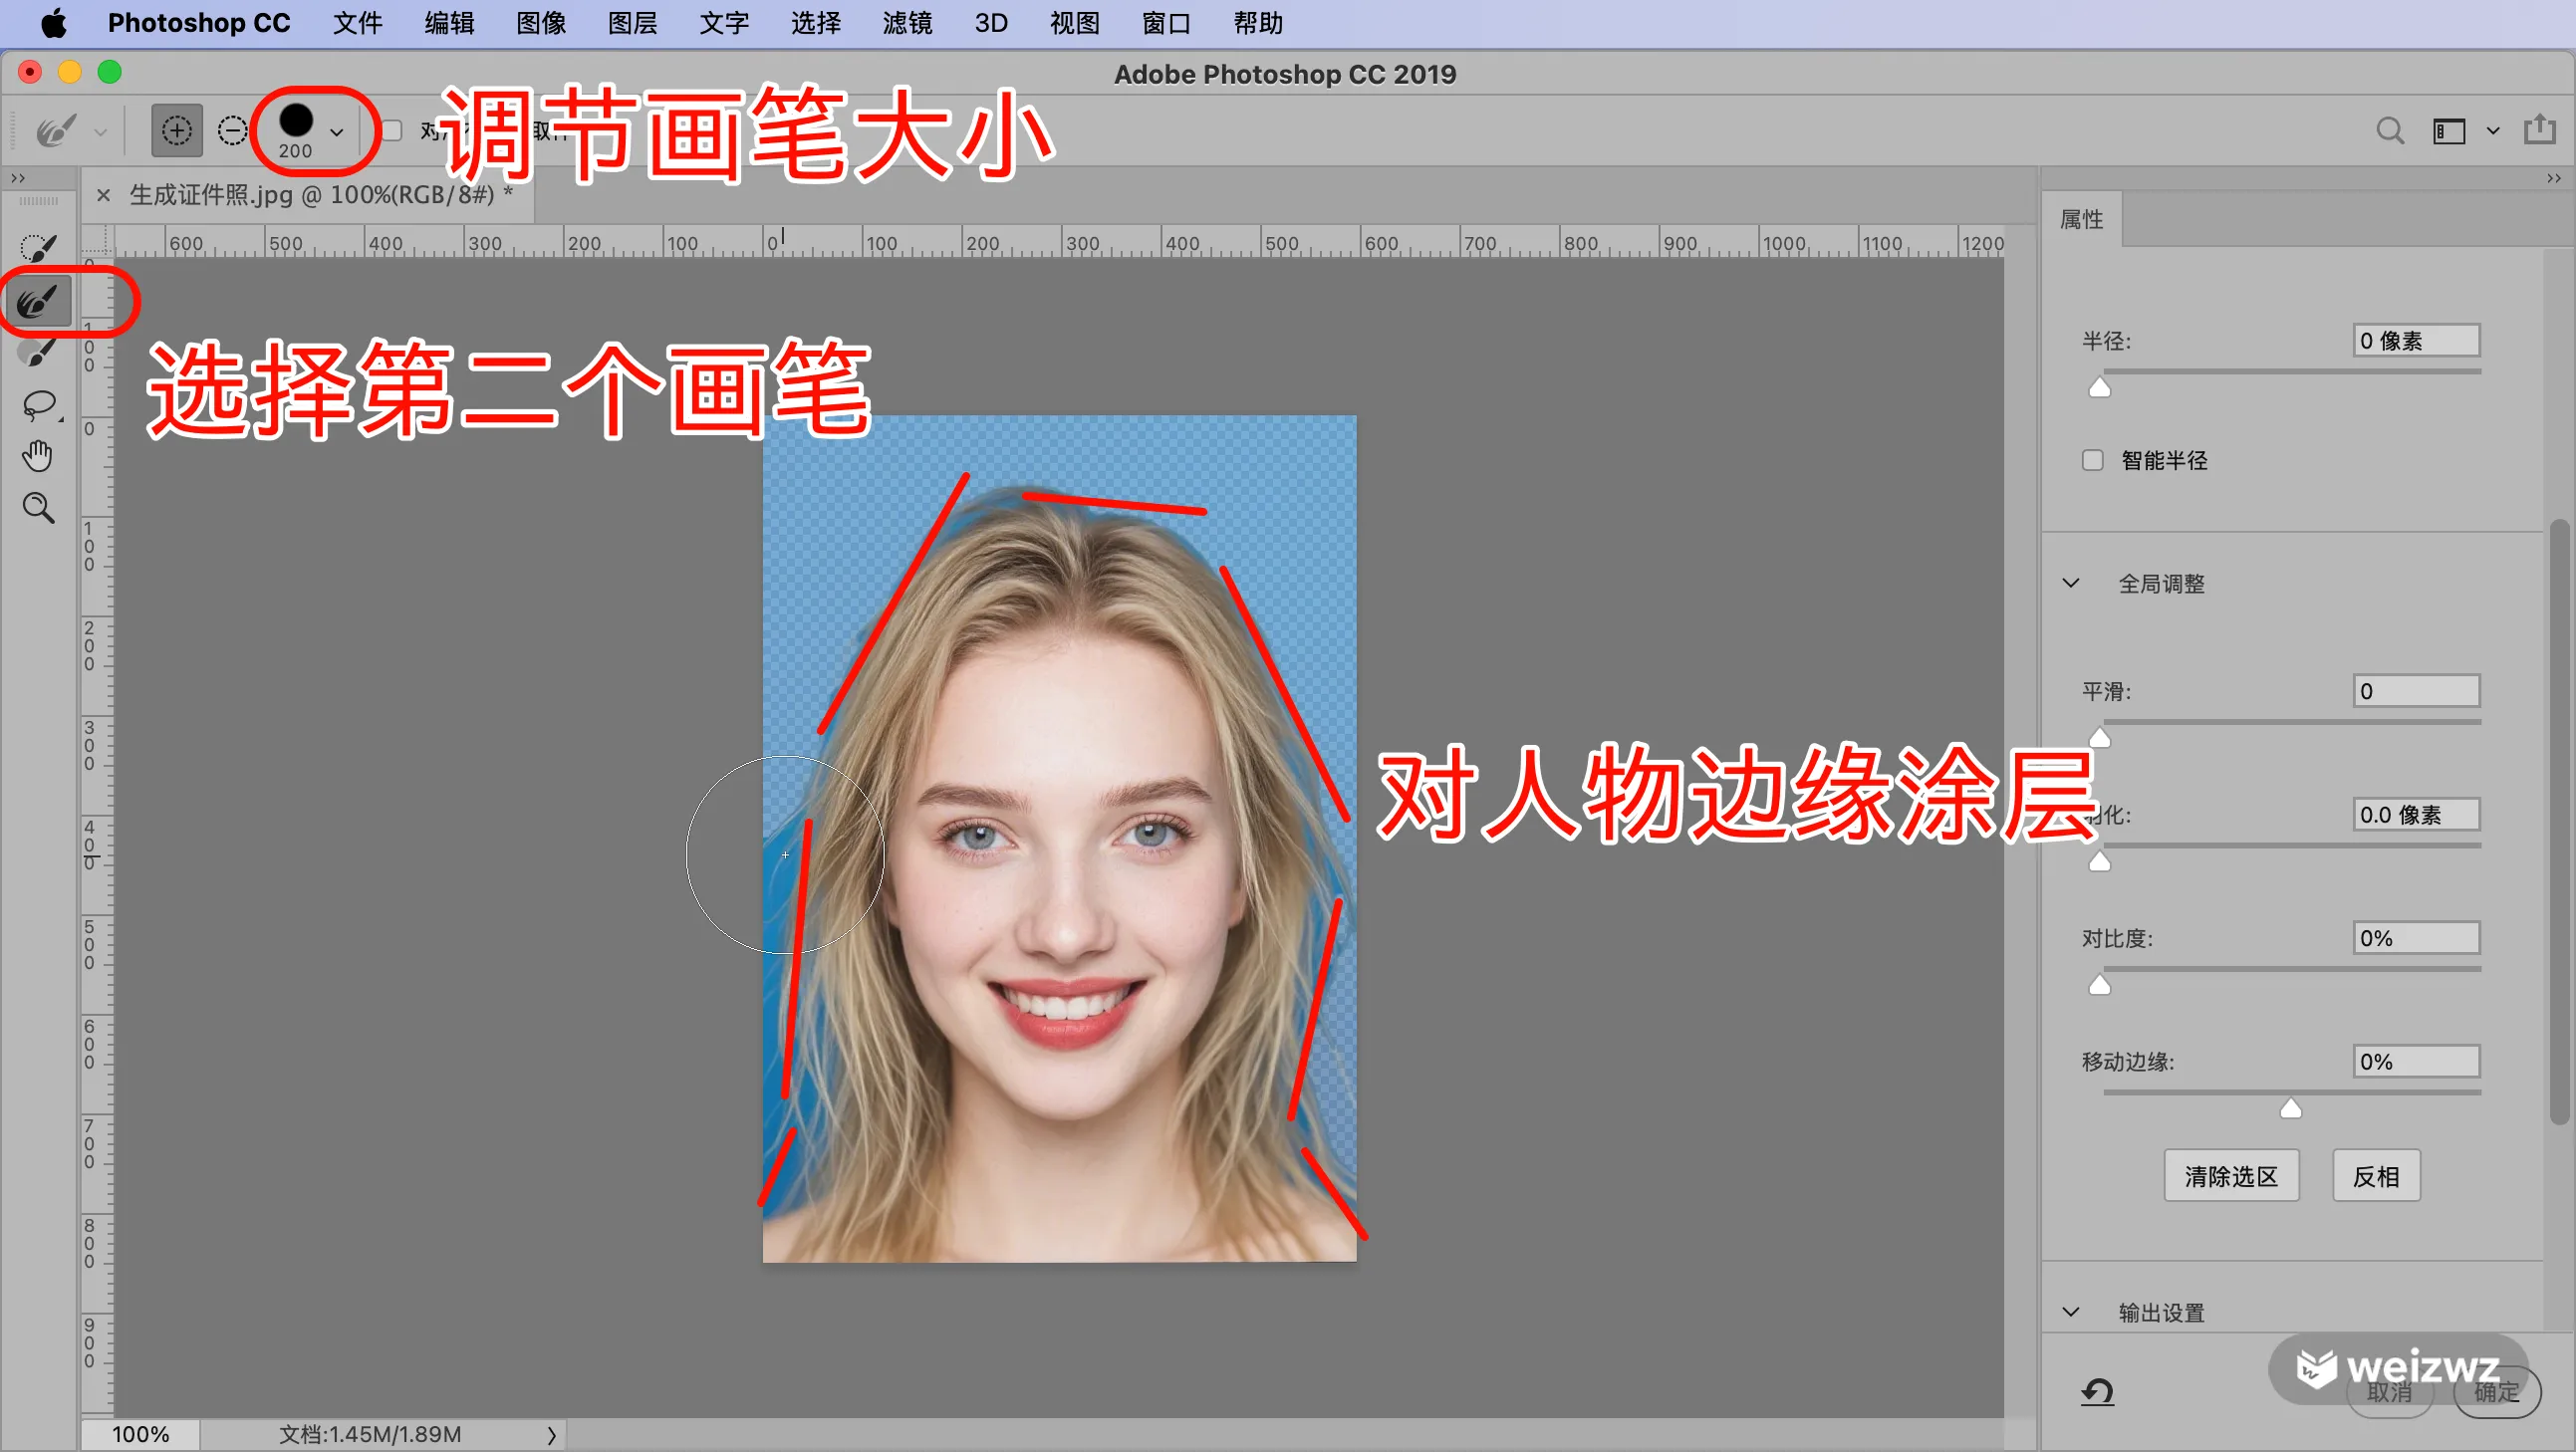
Choose the second brush from the toolbar on the left, set its size to match the edge you are cleaning, and paint along the person's outline. Work around hair and shoulders. The edge should look cleaner and stray background color should be reduced.
Decontaminate colors
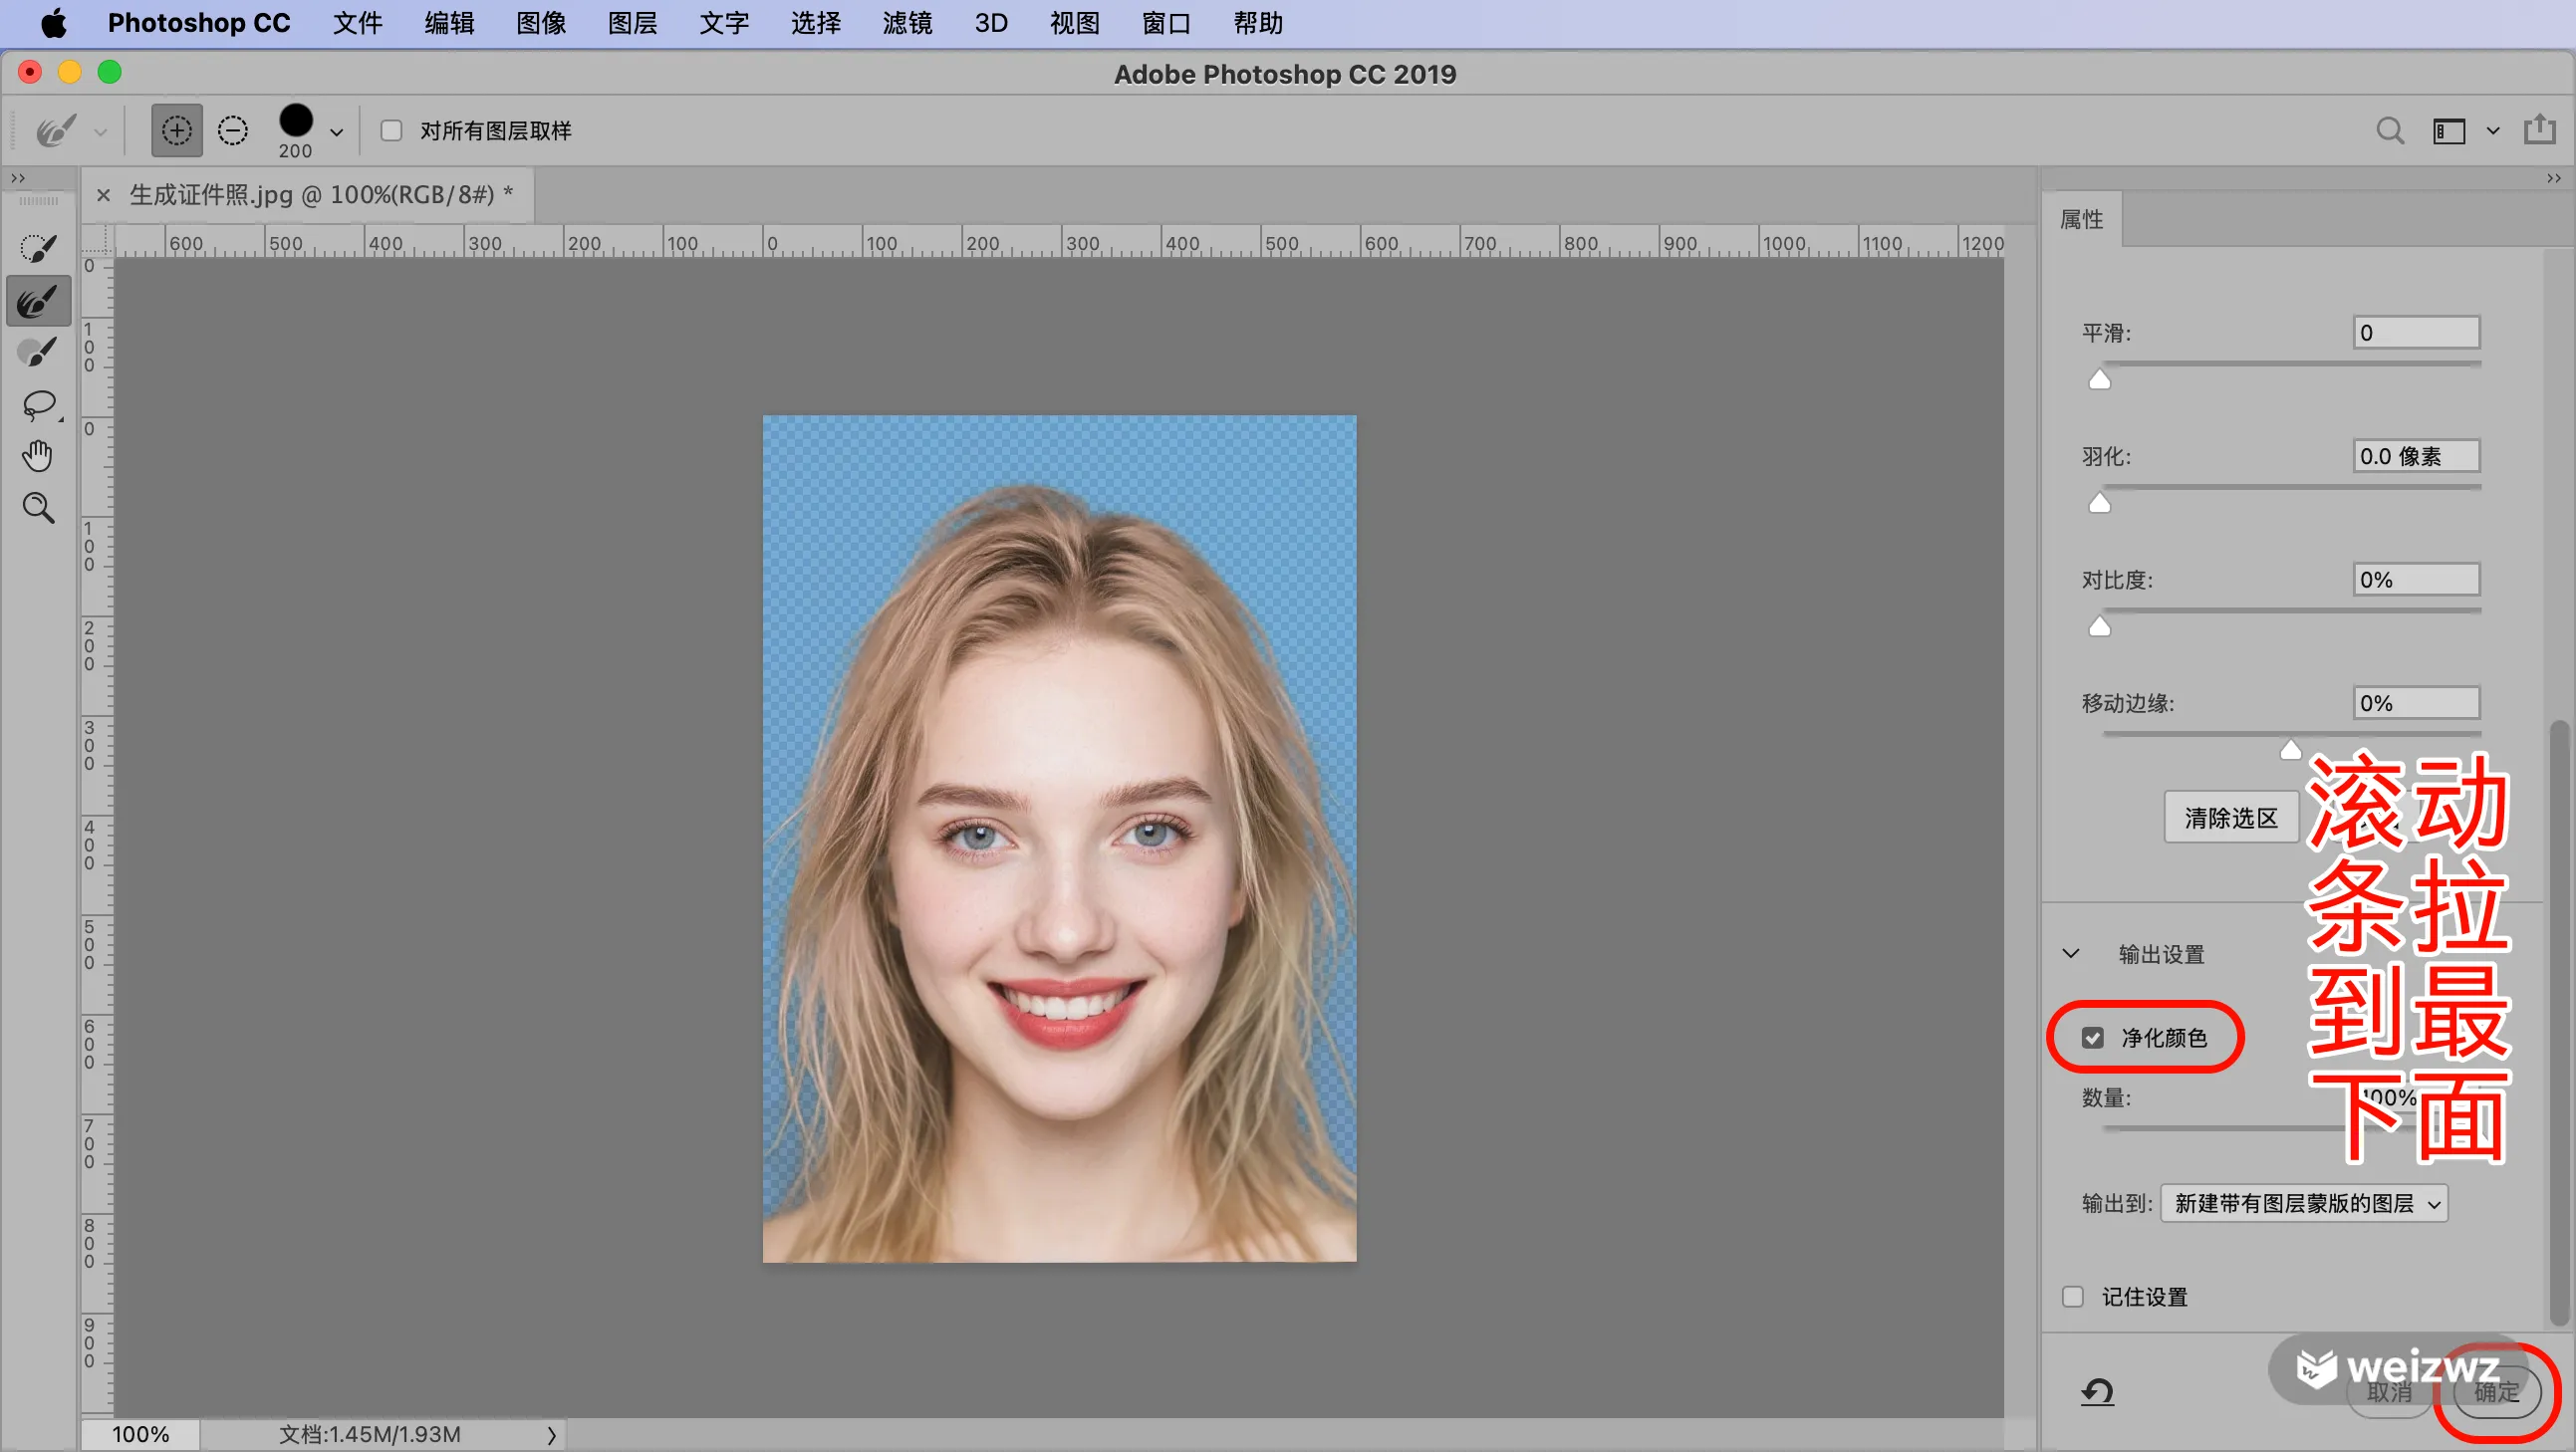
Scroll the panel on the right all the way down, turn on Decontaminate Colors, then click OK. You will return to the main Photoshop window.
Add a solid color background
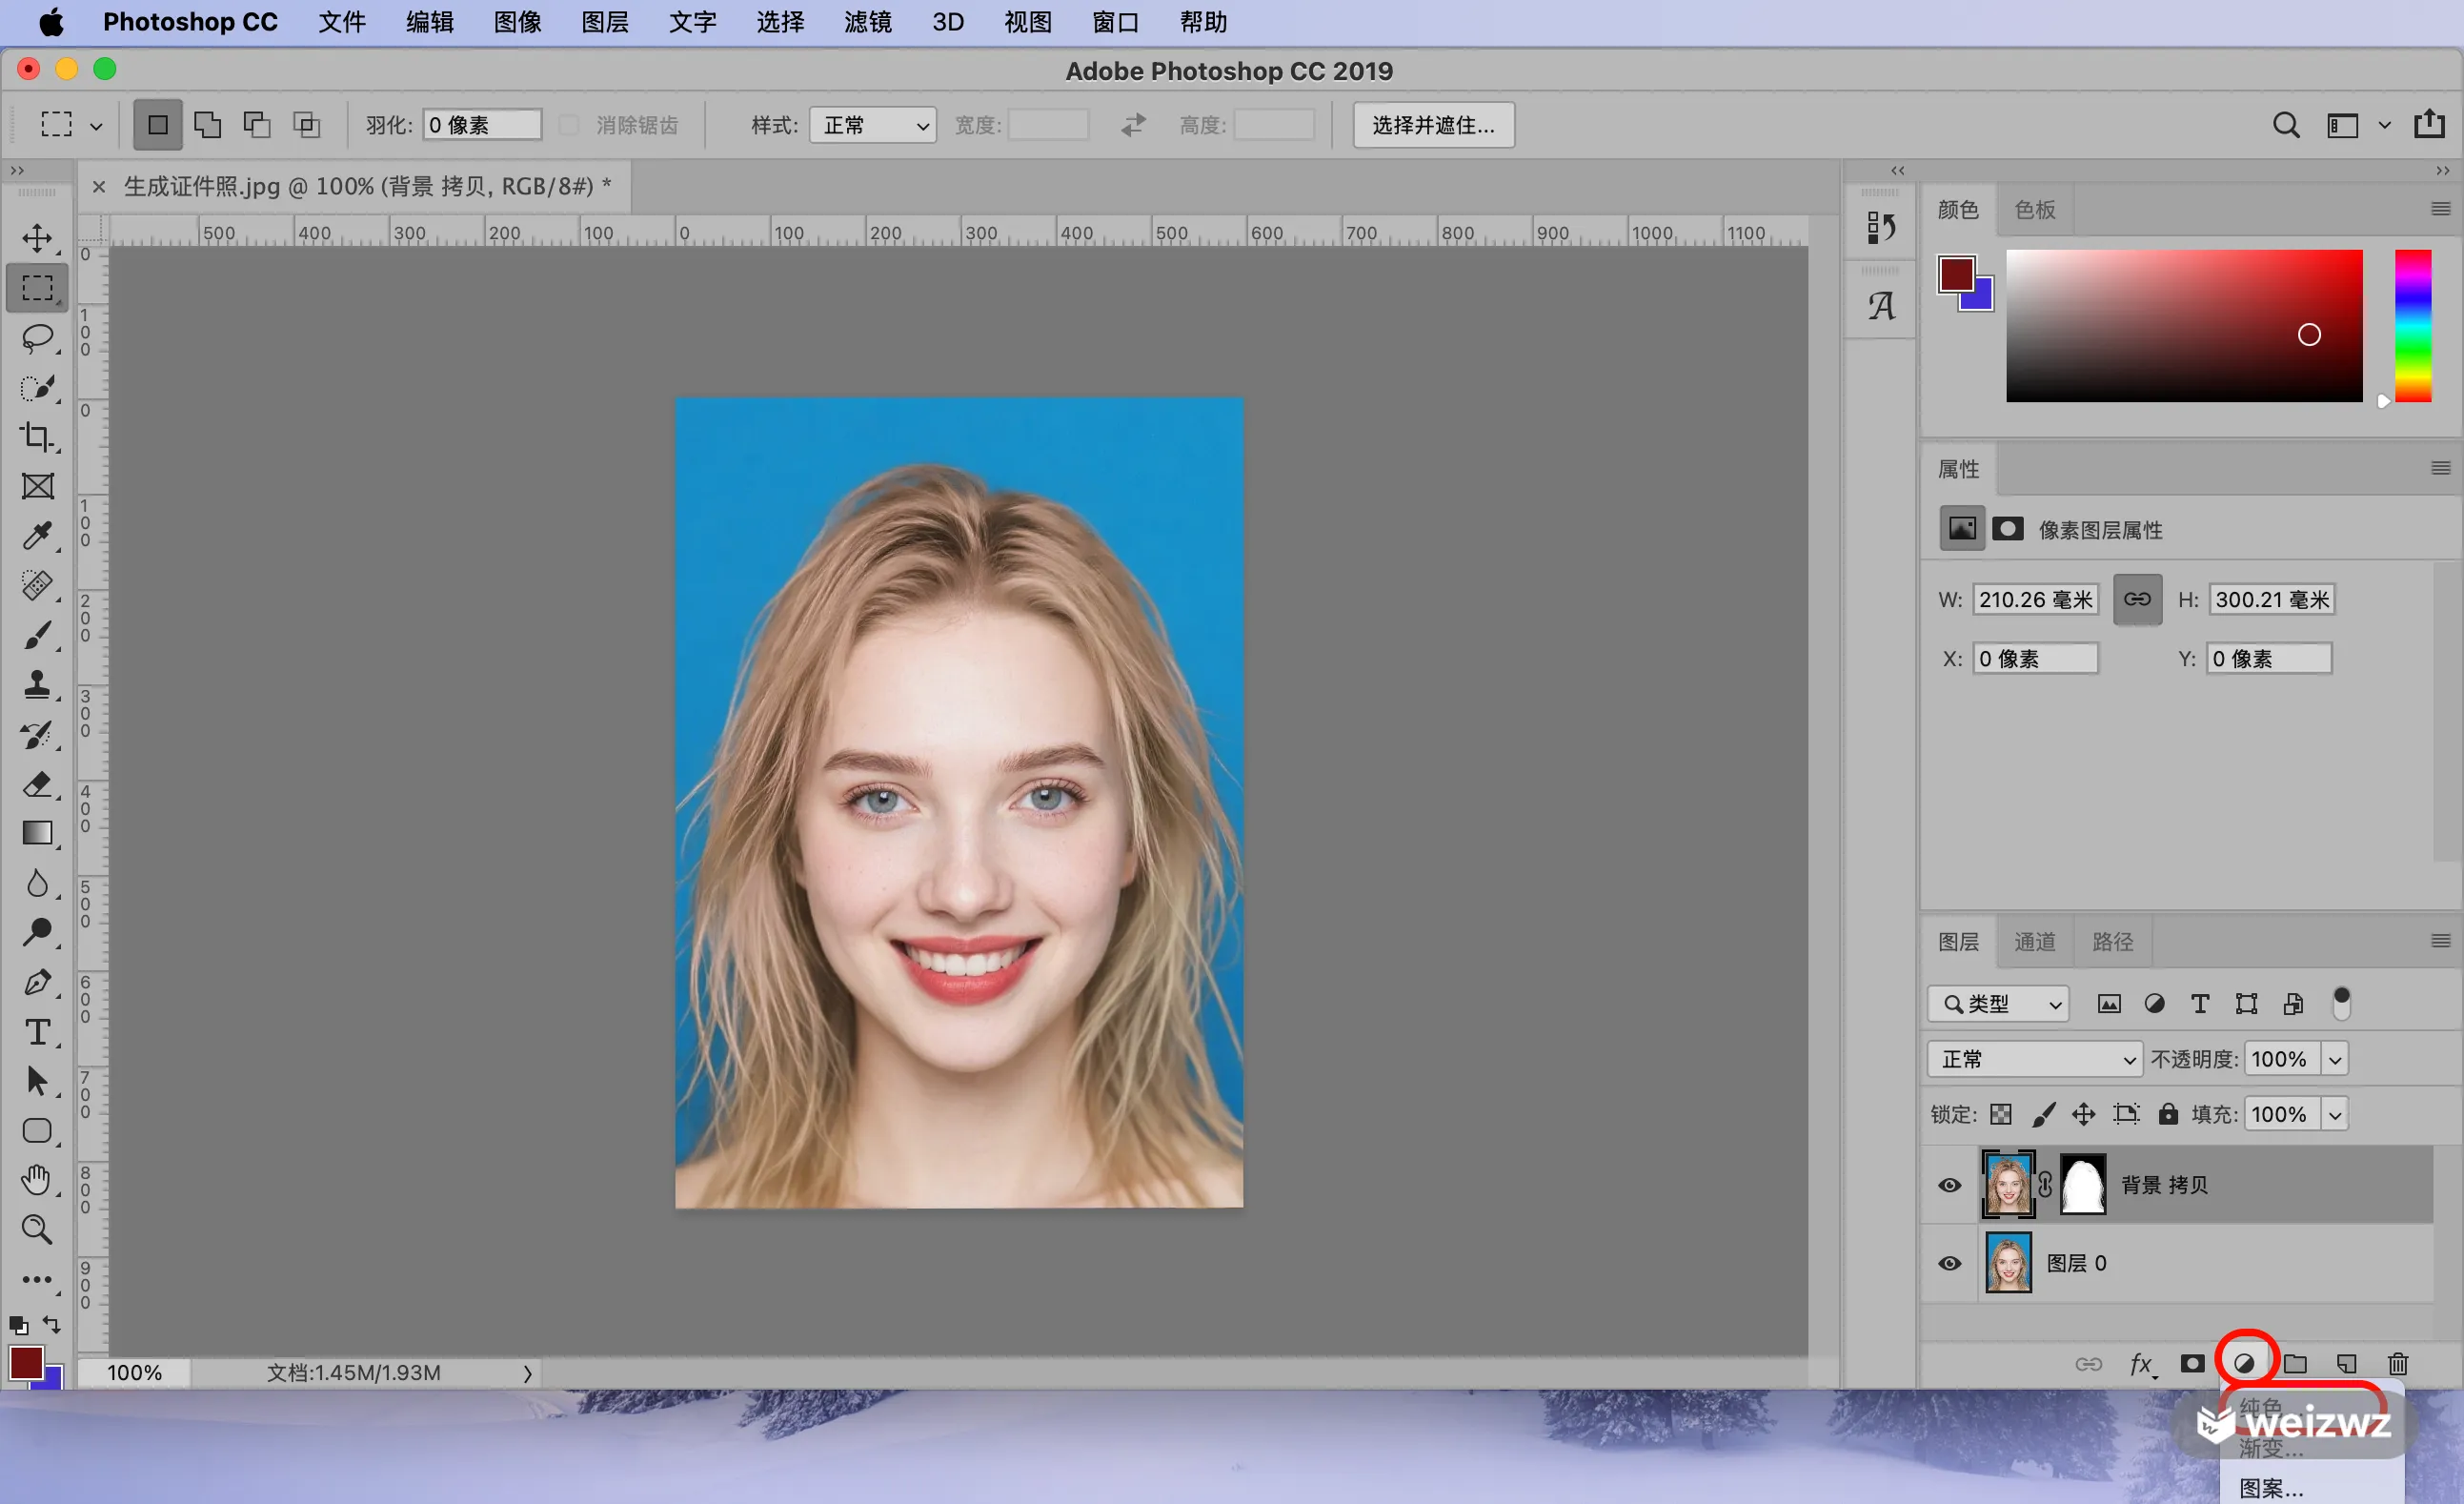
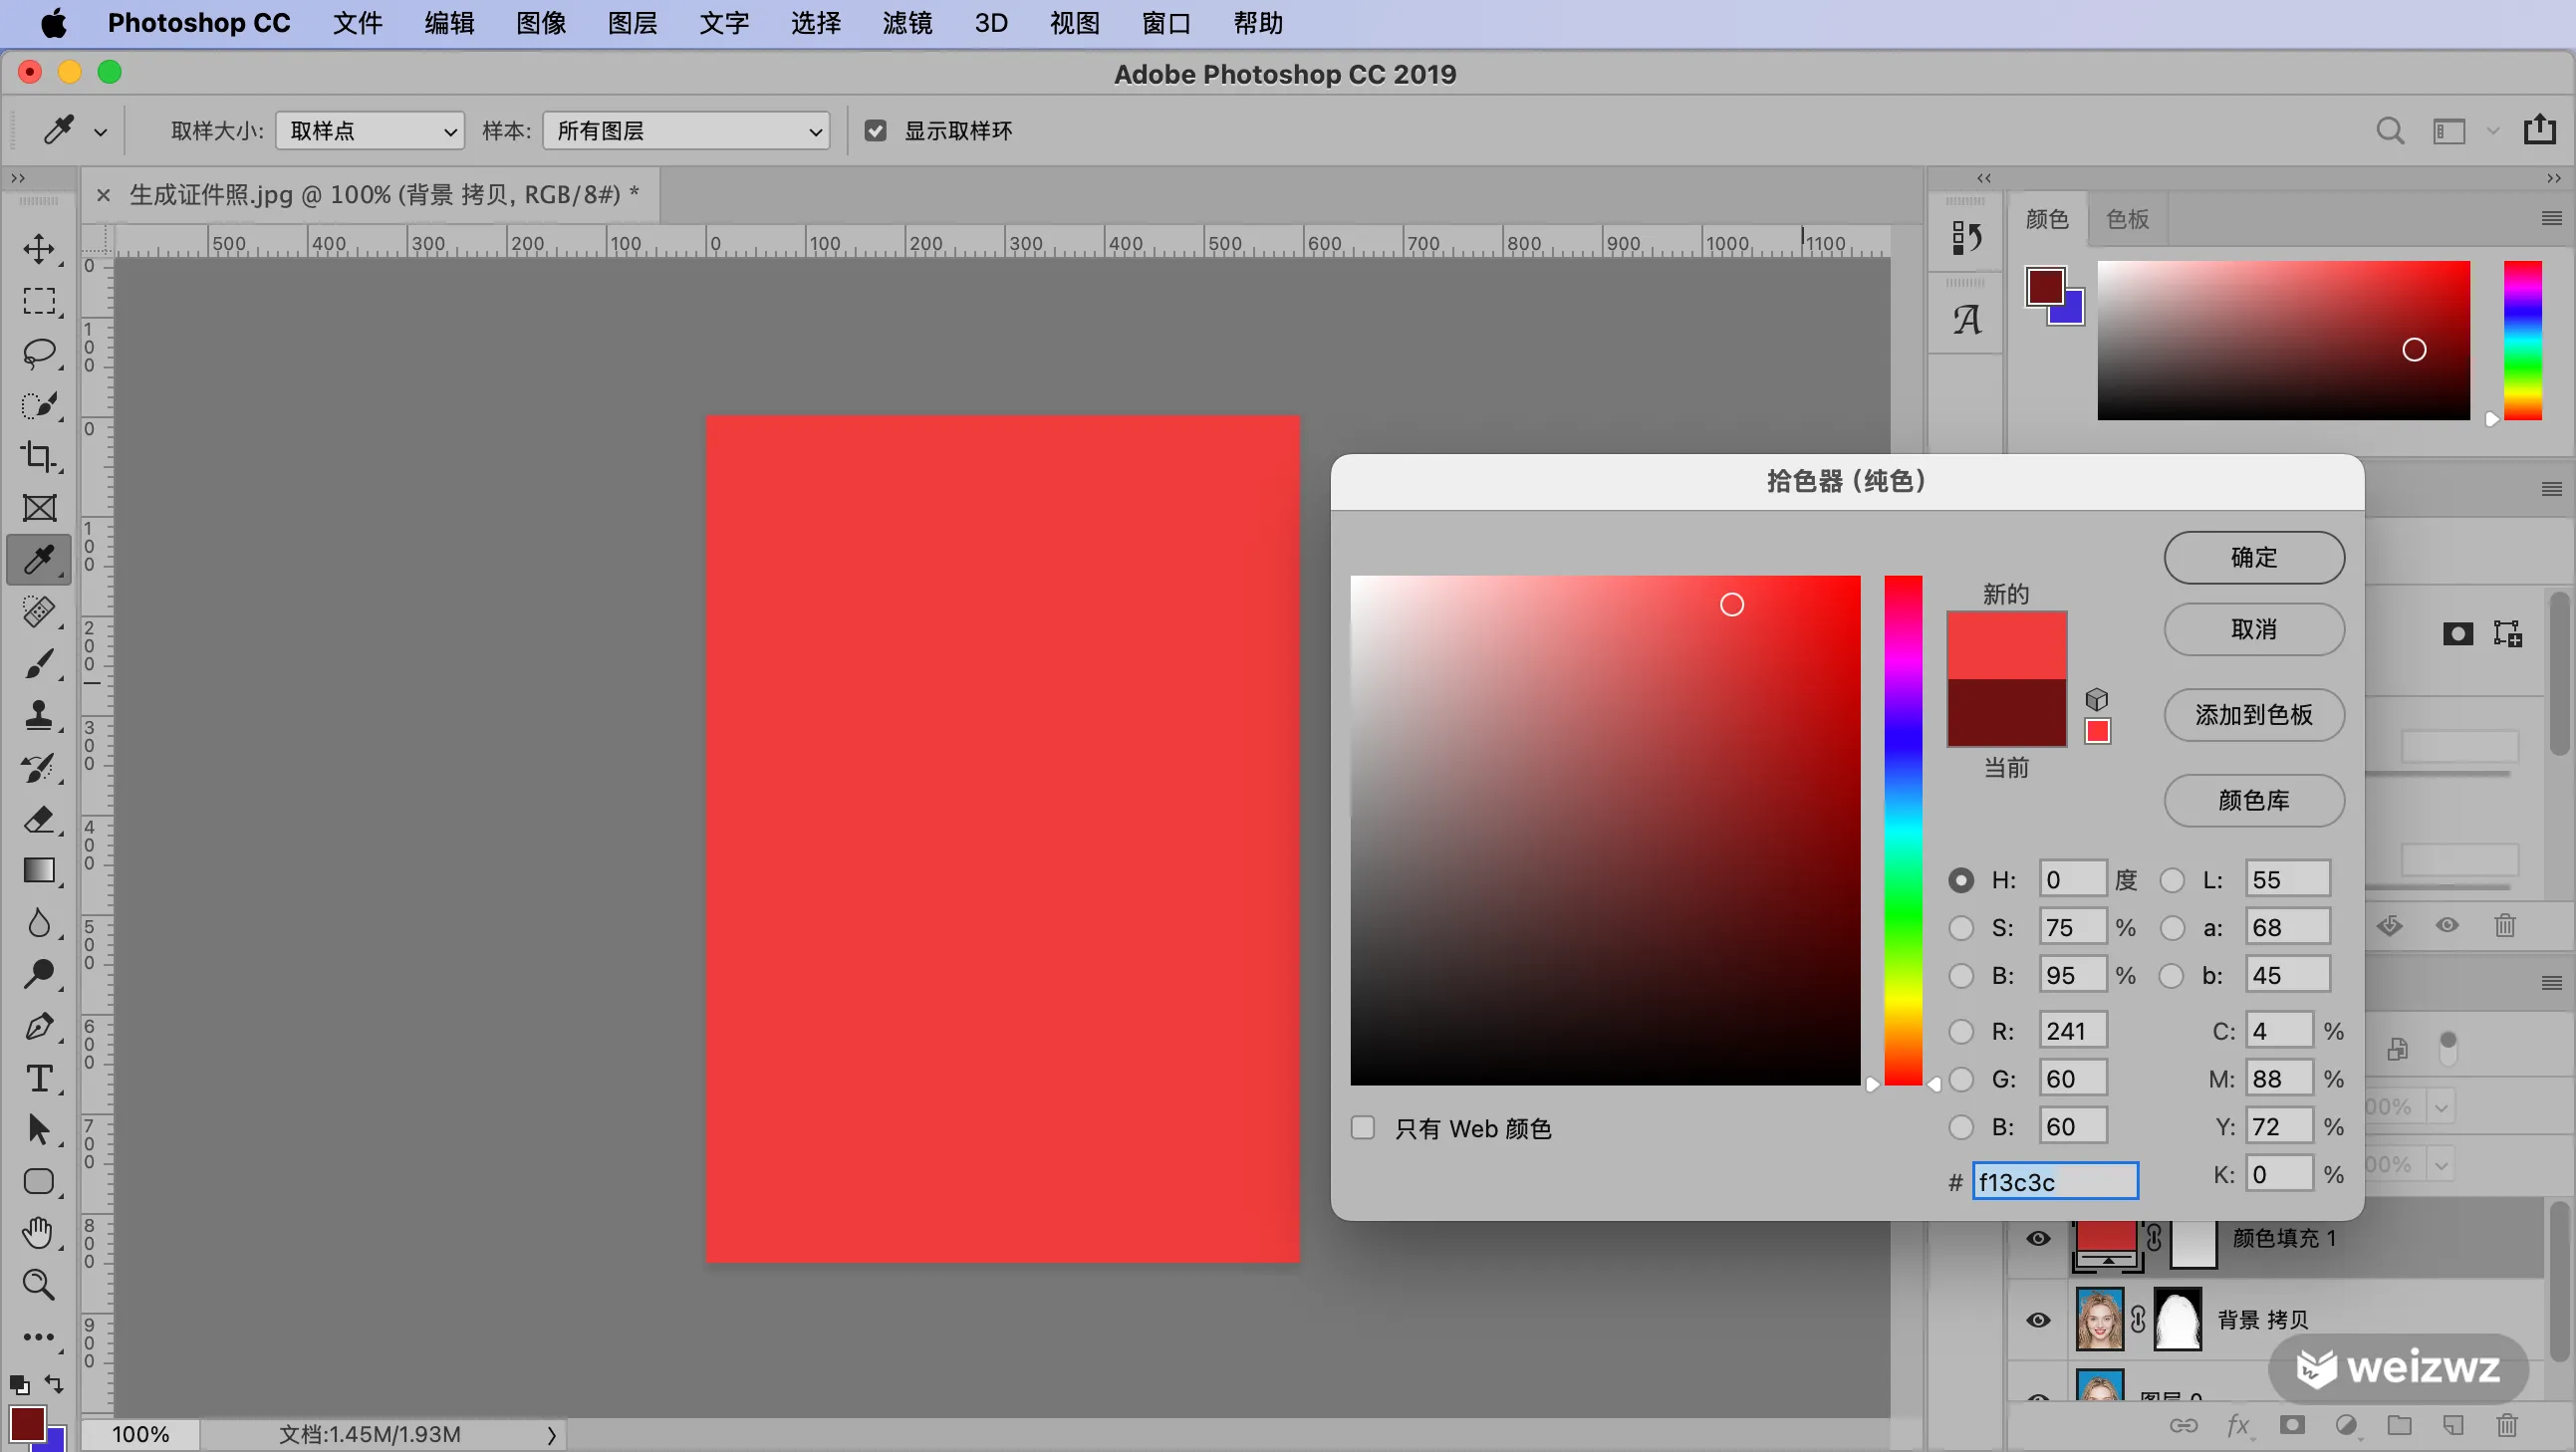
At the bottom of the Layers panel, click the half-filled circle icon and choose Solid Color. Pick the background color you need in the color picker and confirm.
Move the color layer behind the subject
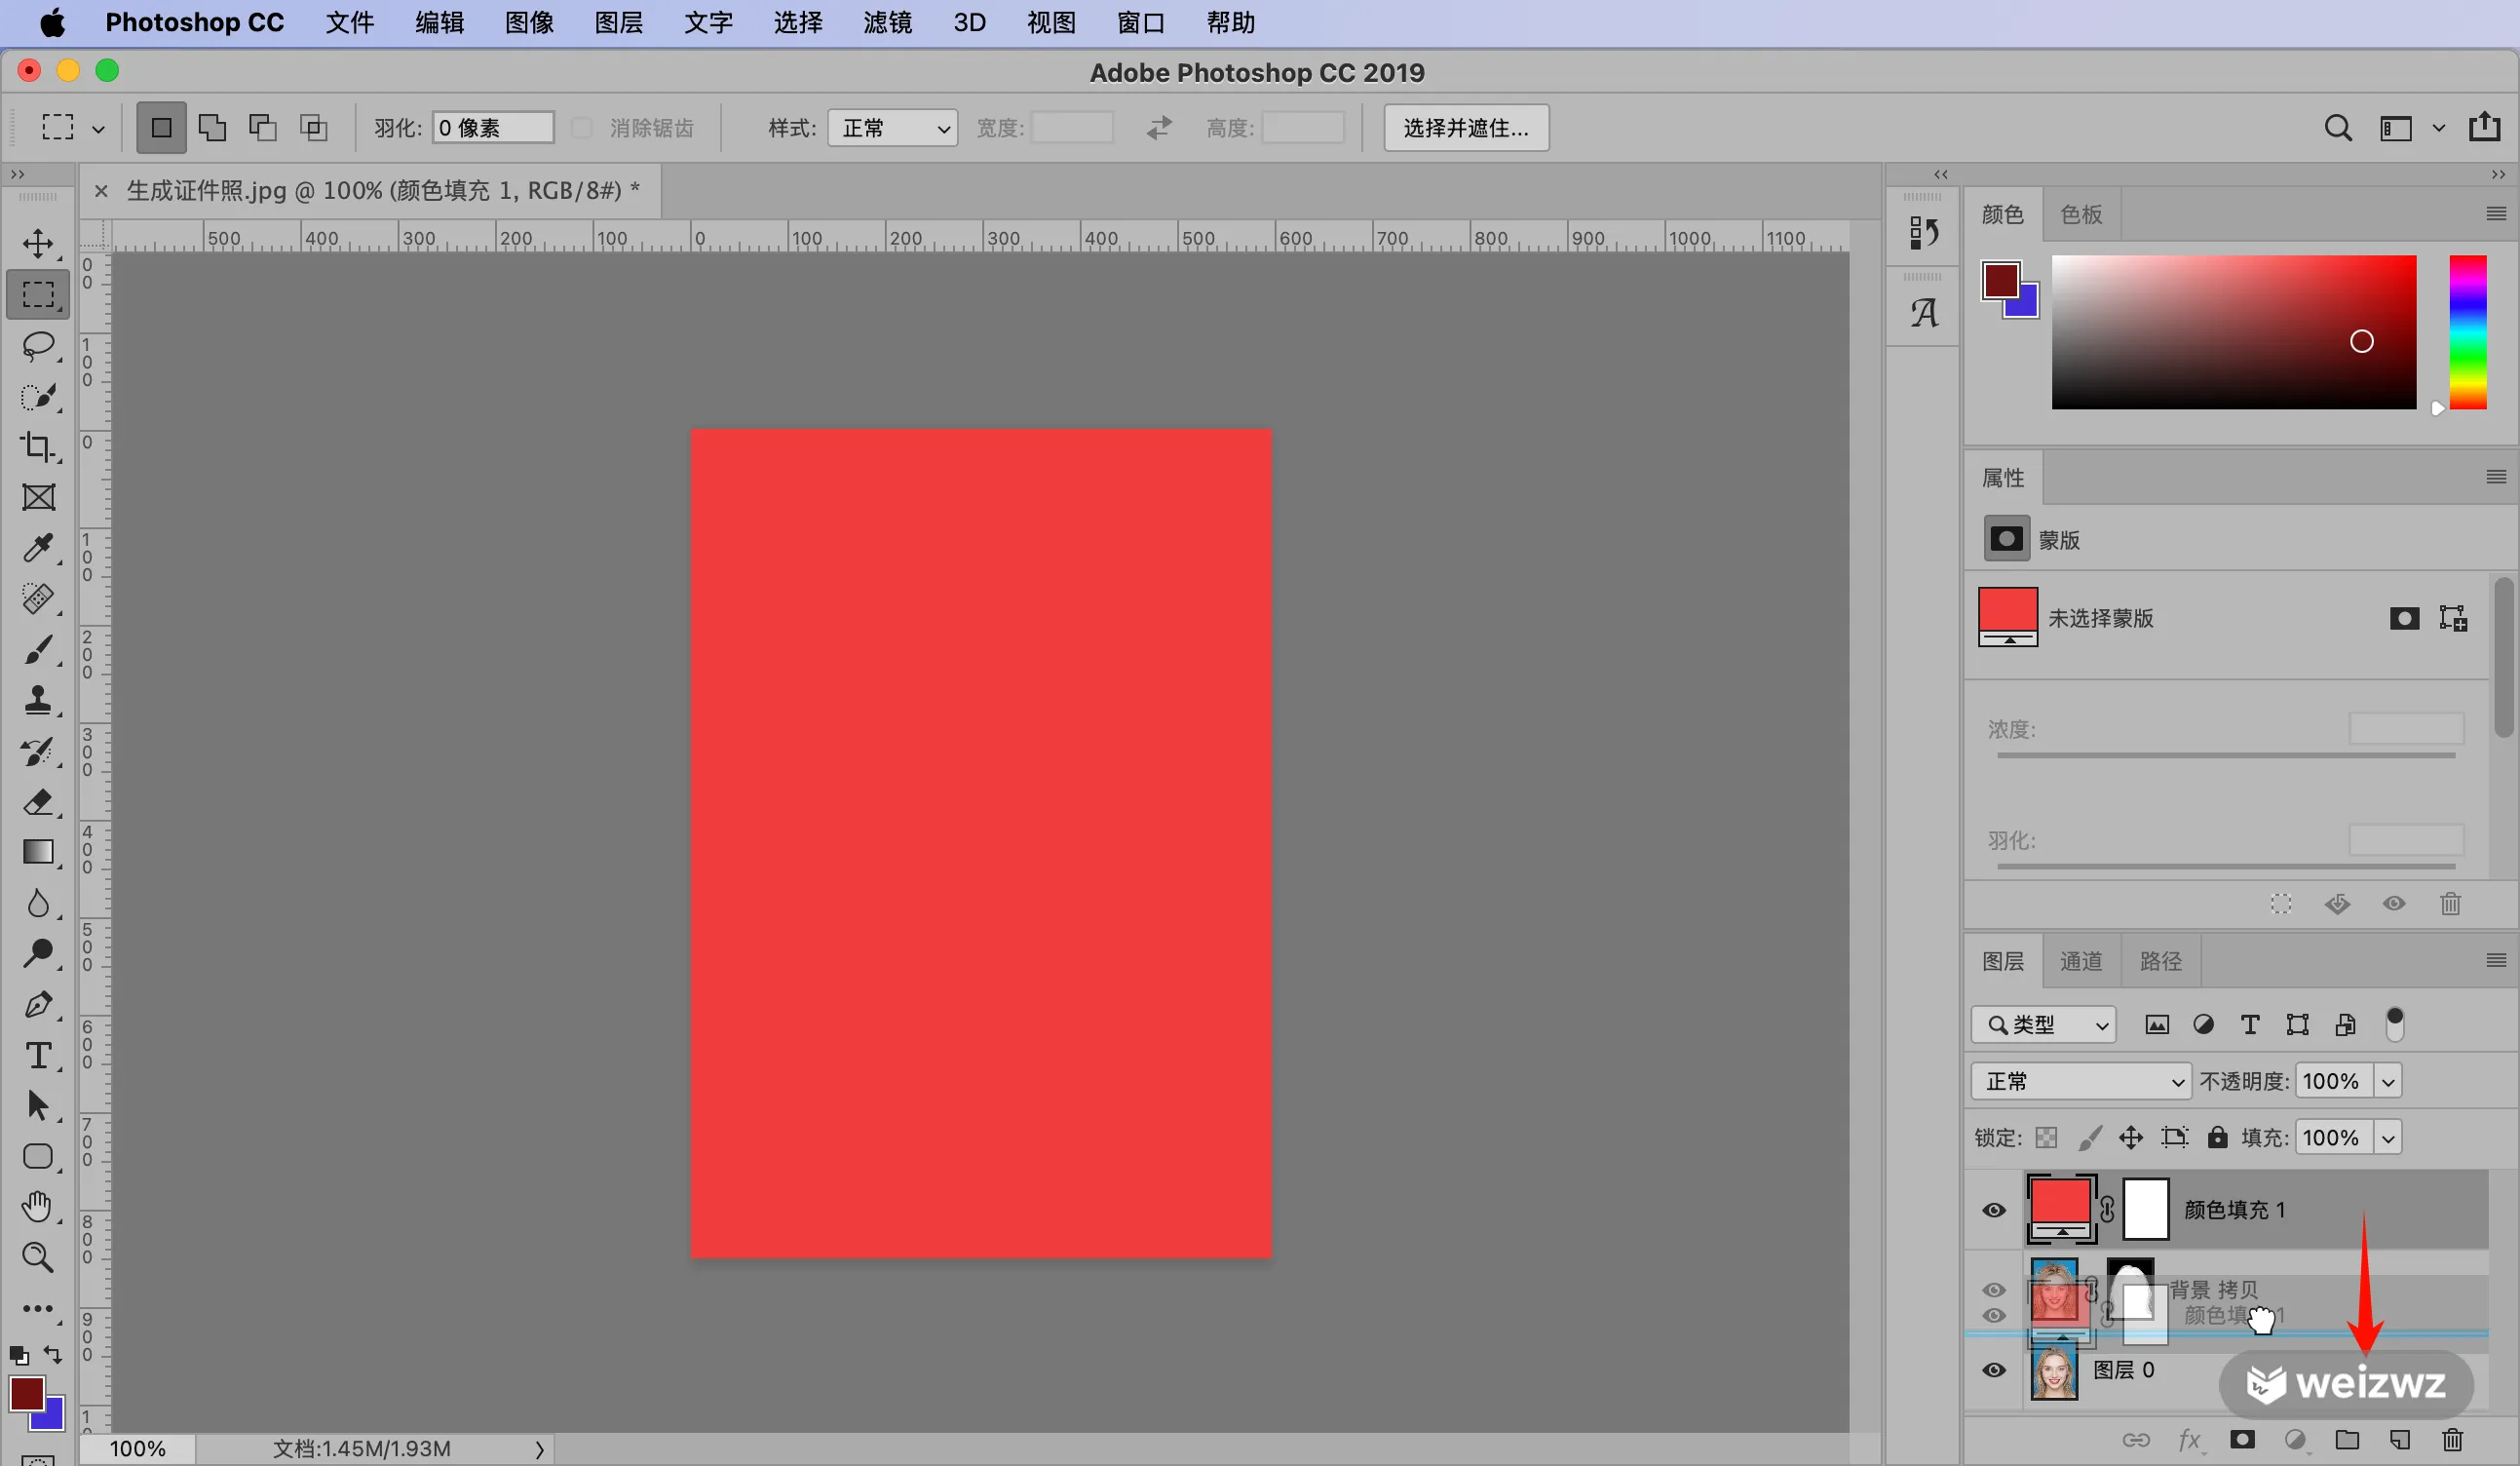
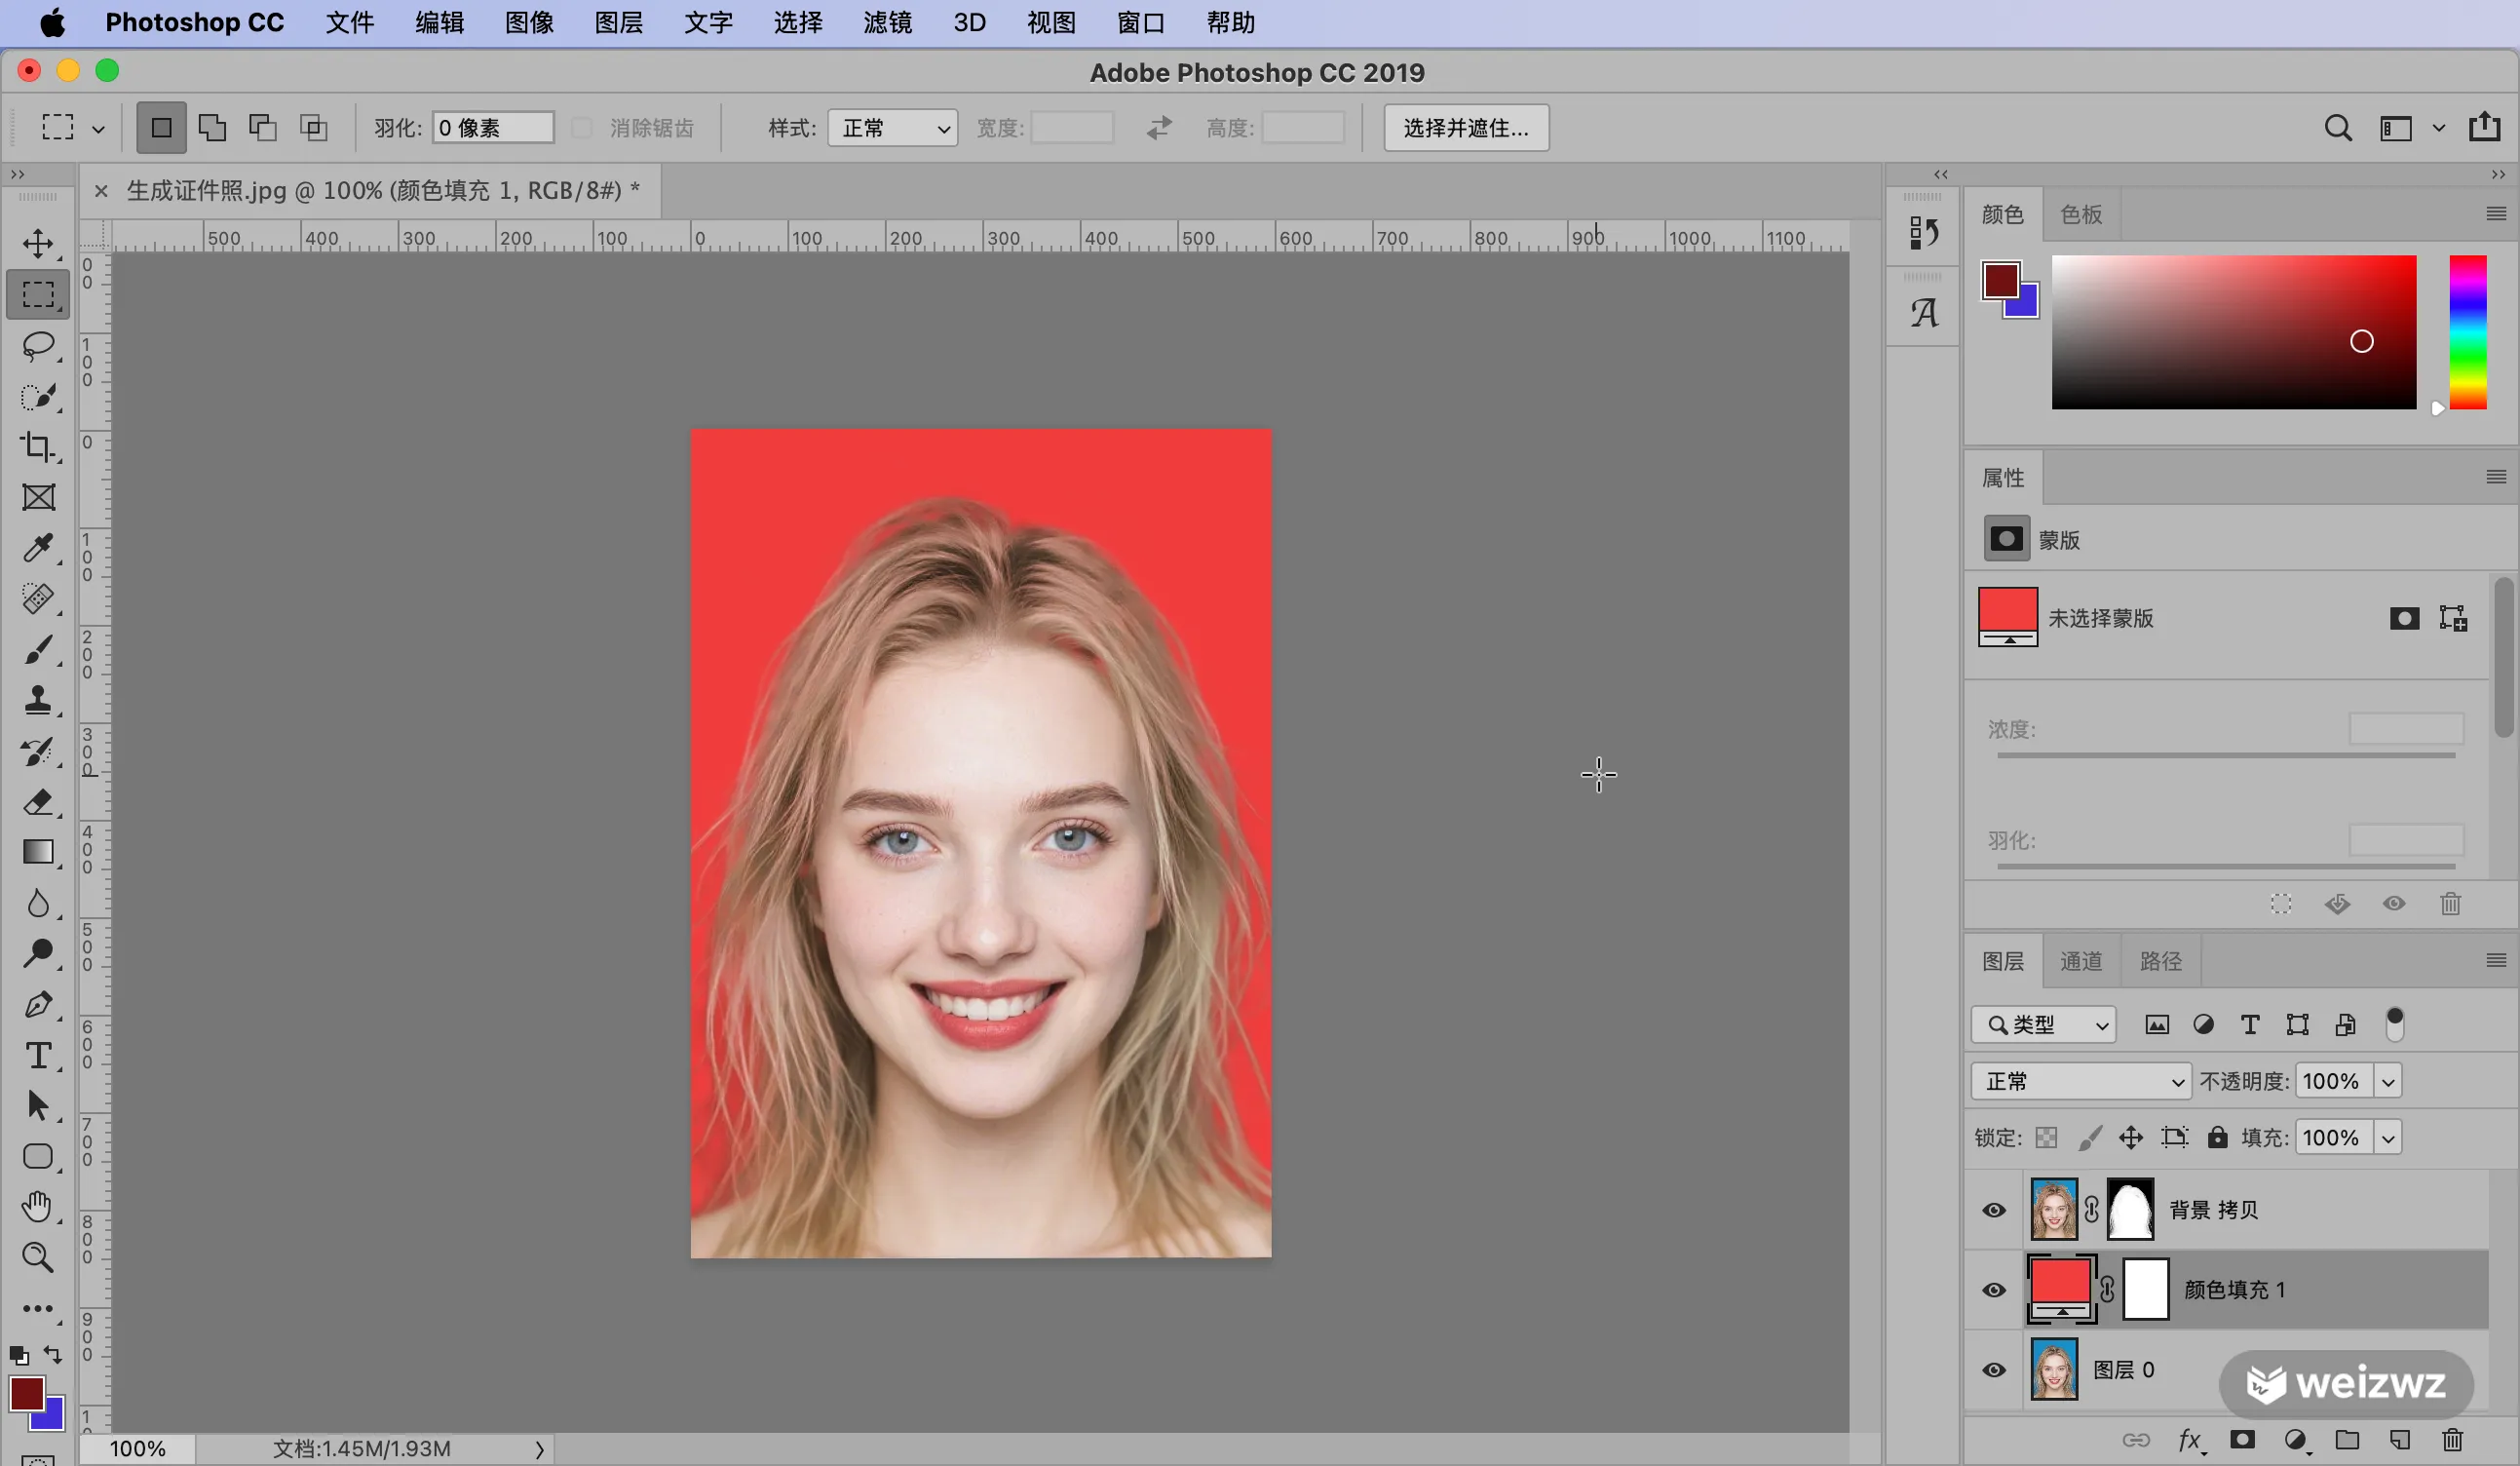
Drag the new solid color layer downward until it sits below the subject layer, shown as Background copy in this example. The old background disappears and the new color fills in behind the person. The hair and edges should stay natural, with no jagged pixels or fringe.
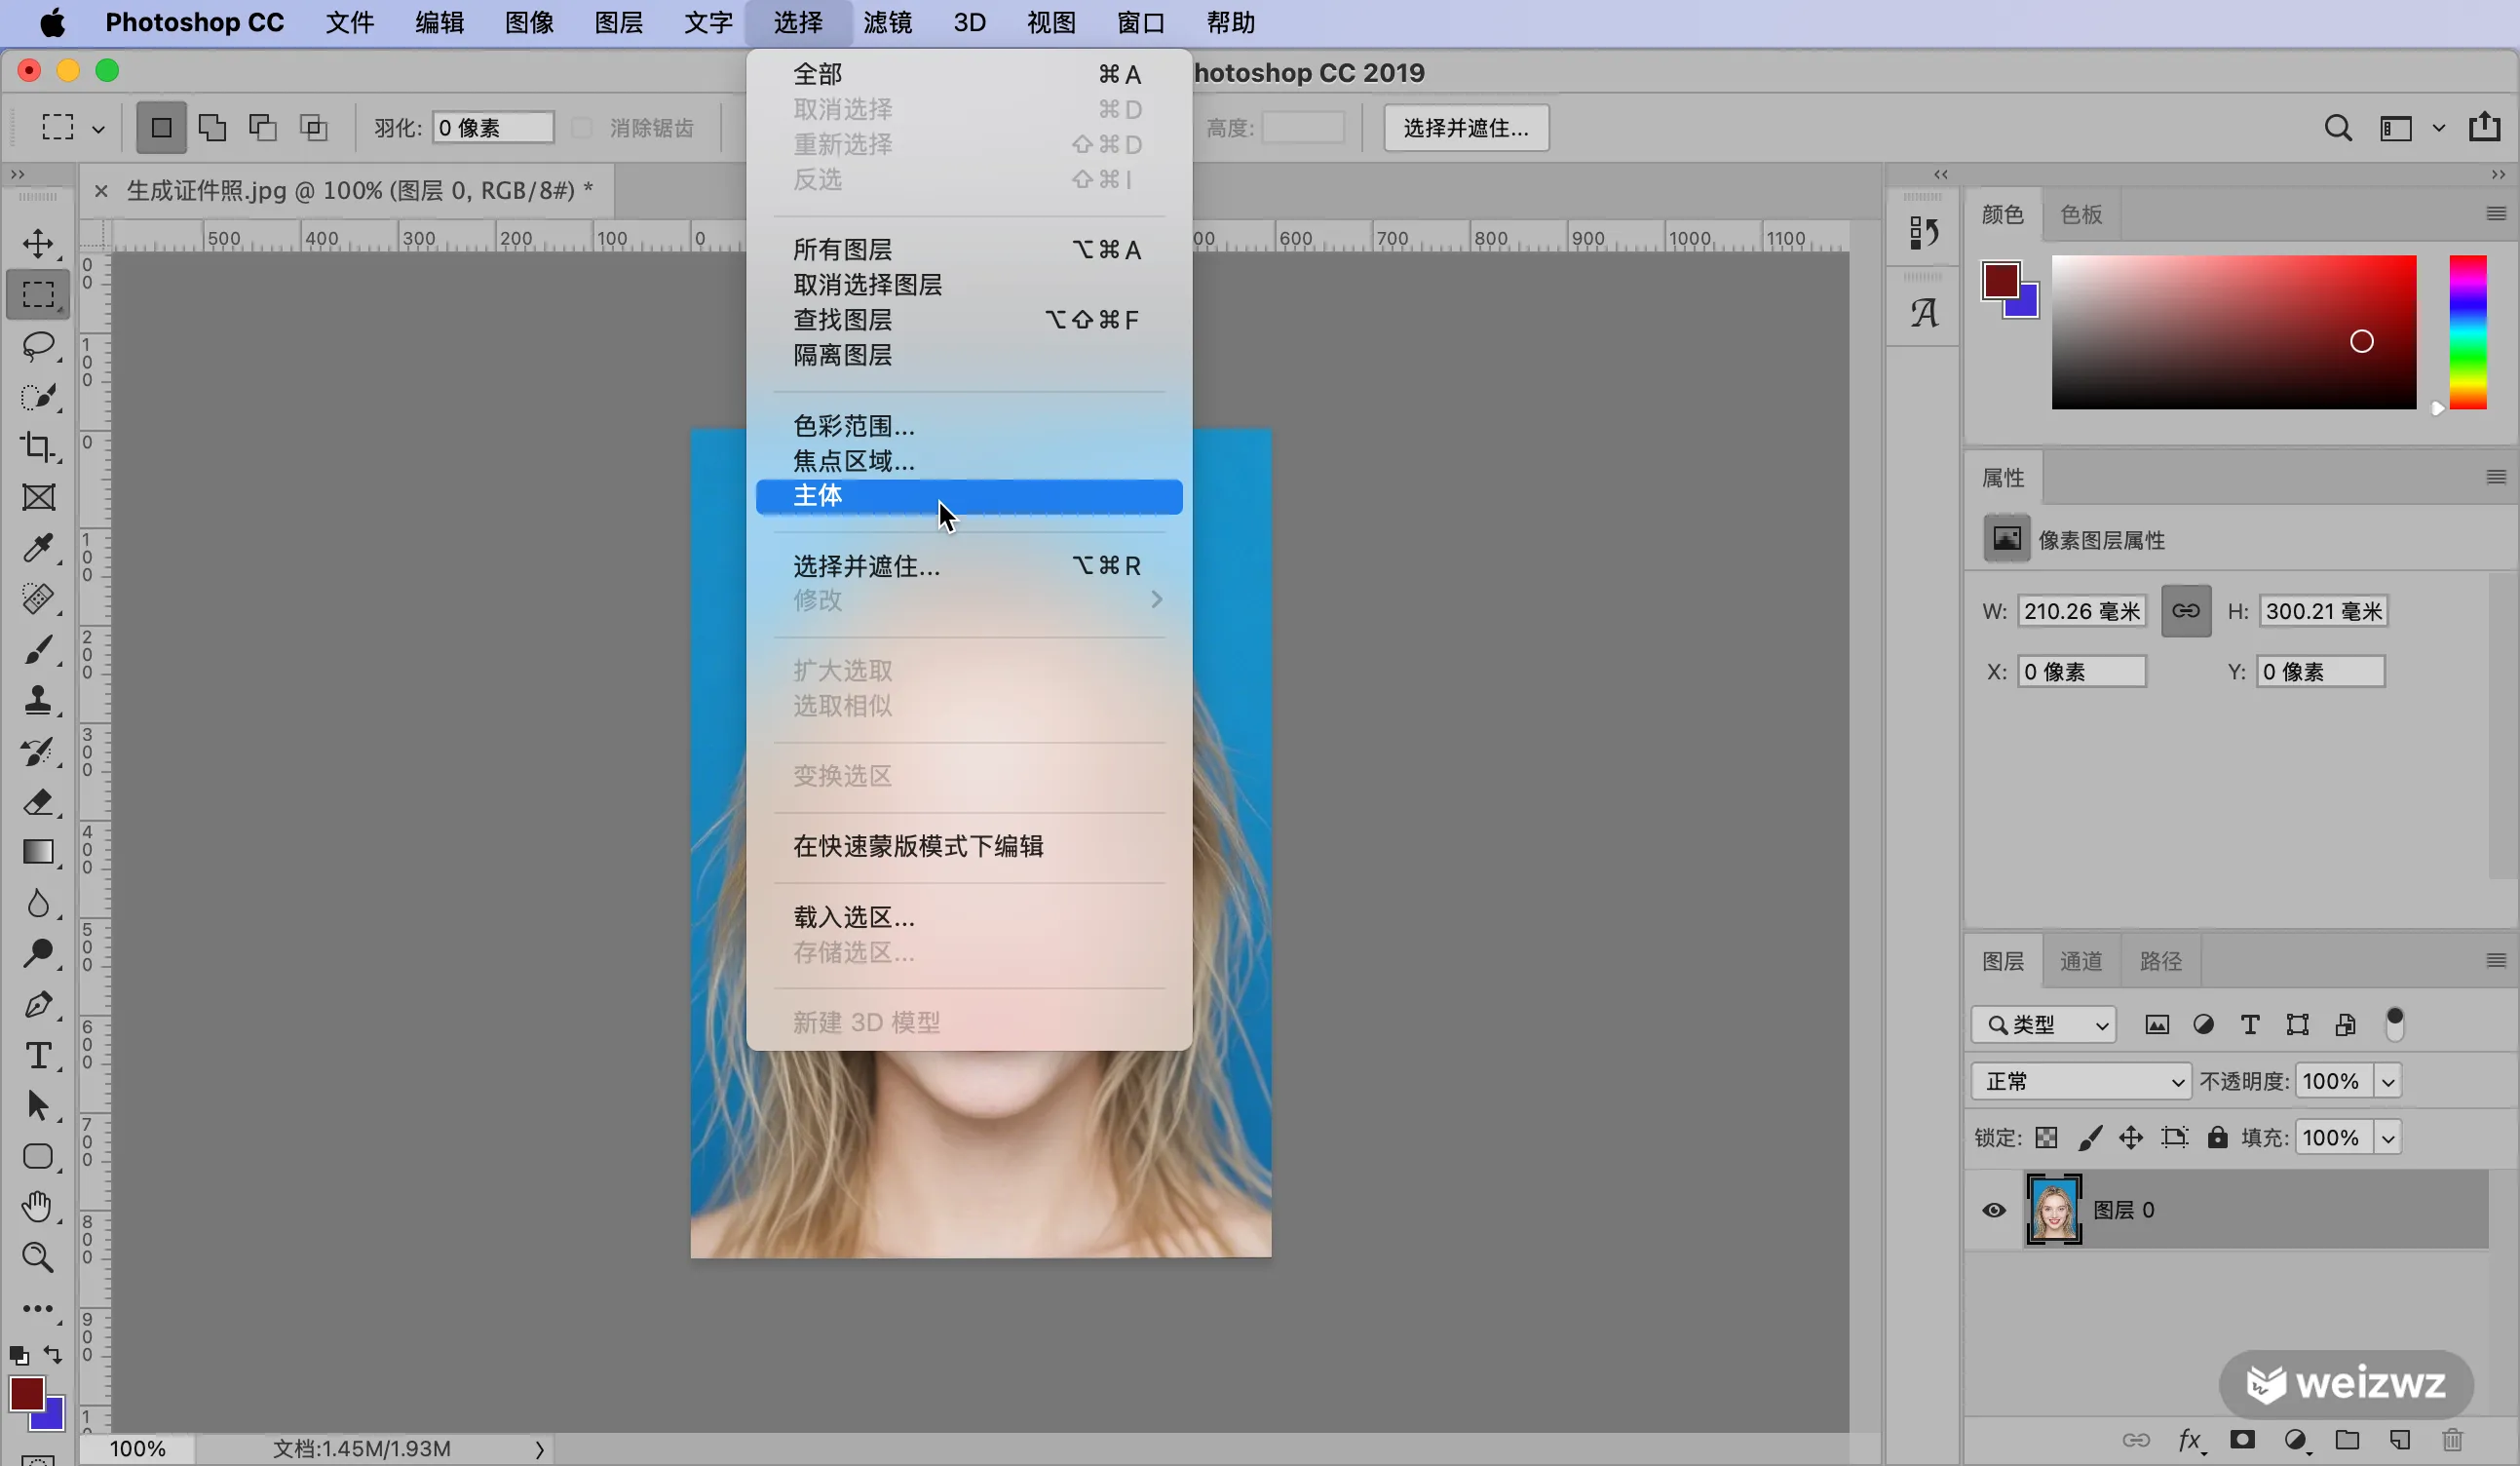
Export the file
Go to File > Export > Quick Export as PNG. If you need another format, choose Export As instead, select the format you want, and confirm.