Installing and using the BaoTa panel
Before installing the BaoTa Linux panel, make sure the server is running a clean Linux system. It should not already have Apache, Nginx, PHP, MySQL, or any bundled web environment installed, because systems with an existing environment cannot use this installation method. Supported systems include CentOS, Ubuntu, Debian, and Fedora. The example here uses CentOS 7.5.
Log in to the server over SSH
Use an SSH client to connect to the server. Xshell is a common choice for this. The SSH port must be open on the server side. The default is usually port 22, but for better security it is a good idea to change SSH to a less commonly used port.
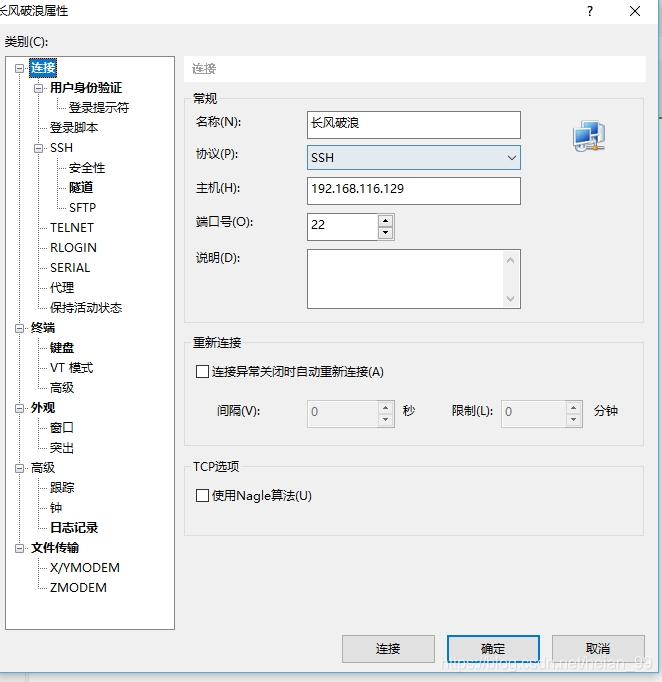
Enter the server username and password to log in. Keep in mind that when you type the password in an SSH session, nothing is displayed on screen. That is normal.
Install the BaoTa panel
Run the following command to install the free BaoTa 6.9 release. Version 6.9 is considered stable, so it is a practical choice. Note that BaoTa Linux 6.0 was developed based on CentOS 7, so you should use a CentOS 7.x system.
<table> <thead> <tr> <th>1</th>
<th>[root@wei ~]# yum install -y wget && wget -O install.sh http://download.bt.cn/install/install_6.0.sh && sh install.sh</th>
</tr>
</thead>
<tbody>
<tr>
<td></td>
<td></td>
</tr>
</tbody>
</table>
If the system is older than CentOS 7, then the 5.9 installation script is the safer option. Since CentOS 6 has already reached the end of official maintenance, installing CentOS 7 directly is the better route when setting up a new server.
<table> <thead> <tr> <th>1</th>
<th>yum install -y wget && wget -O install.sh http://download.bt.cn/install/install.sh && sh install.sh</th>
</tr>
</thead>
<tbody>
<tr>
<td></td>
<td></td>
</tr>
</tbody>
</table>
Press Enter to start, then type y when prompted and continue.

After that, wait for the installation to finish.
When it completes, the installer provides the login URL for the BaoTa panel along with the default username and password.
Log in to the panel
Once installation is complete, open the panel URL in a browser. Copy the URL shown by the installer and visit it directly. You also need to make sure port 8888 is open on the server, otherwise the web panel will not load.
Use the default account and password to sign in.
Configure the panel before installing the web environment
After logging in, the panel lets you choose between LNMP and LAMP. Which one to use depends on the site environment you need.
For production use, compiled installation is recommended because it is more stable. For testing, the fast installation option is more convenient. The tradeoff is stability: compiled installation takes much longer, but it is the safer choice for serious use.
A good practice is to avoid installing the runtime environment immediately after the first login. While that installation is running, the panel settings cannot be changed. Since a compiled installation can take close to an hour, it makes sense to secure and adjust the panel first.
Open the panel settings
Change the panel port
Replace the default panel port with a less commonly used one.
Bind a domain name
You can bind a domain to the panel. After that, the panel can only be accessed through the domain you assigned.
Bind an IP address
If you have a fixed public IP, you can restrict panel access to that IP. Once bound, access will only work from the specified address. This is not suitable for a home computer using a dynamic IP, because the address may change and lock you out.
Change the default panel username and password
The default login credentials should be changed as soon as possible. Set a username and password you can remember, and avoid weak passwords.
Bind a BaoTa account
If you already have a BaoTa account, bind it here. If not, you can register one on the official site. The account is needed when purchasing paid plugins or activating the Professional edition.
Bind the WeChat mini program
The WeChat mini program is a paid feature, so it can only be used after purchasing it or upgrading to the Professional edition. It allows server monitoring, which is convenient for checking server status at any time.
Security settings
The security section lets you enable or disable ports and adjust several defaults. Recommended changes include:
- changing the SSH port
- disabling ping
- changing the FTP port
- changing the default phpMyAdmin port
- disabling ports that are not currently needed, then re-enabling them only when required
Install the web environment
Go to software management and install the environment your website needs.
In this example, LNMP is selected: Linux + Nginx + MySQL + PHP.
Create a website
After the environment finishes installing, you can create a site. There are two common ways to do it.
The first is to go directly to the website section and choose Add Site.
The second is to install the BaoTa one-click deployment source plugin from the plugin area inside software management, then create the site through that tool.
Buy plugins when needed
If a certain plugin is required during use, open Software Management > Paid Plugins and purchase it there.
Select the purchase period and complete the order.
Upgrade to the Professional edition
If you expect to use multiple paid plugins, upgrading to the Professional edition is usually the better option.
Choose the subscription period and pay for the upgrade. If your account already has a Professional edition purchase associated with it, you may also be able to use a voucher for payment.
After refreshing the panel, the expiry section may show a permanent authorization status.
If the upgrade does not complete successfully from the panel, log in to the server over SSH and run the manual upgrade command below:
<table> <thead> <tr> <th>1 2 3 4 5 6 7 8 9</th>
<th> 或者进入文件管理器,打开终端,粘贴升级代码,然后点击“发送”,手动升级到专业版。
  ```</th>
</tr>
</thead>
<tbody>
<tr>
<td></td>
<td></td>
</tr>
</tbody>
</table>
```</th>
</tr>
</thead>
<tbody>
<tr>
<td></td>
<td></td>
</tr>
</tbody>
</table>