The biggest lesson from my recent blog-building experiments is simple: don’t go crazy with optimization.
It all started when I wanted to ease the load on my server. My traffic was getting heavier, so I figured I’d move the media files to an image host. I searched around for WordPress image hosting migration tips, and the first result was a post about using Cloudflare R2 as a media bucket for WordPress.
My domain is already on Cloudflare, and I’ve used a few of its free services before. I even considered building a Hugo blog with Cloudflare Pages. Since R2 is S3-compatible and offers a generous free tier, I decided pretty quickly to move all my media files into an R2 bucket.
Setting up the bucket
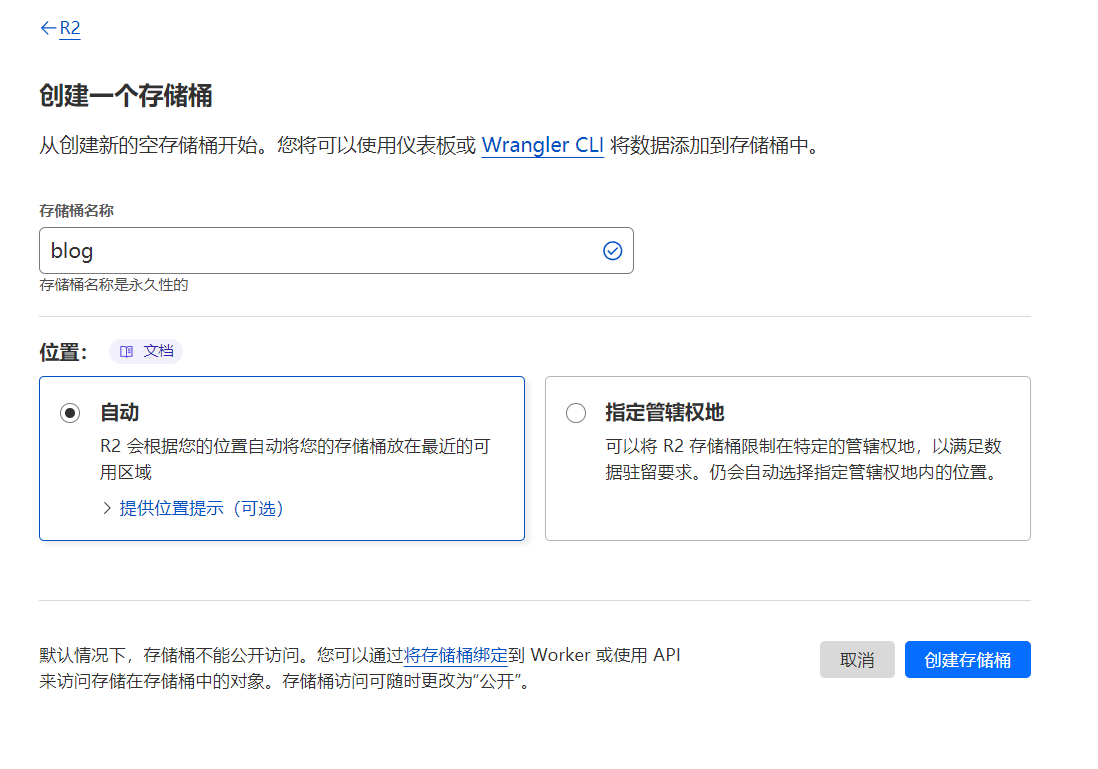
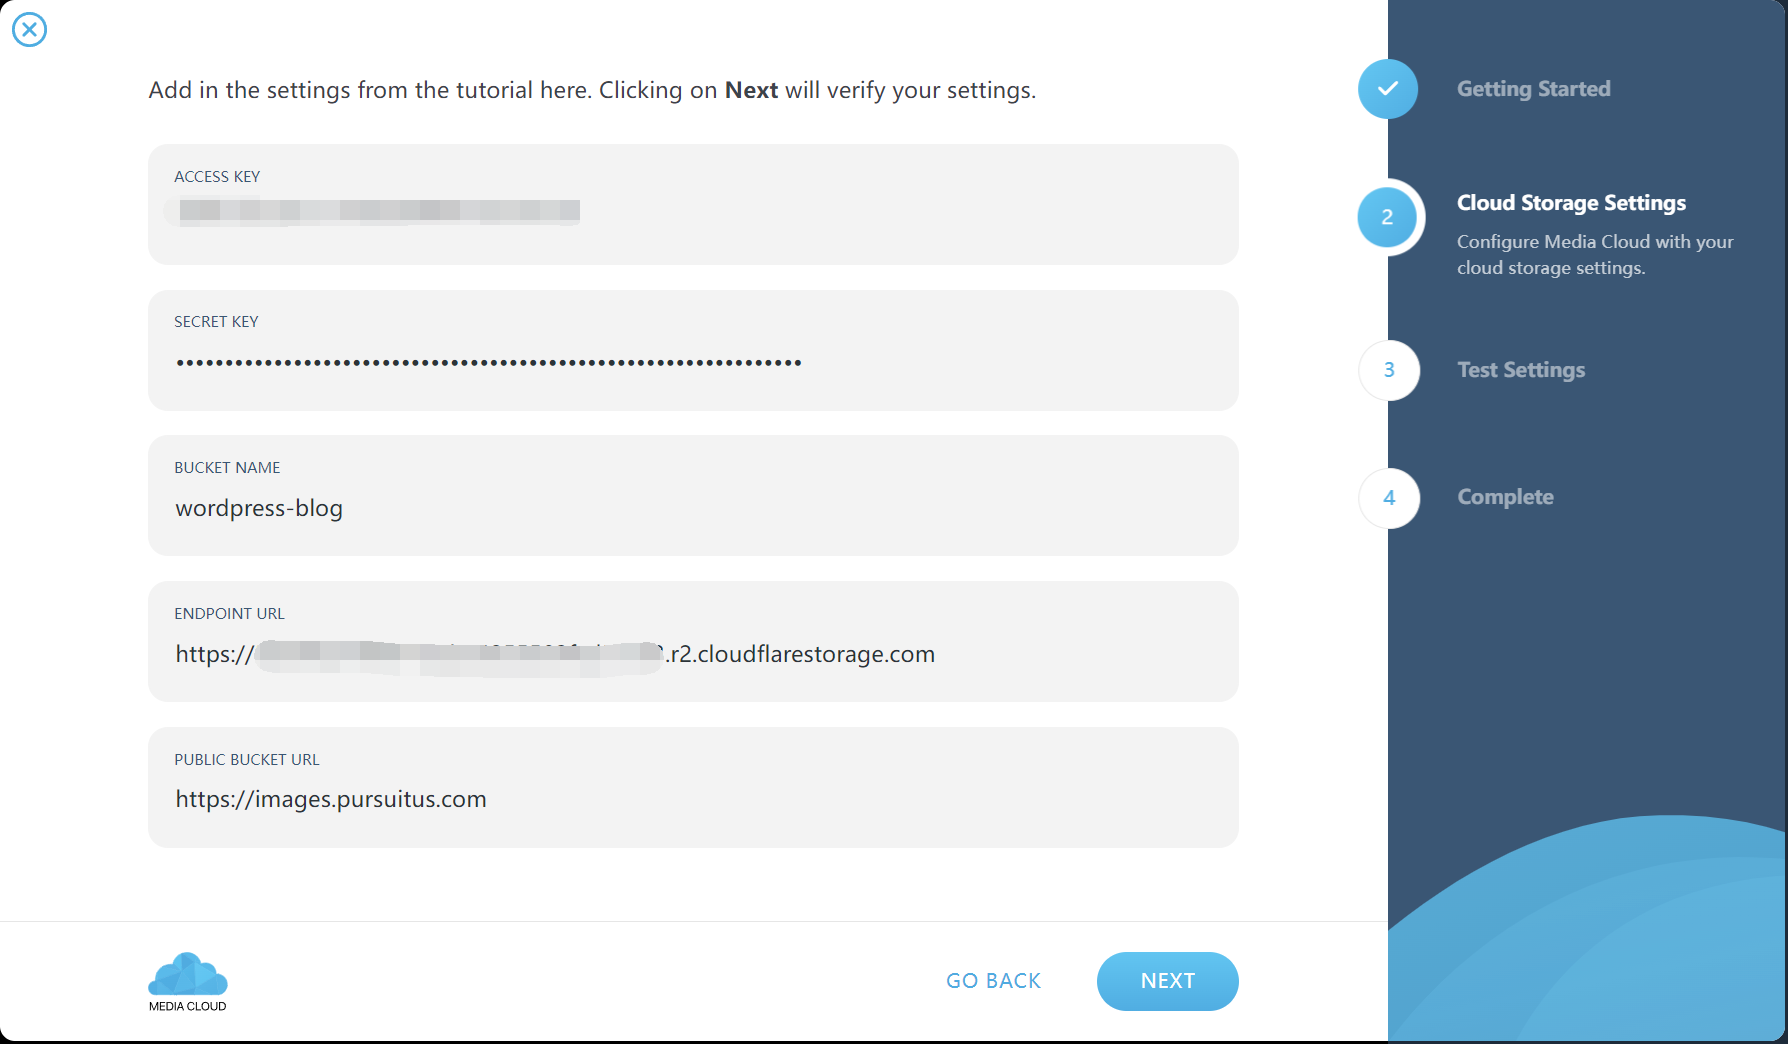
To use R2, you first need a Cloudflare account and a payment method linked to it. I used PayPal. After that, you can go into the R2 dashboard and create a bucket. I left the location on automatic.
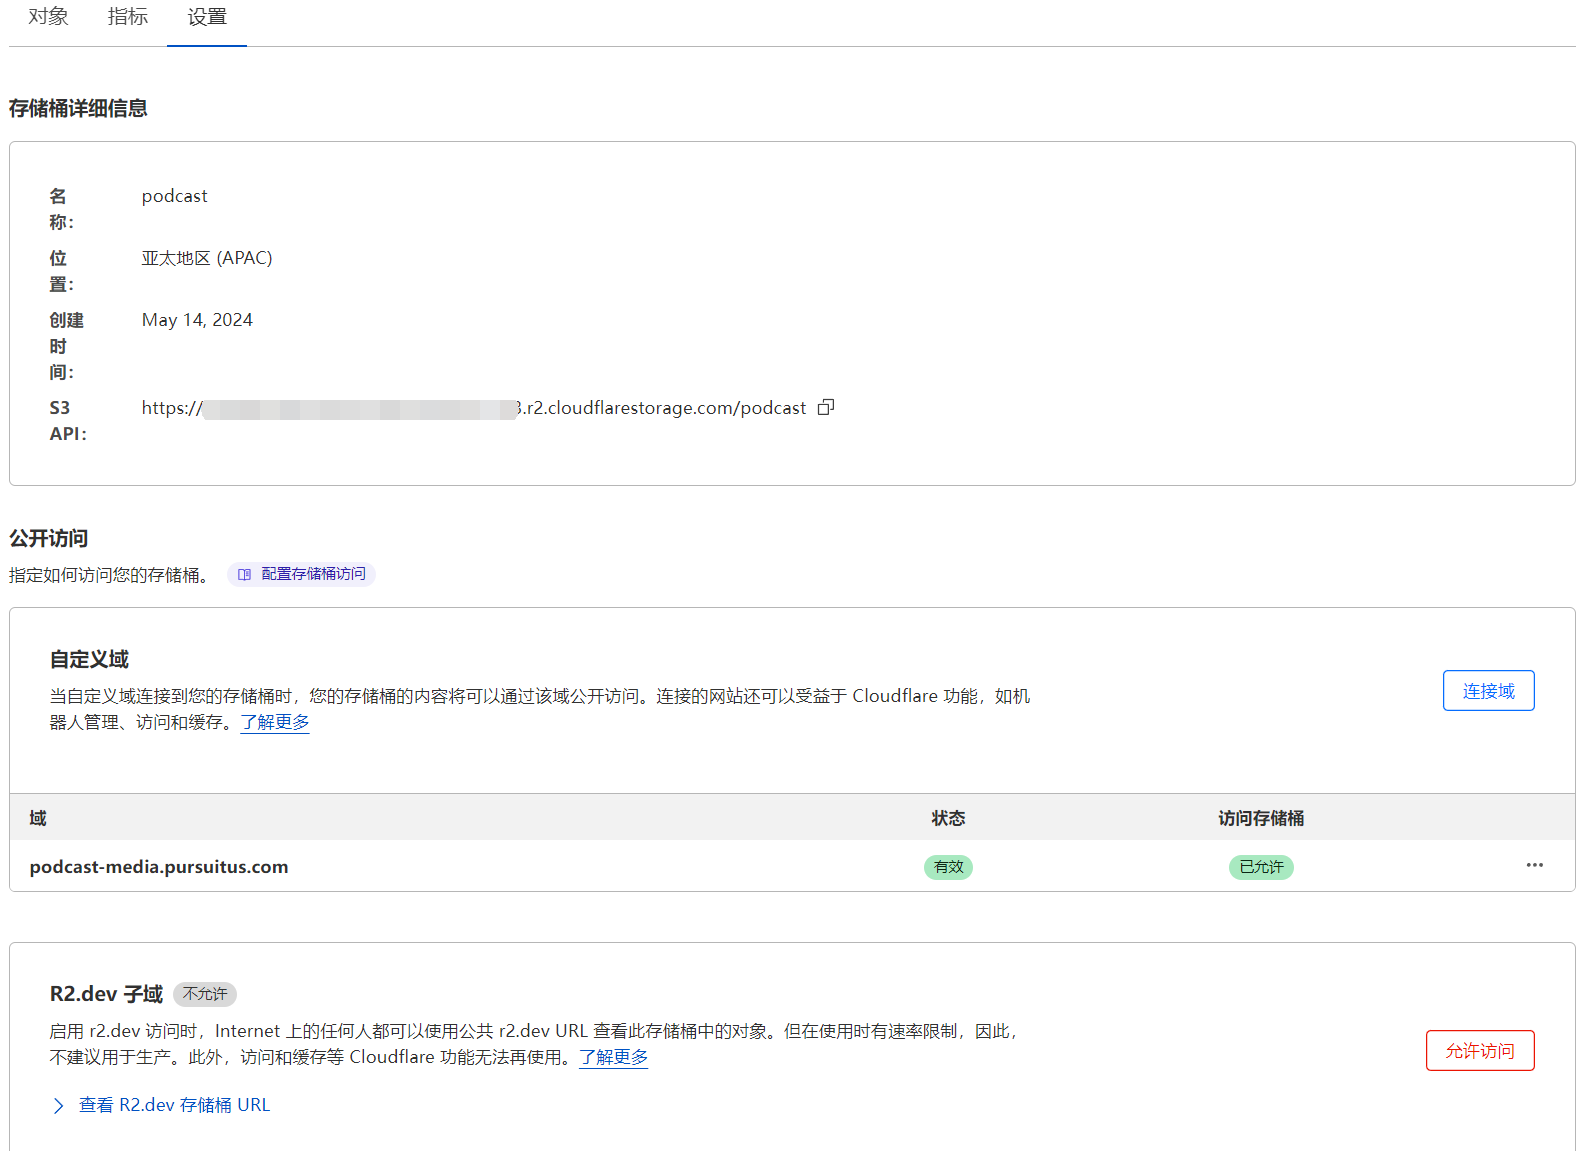
Once the bucket is created, you need to open the bucket settings, enable public access, and bind a custom domain to it. That way, anything uploaded to the bucket can be accessed through that address.
Creating an API token
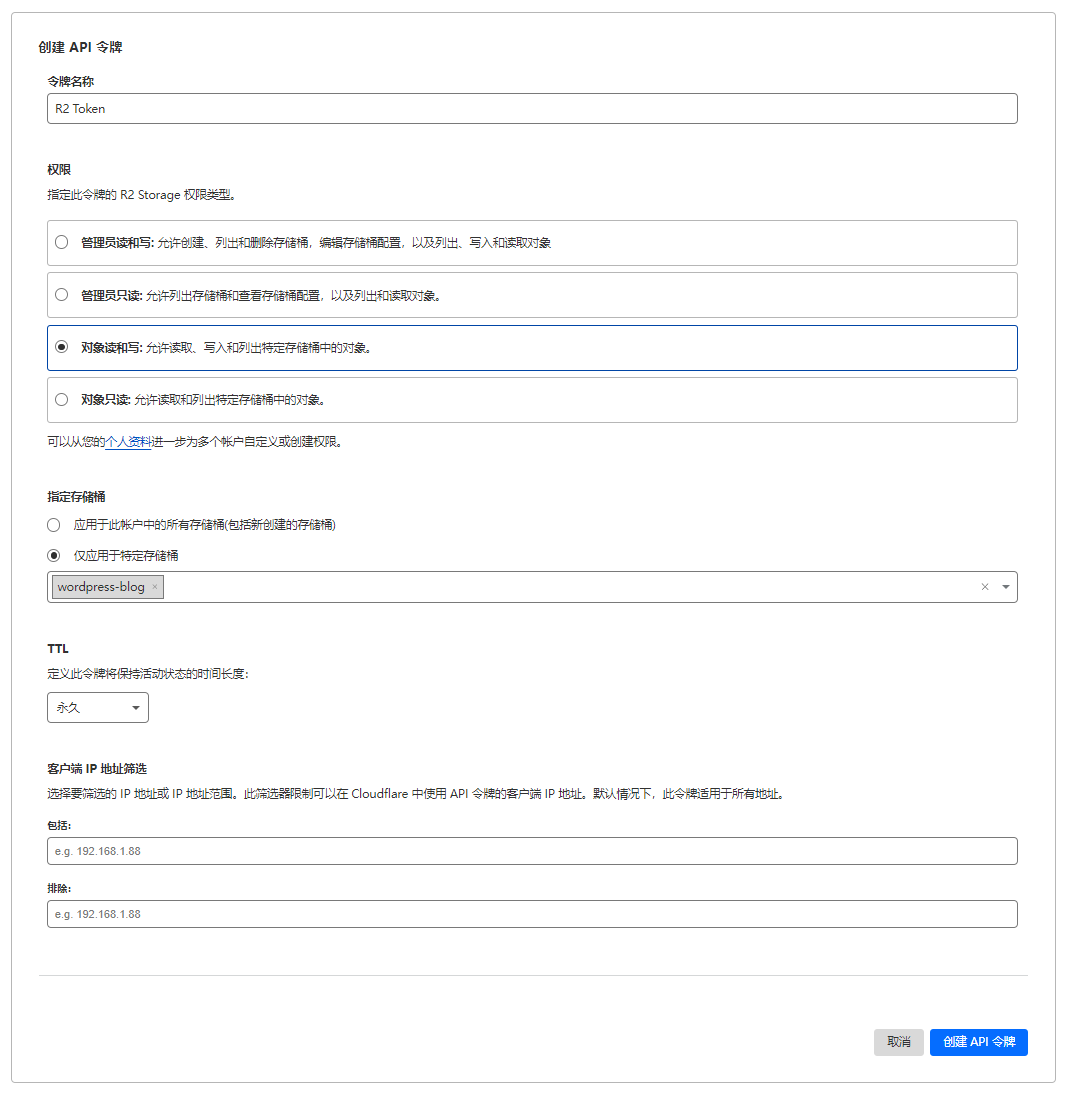
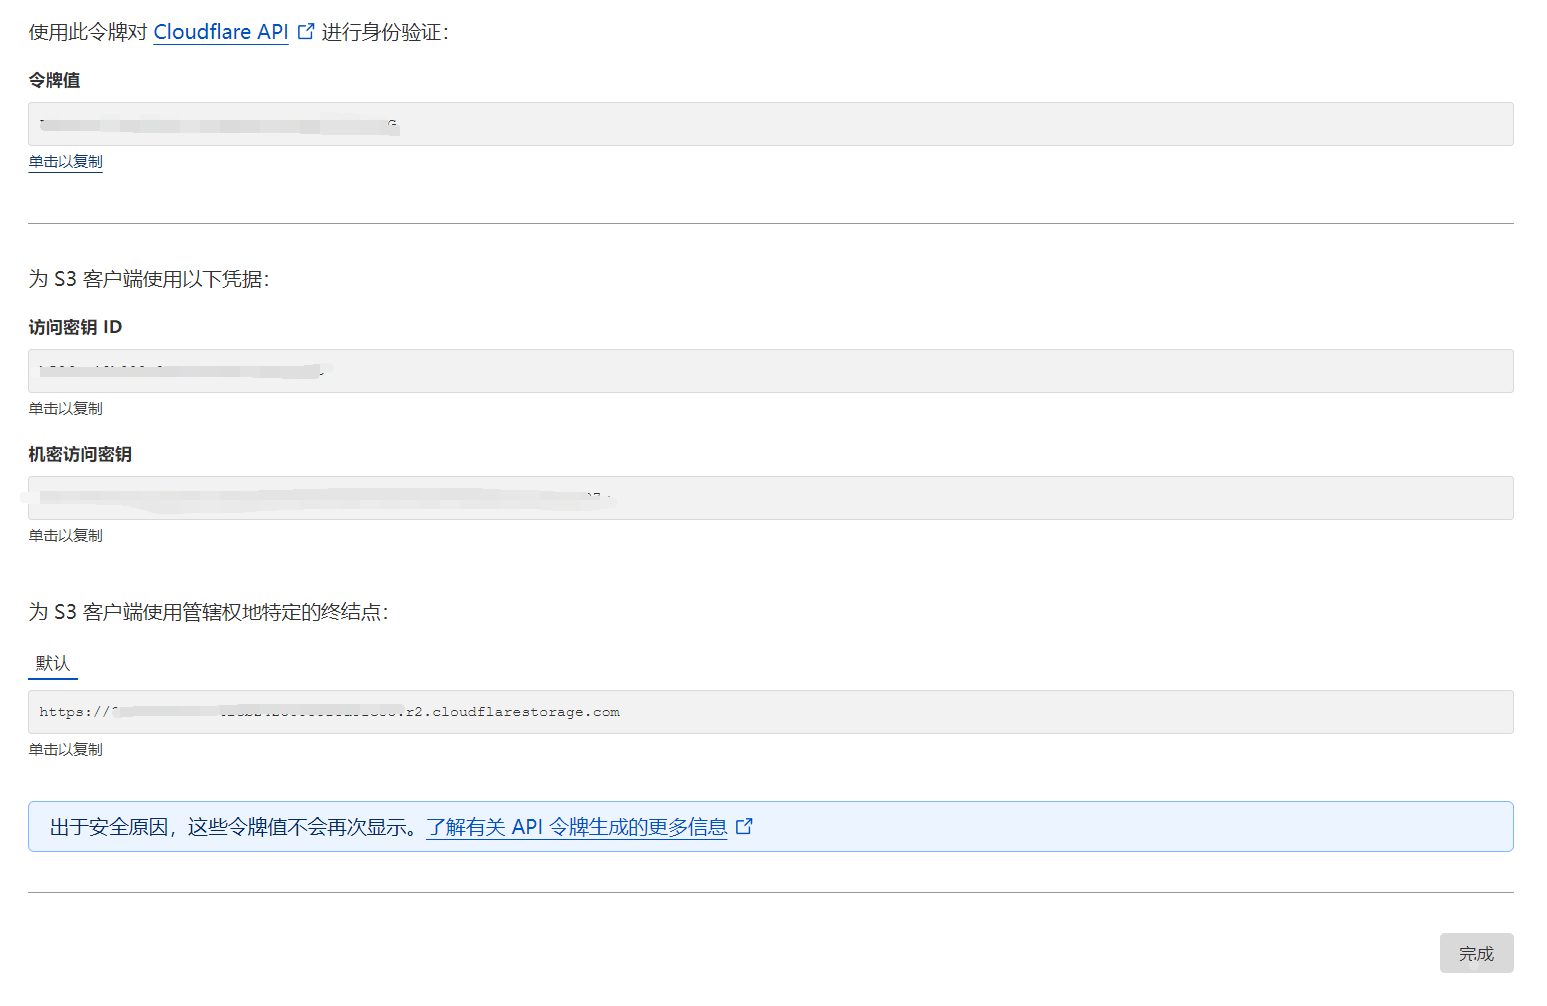
Next, I created an API token from the R2 bucket page. WordPress needs it to connect to the bucket, and so do other management tools.
One thing to keep in mind: the token can be used for a long time, but once you close that token page, you can’t open it again later. If you lose the key during setup or accidentally delete it from your config tool, that token is basically dead. Some people online said the only fix was to delete the bucket, but that’s not necessary. Just delete the token and generate a new one. A single bucket can have multiple tokens, so it’s best to name them clearly and keep them separate by use case.
By the way, R2’s web management is honestly pretty awful. Uploads are slow and often fail halfway through. You can only delete 25 files at a time, and the worst part is that folders can’t be deleted at all. The experience is miserable.
If you know what you’re doing, using the CLI is probably the easiest way. If you’re like me and don’t want to deal with that, you can use S3-compatible GUI tools instead. The setup is basically the same: access key, secret key, and so on.
On Windows, WinSCP and S3Browser both work. WinSCP feels more like FTP, but bulk deletion is painfully slow. S3Browser is terrible for uploading lots of files, but clearing an entire bucket is incredibly fast, which I learned the hard way.
On Mac, I still haven’t found a good equivalent. FileZilla’s S3 support costs money, and Cyberduck kept failing SSL verification for me. I didn’t feel like debugging it, so I gave up.
Installing the Media Cloud plugin
Because I was too lazy to mess with the WordPress database files directly, I chose the Media Cloud plugin. Its setup is pretty friendly, and it even has video tutorials. You just paste the API token information into the right fields and click Test Settings to see whether it works.
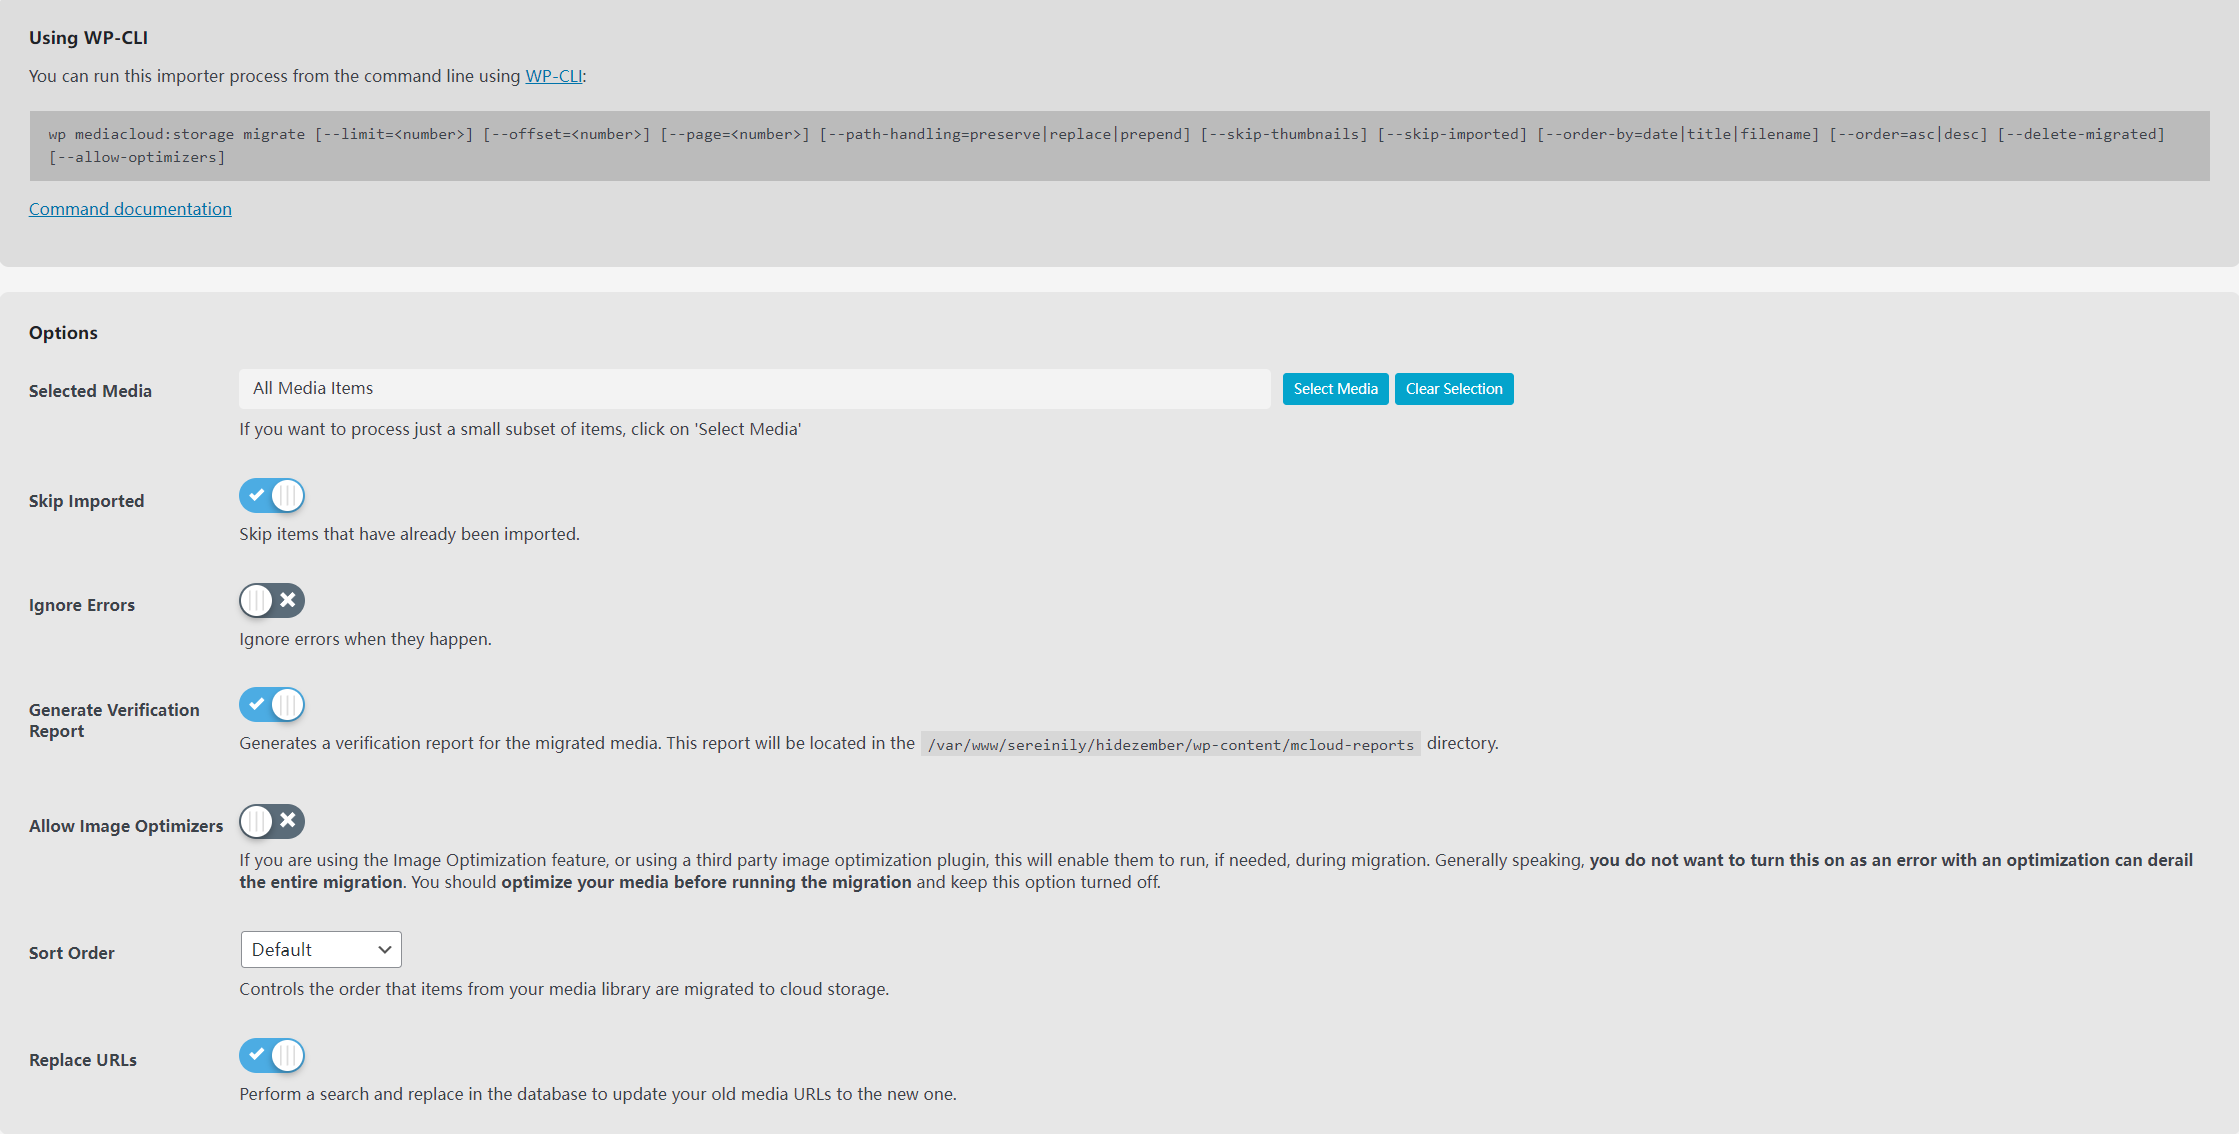
After that, any new images uploaded to the media library would automatically go into the bucket. If you want to move all your old WordPress media files too, there’s a Migrate to Storage option under Task manage — but that feature is paid.
The EWWW Image Optimization disaster
My first disaster came from a tempting line in Media Cloud’s settings:
Media Cloud will output URLs for webp images, if a webp image has been generated for an attachment via the EWWW Image Optimization plugin
That sounded nice enough, so I went for it.
EWWW Image Optimization can convert all your blog images to WebP, and it’s free. Even images that are already in the media library can be batch processed.
I started the bulk optimization right after activating Media Cloud. Every optimized image was treated like a newly uploaded file and got pushed into the bucket. I hadn’t enabled syncing for the old media files yet, so the whole bucket ended up with just one 2024/05 folder full of thousands of images. My obsessive brain absolutely couldn’t handle that, so I used S3Browser to delete the folder.
That made everything even worse. Suddenly none of the media files in WordPress could be opened, and even the thumbnails disappeared.
I tried a bunch of things, but nothing fixed it. I also couldn’t find any real solution on EWWW’s site. In the end, I had no choice but to restore a backup with UpdraftPlus.
That process came with its own chain of nonsense: plugin crashes, 504 errors, MySQL refusing to start, and various other random failures. After a lot of trouble, I finally got the site back to the previous day’s backup.
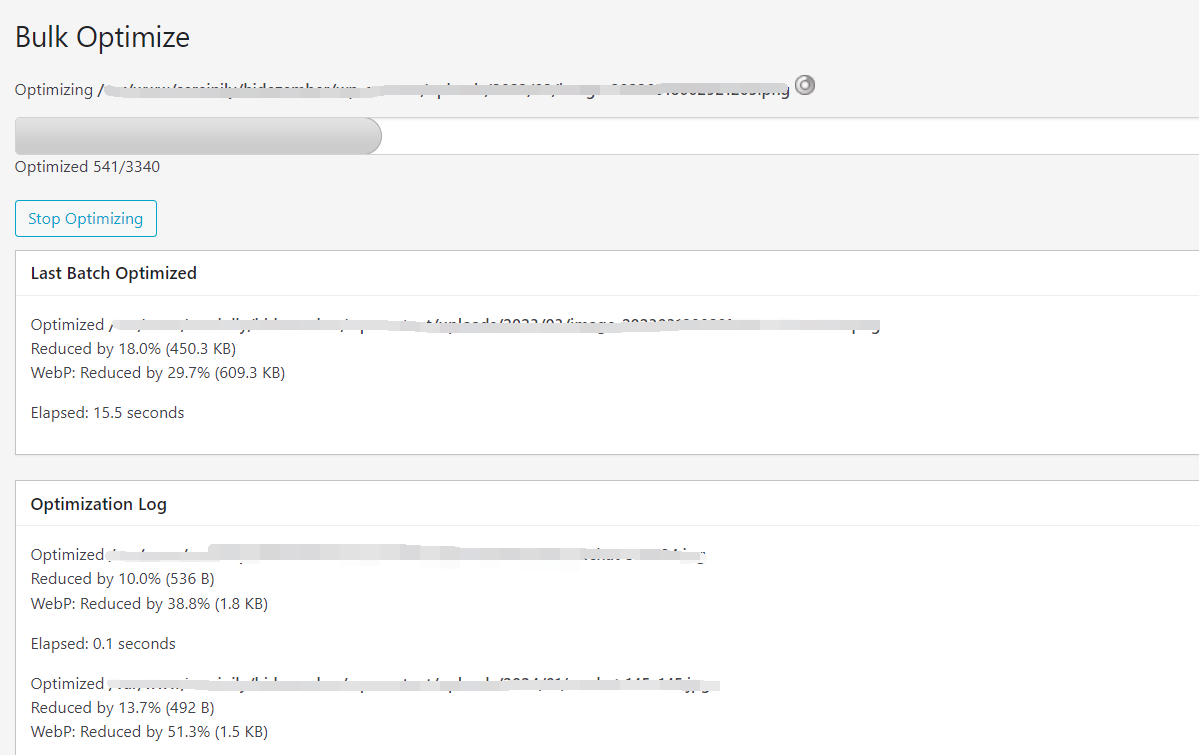
The second time around, I learned my lesson and paid for one month of the plugin, which was less than five dollars and still acceptable. After reconfiguring the whole blog, I started the migration. About 1,000 images — or five to six thousand files if you count thumbnails and other variants — took roughly three hours. I have no idea whether that’s fast or slow. At least I didn’t need to sit there waiting the whole time.
After the migration finished, I made the mistake of running EWWW optimization again. And somehow this time all the image URLs got scrambled, so the images in the posts stopped loading completely.
At that point I gave up trying to be clever and restored another backup with UpdraftPlus. The disaster got bigger because UpdraftPlus itself started throwing errors. I restored three or four times, and each time it failed with either a plugin error or an uploads verification problem. In the end I had to go back one more day, and that one finally worked.
The problem was that I had published a blog post and received a few comments during that lost day. Losing them was annoying. I ended up opening the database and manually inserting the backup data entry by entry, which completely defeated my original plan of avoiding database edits.
If you were subscribed to my RSS feed during those two days, you might have seen the same content get updated weirdly more than once. Sorry about that.
After that backup recovery, I swore off optimization plugins and just decided to use things as they are.
Moving the podcast into R2
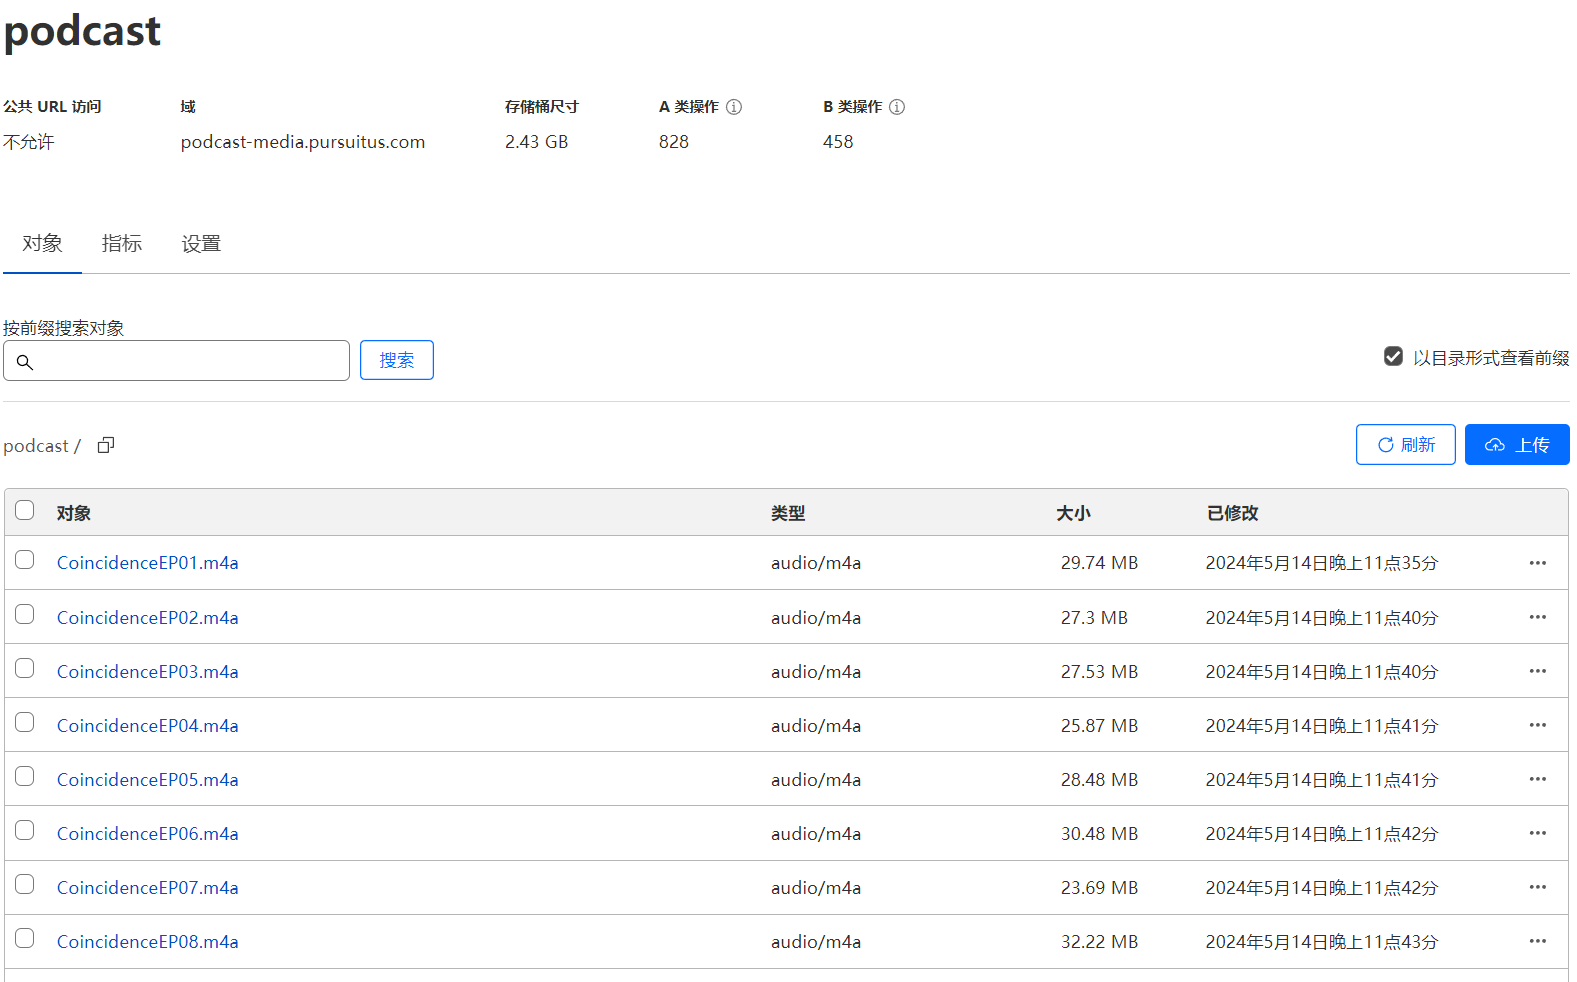
Besides blog images, I also have a podcast. It’s mostly a hobby project, but the files take up a surprising amount of server space. Moving it to R2 would save a lot of resources.
The podcast is actually easy to handle because there are only a bit over 50 episodes, all in the same folder. I created a separate bucket for the raw podcast files and uploaded everything with WinSCP.
For this part, I didn’t bother with Media Cloud’s migration tool. I just opened the WordPress database and ran a MySQL update.
UPDATE wp_podcast_postmeta
SET meta_value = REPLACE(meta_value, '源地址', '新地址')
WHERE meta_key IN ('enclosure', 'audio_file');
The replacement was done very quickly. I tested playback on the site and in Ximalaya-like apps, and everything seemed fine. The files in the bucket were neatly organized too, which made my obsessive side very happy.