I’ve been spending a lot of time tinkering with smart home setups lately, mainly because I wanted more flexible automations than the official Mi Home app can provide. One example is the low-power auto shutoff feature for the Xiaomi Smart Plug 2 Bluetooth Gateway Edition, which isn’t easy to achieve in the stock app. That was enough reason to try an open smart home platform: Home Assistant.
Before getting into the installation steps, it helps to clear up a few practical questions.
A few things worth knowing first
Can Mi Home still control my devices after I add them to Home Assistant?
Yes. I’m using the Xiaomi Miot Auto integration to connect Xiaomi devices, and after adding them this way they still remain controllable inside Mi Home.
Is HAOS the best choice?
I wouldn’t recommend it here. Deploying Home Assistant with Docker is the more practical option. In this setup, HAOS can be troublesome because image pulling may depend on GitHub, and under some network conditions that often fails.
What extra features does this make possible?
A concrete example is the low-power automatic power-off function for the Xiaomi Smart Plug 2.
Are there any current issues?
The main problem I’ve run into is automation delay. I’m not sure whether it’s caused by my configuration or by the integration itself, but the response can be noticeably slow. After a human presence sensor is triggered, it can take more than 10 seconds before Home Assistant reacts and turns on the light, which is much slower than the same automation inside Mi Home.
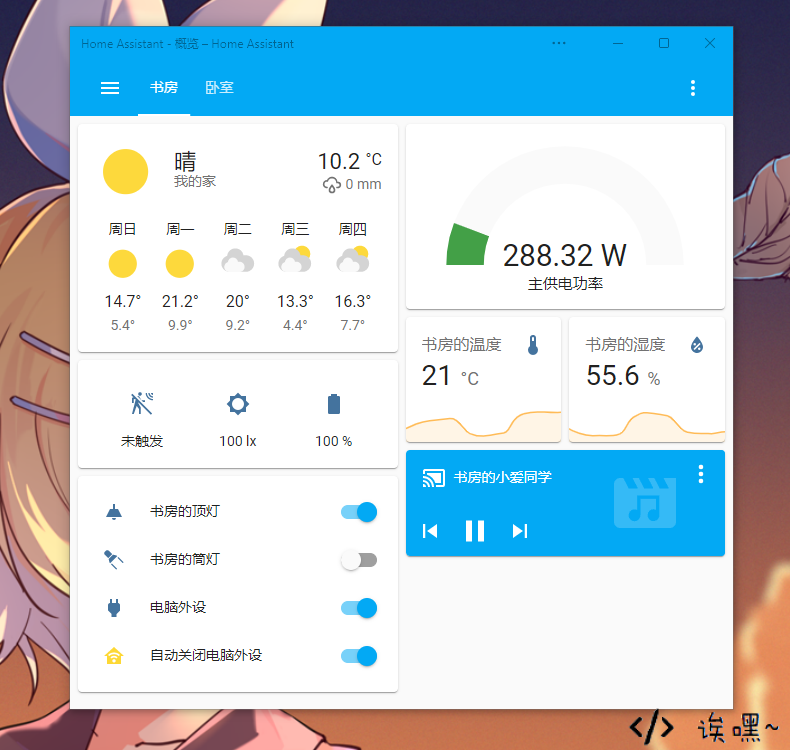
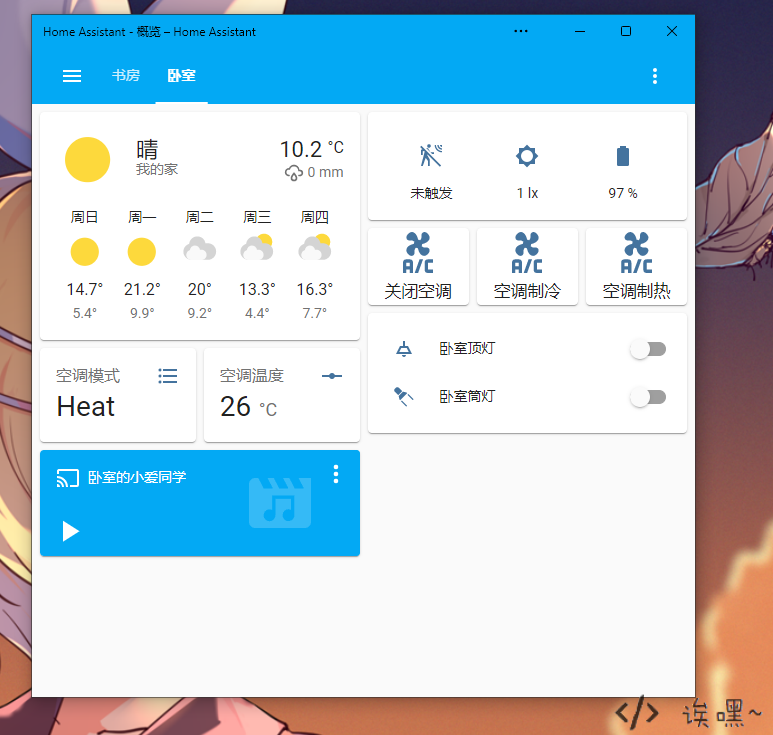
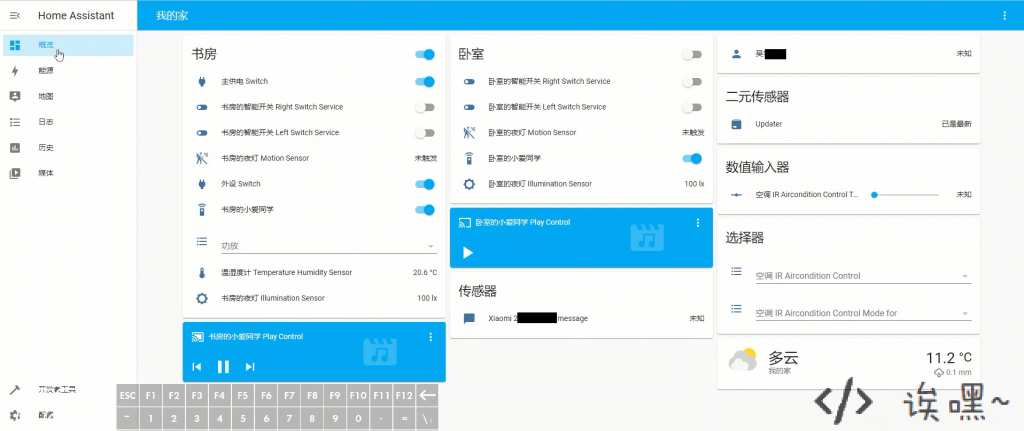
What the setup looks like
Here’s how the finished configuration looks in practice:
Deploying Home Assistant with Synology Docker
I chose to run Home Assistant in Docker on a Synology NAS.
Install Docker on Synology
Open Synology’s package center, search for Docker, and install it.
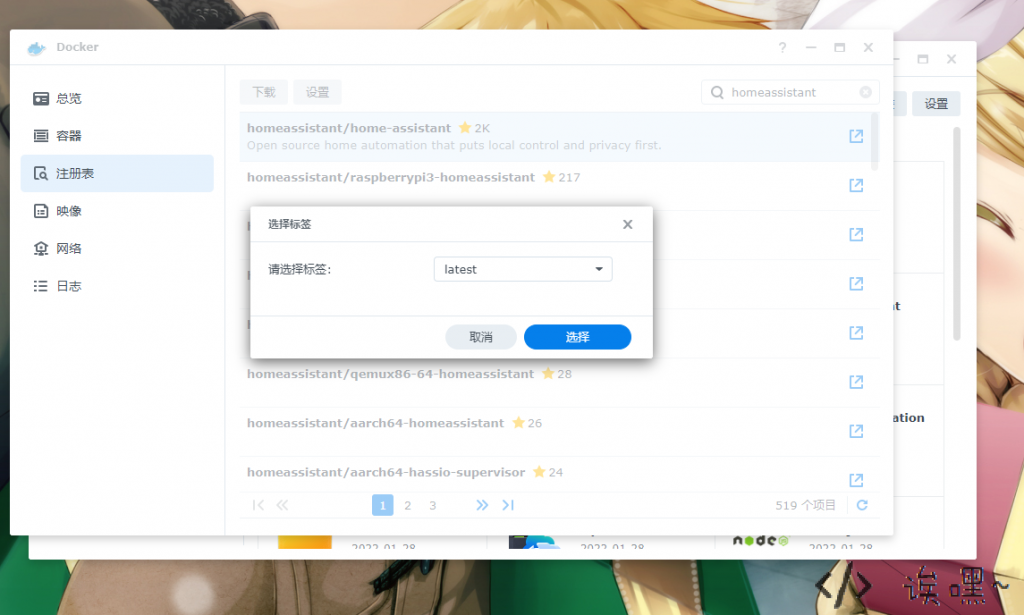
Download the Home Assistant image
In Docker’s Registry, search for homeassistant. Choose homeassistant/home-assistant, then download it. For the tag, select latest.
Create the container
Once the image finishes downloading, go to the Image tab, select the image you just pulled, and click Launch.
If the download fails, switching to a domestic mirror may help.
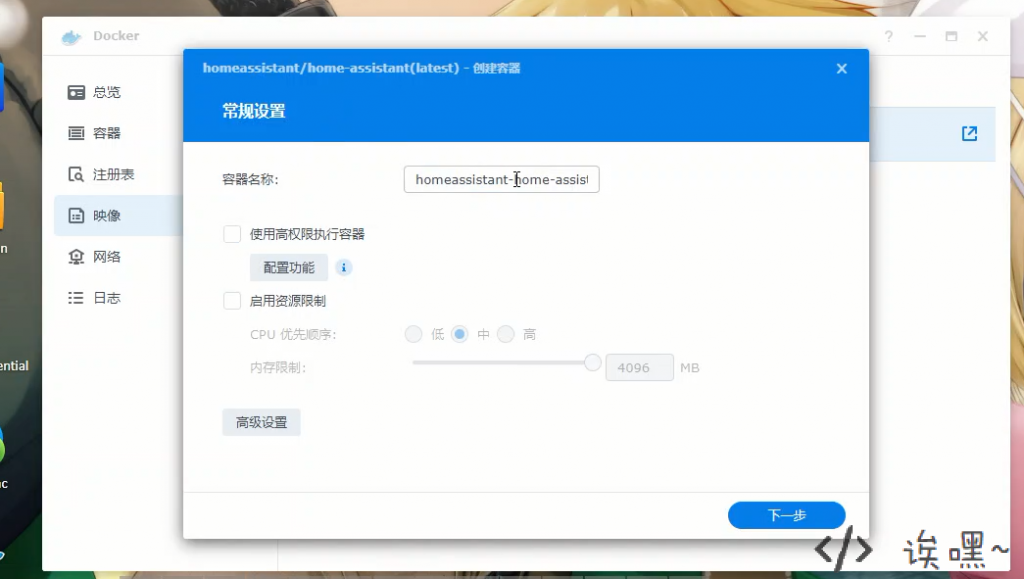
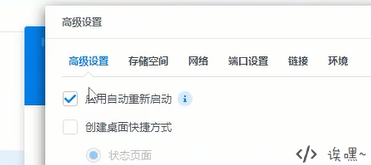
In the popup window, open Advanced Settings. The container name can be anything you want.
Enable auto-restart / auto-start, so the container starts together with the NAS.
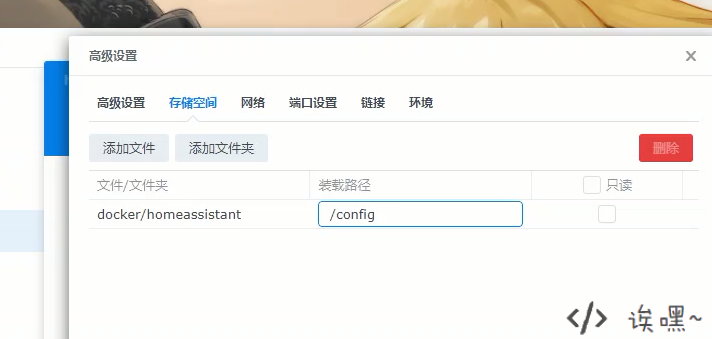
Under the Volume tab, mount the /config directory to a local folder on the NAS. This makes it much easier to edit Home Assistant’s configuration files later.
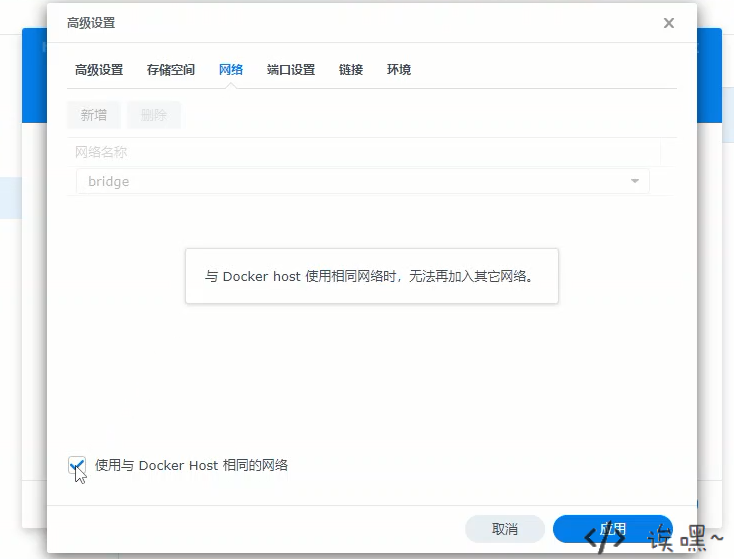
Then switch to the Network tab and choose Use the same network as Docker Host. With this setting, Home Assistant will be reachable directly through your Synology NAS IP address on port 8123.
After that, click Apply and continue through the rest of the setup to create the container.
Accessing Home Assistant for the first time
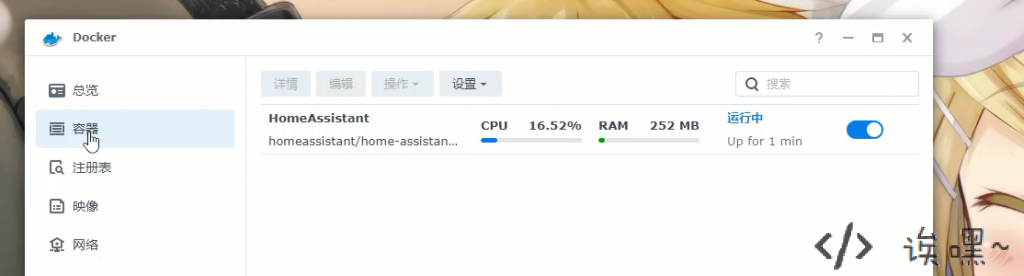
Once the container appears in Docker’s container list, wait a few minutes for initialization to complete.
Then open a browser and visit:
Synology-IP:8123
That will bring up the Home Assistant onboarding page.
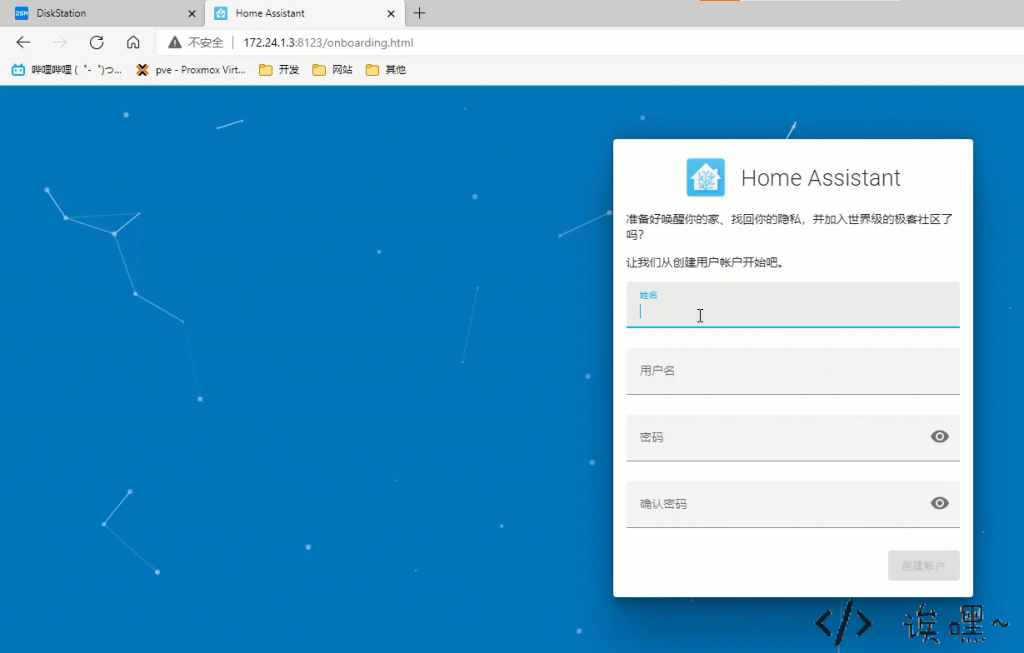
Follow the setup guide to enter the main interface. One small but important detail: it’s better to use an English username, since using Chinese characters may cause issues.
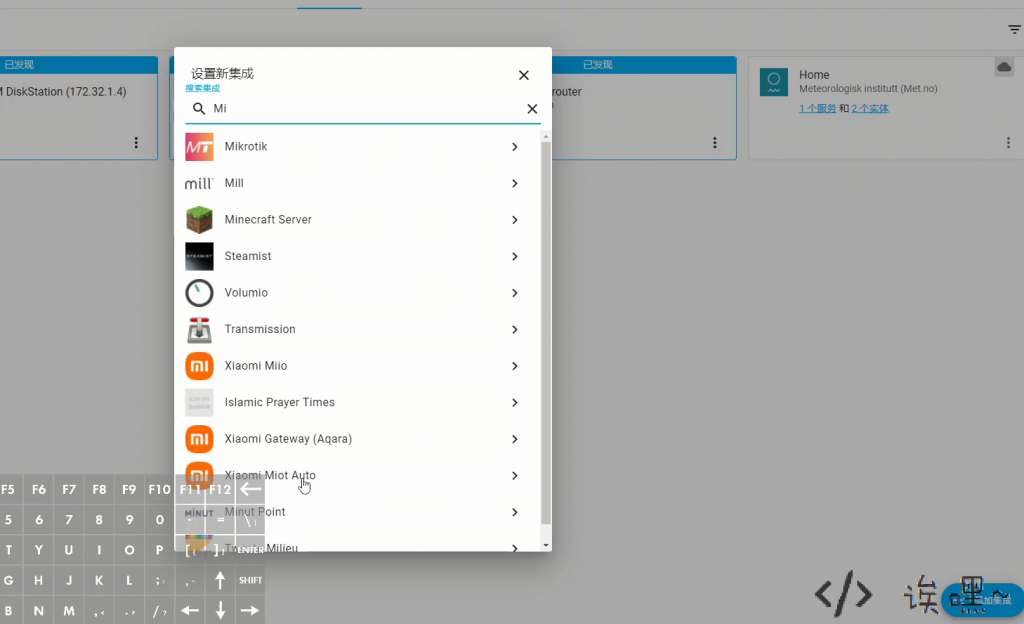
Installing Xiaomi Miot Auto
To connect Xiaomi devices, first download the Xiaomi Miot Auto integration.
GitHub release page: https://github.com/al-one/hass-xiaomi-miot/releases
Alternative download mirror: https://share.unknown-o.com/homeassistant/plugins/hass-xiaomi-miot
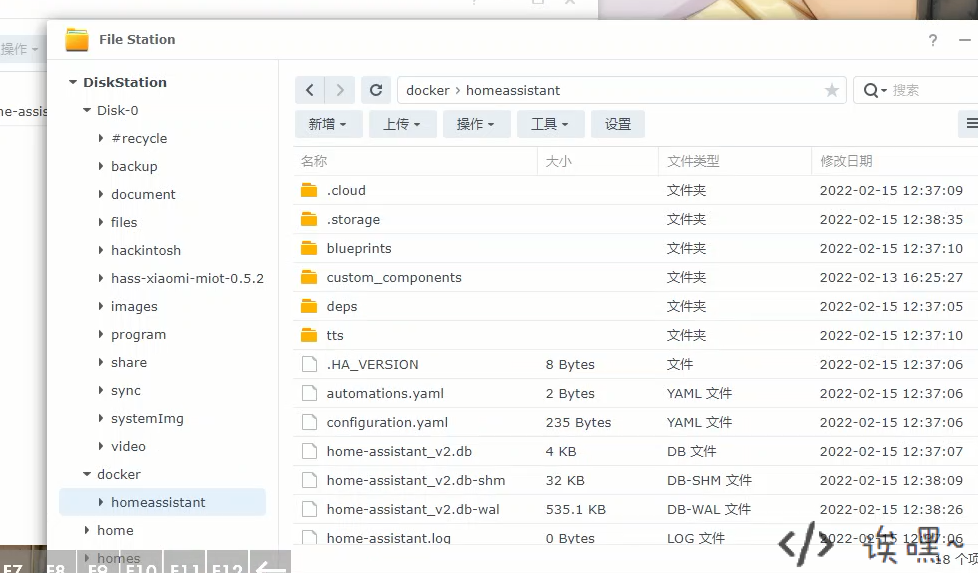
After downloading it, upload the archive to your Synology NAS and extract it.
Copy the custom_components folder into the root of your Home Assistant configuration directory. If you haven’t installed any custom integrations before, that folder may not already exist. If it does exist, just overwrite it.
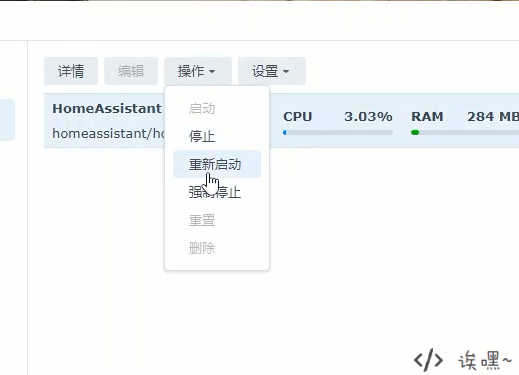
After the files are copied, go back to Docker and manually restart the Home Assistant container.
Adding Mijia devices
Now reopen Home Assistant and sign in.
From the main interface, go to Configuration -> Devices & Services.

Click Add Integration, then search for Xiaomi in the popup. From the results, choose Xiaomi Miot Auto.
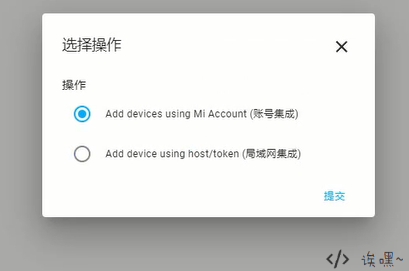
Next, select account integration.
Enter your Mi account username and password.
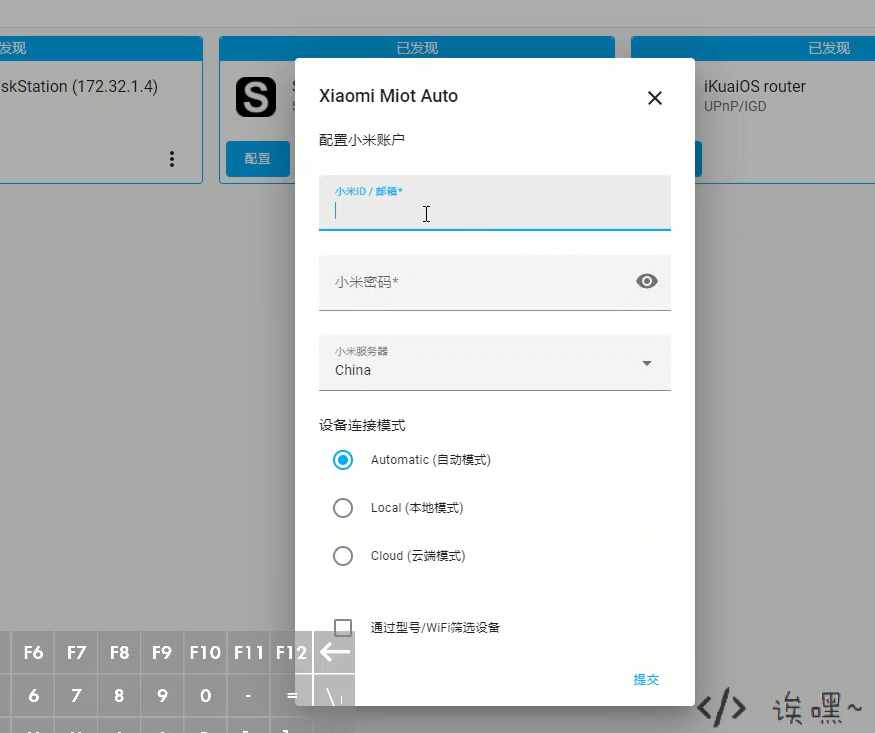
One thing to keep in mind: your Mijia devices should ideally be on the same local network as Home Assistant. Otherwise, some devices may fail to report status or may not be controllable at all. In my testing, even enabling cloud mode did not fully solve this, which may be a bug.
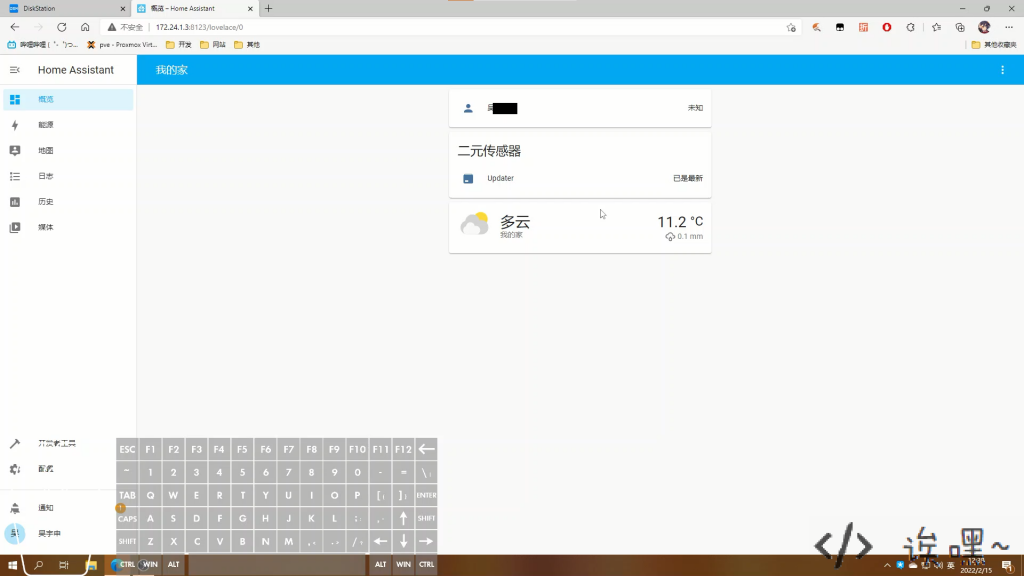
Once the integration finishes, your devices should appear in Home Assistant.
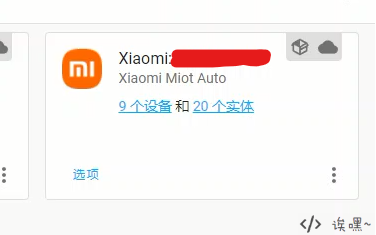
Go back to Overview, and you’ll see that Home Assistant has automatically added your Mijia devices to the dashboard.
At that point, the basic setup is done and you can start controlling your Xiaomi devices from Home Assistant.
If you don’t like the default layout, you can install a custom theme and adjust the dashboard to your own taste.