Preface
Make sure DNS is already working before starting this lab. The FTP server in this exercise is accessed by domain name, so the earlier DNS setup must be completed successfully first.
This task continues from the previous environment and focuses on securing a vsftpd-based FTP server with SSL/TLS so that data exchanged between client and server is encrypted. The intended use case is a company FTP service for updating website content and storing shared files.
Lab scenario
A company needs to deploy an FTP server with vsftpd for website updates and public file storage. To protect confidentiality and integrity during transmission, the server must use SSL/TLS, and clients must connect over FTPS rather than plain FTP.
Required virtual machines
- 1 DNS server (
Server) - 1 Web/FTP server (
Ftp Server) - 1 client (
Client1)
Requirements
- Plain, insecure FTP must not be used. Enable FTPS with a certificate issued through a CA workflow, using the following certificate information:
- Country Name (2 letter code)
[XX]:CN - State or Province Name (fullname)
[]:GD - Locality Name (eg, city)
[Default City]:GuangZhou - Organization Name (eg, company)
[Default Company Ltd]:mydomain.com - Organizational Unit Name (eg, section)
[]:Operations Departments - Common Name (eg, your name or your server’s hostname)
[]:ftp.mydomain.com
- The server must be accessed using the domain name
ftp.mydomian.com. - User
webadminmust log in to the FTP server with/webdata/as the root directory. - After login, the user must be confined to its own root directory.
- The web administrator may upload and download files, but uploads with
.doc,.docx, and.xlsxextensions must be blocked. - Maximum download speed must be limited to
100kb/s, and no more than2users from the same IP may be online at once. - Downloads through tools or browsers must also stay within
100kb/s. - No more than
2login processes/users may be established simultaneously from a single IP address.
1. Configure the FTP server IP address
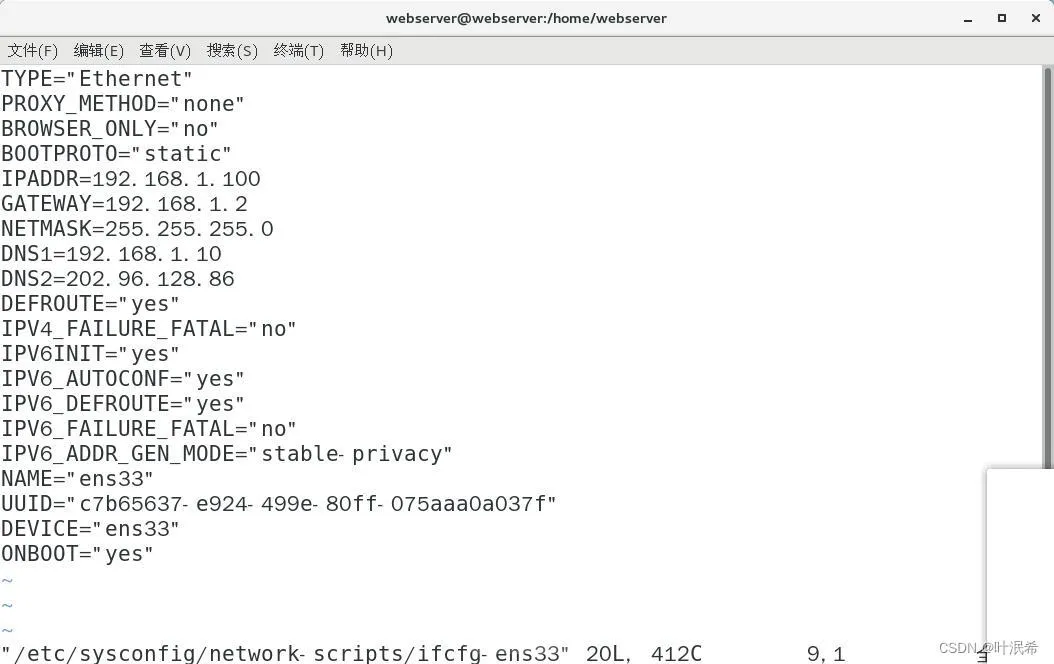
Set the FTP server network configuration as follows:
1 2 3 4 5 6
BOOTPROTO=static IPADDR=192.168.1.100 GATEWAY=192.168.1.2 NETMASK=255.255.255.0 DNS1=192.168.1.10 DNS2=202.96.128.86
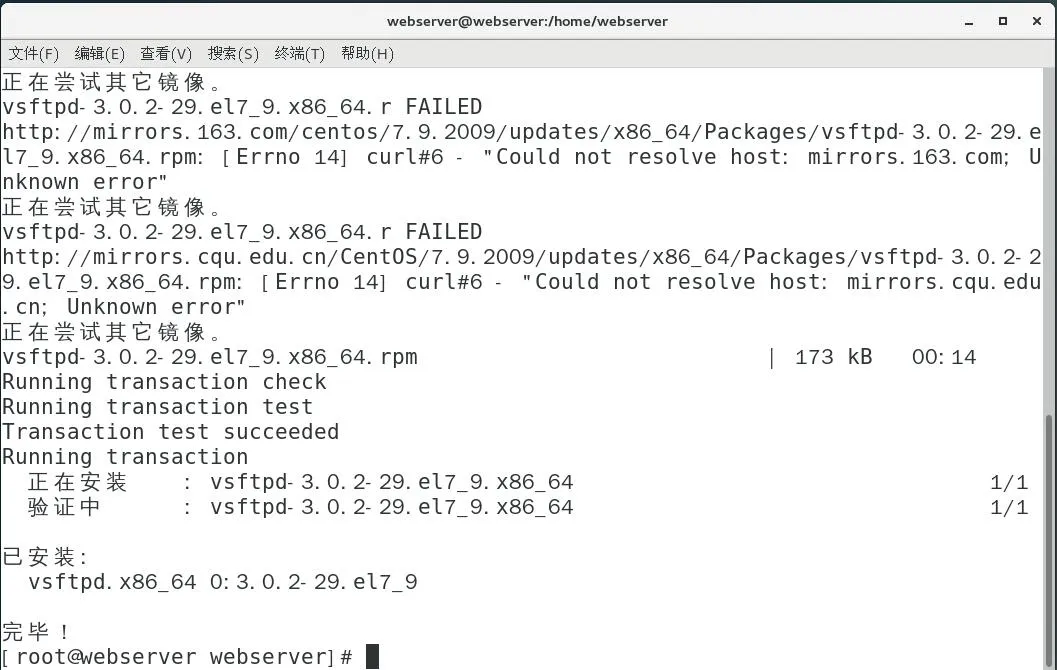
2. Install and start vsftpd
Install the FTP service and enable it at boot:
1 2 3
yum -y install vsftpd //安装vsftp服务 systemctl start vsftpd //开启vsftp服务 systemctl enable vsftpd //开机自启
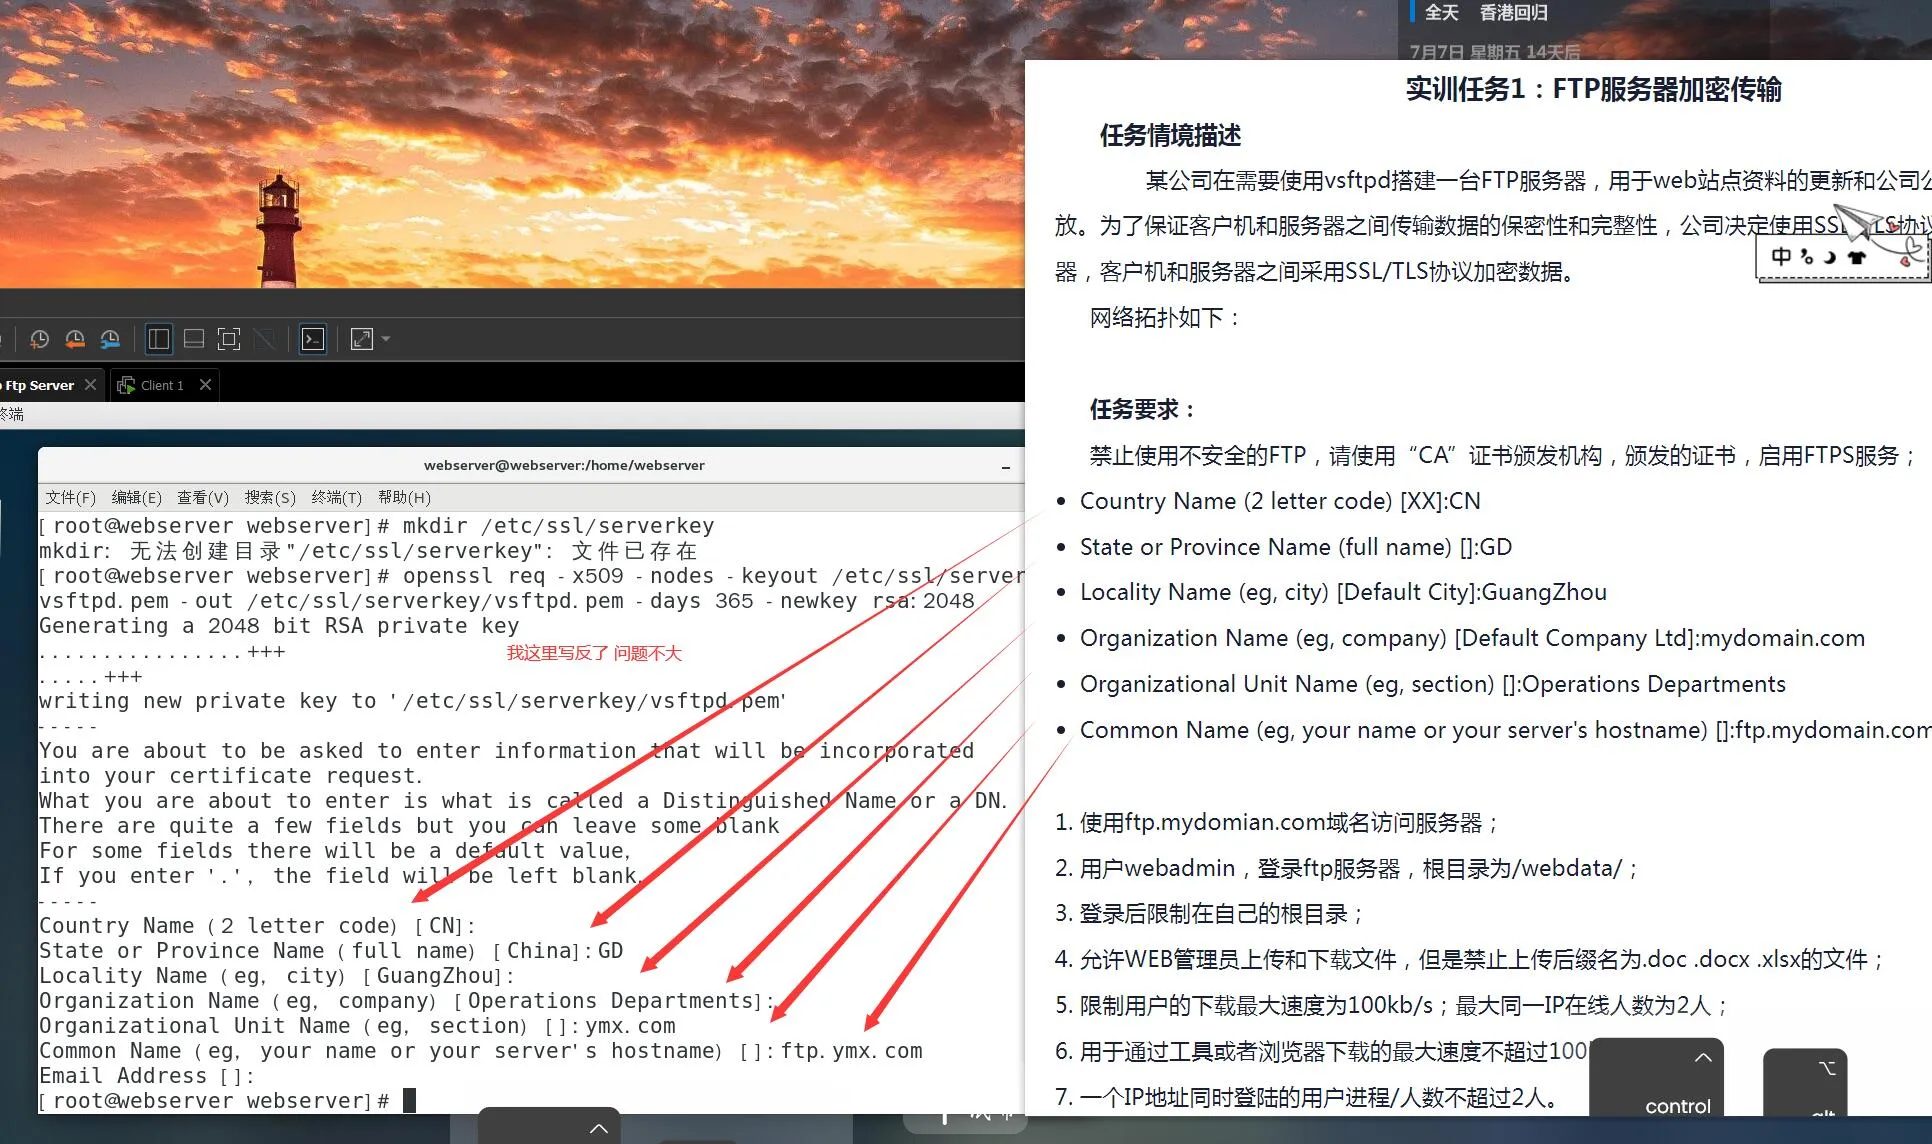
3. Generate the server certificate
Create a directory for the key and certificate, then generate the certificate with OpenSSL.
1 2 3 4 5 6 7 8 9 10 11 12 13 14 15 16 17 18 19 20 21 22
创建目录[root@webserver webserver]# mkdir /etc/ssl/serverkey 生成证书[root@webserver webserver]# openssl req -x509 -nodes -keyout /etc/ssl/serverkey/vsftpd.pem -out /etc/ssl/serverkey/vsftpd.pem -days 365 -newkey rsa:2048 Generating a 2048 bit RSA private key ................+++ .....+++ writing new private key to '/etc/ssl/serverkey/vsftpd.pem' ----- You are about to be asked to enter information that will be incorporated into your certificate request. What you are about to enter is what is called a Distinguished Name or a DN. There are quite a few fields but you can leave some blank For some fields there will be a default value, If you enter '.', the field will be left blank. ----- Country Name (2 letter code) [CN]: State or Province Name (full name) [China]:GD Locality Name (eg, city) [GuangZhou]: Organization Name (eg, company) [ymx.com]: Organizational Unit Name (eg, section) []:Operations Departments Common Name (eg, your name or your server's hostname) []:ftp.ymx.com Email Address []: [root@webserver webserver]#
One screenshot for this section was incorrect, so the command output above should be followed rather than the image.
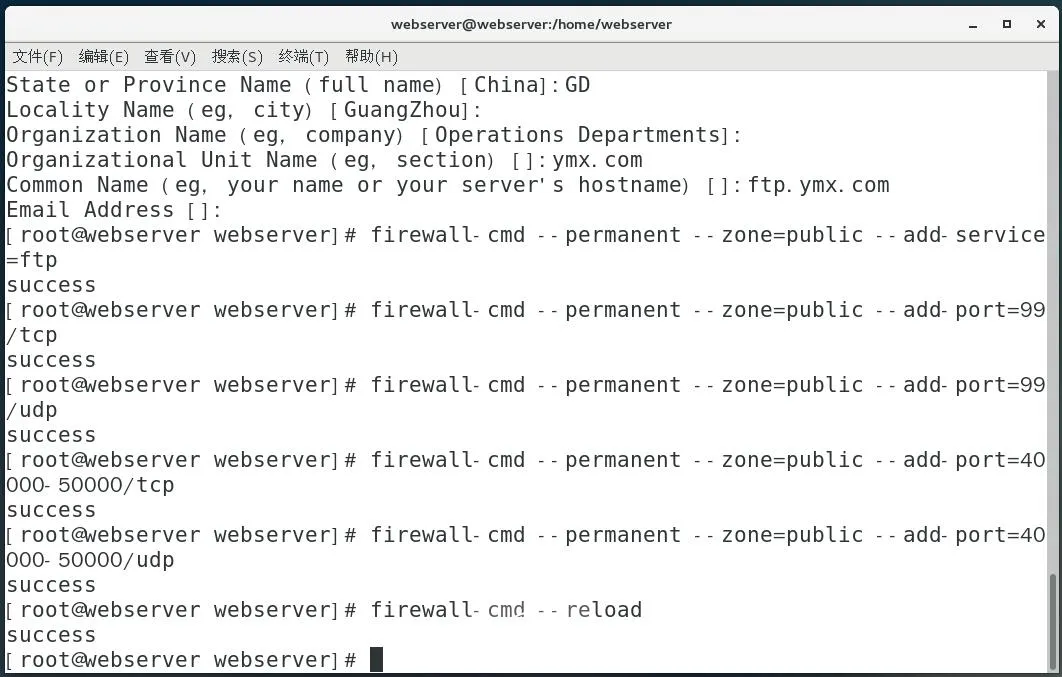
4. Open the required firewall ports
Allow FTP service traffic, FTPS port 990, and the passive port range used by vsftpd.
1 2 3 4 5 6 7 8 9 10 11 12 13 14
允许ftp通过[root@webserver webserver]# firewall-cmd --permanent --zone=public --add-service=ftp success 允许端口通过[root@webserver webserver]# firewall-cmd --permanent --zone=public --add-port=990/tcp success 允许端口通过[root@webserver webserver]# firewall-cmd --permanent --zone=public --add-port=990/udp success 允许端口通过[root@webserver webserver]# firewall-cmd --permanent --zone=public --add-port=40000-50000/tcp success 允许端口通过[root@webserver webserver]# firewall-cmd --permanent --zone=public --add-port=40000-50000/udp success 重启防火墙[root@webserver webserver]# firewall-cmd --reload success [root@webserver webserver]#

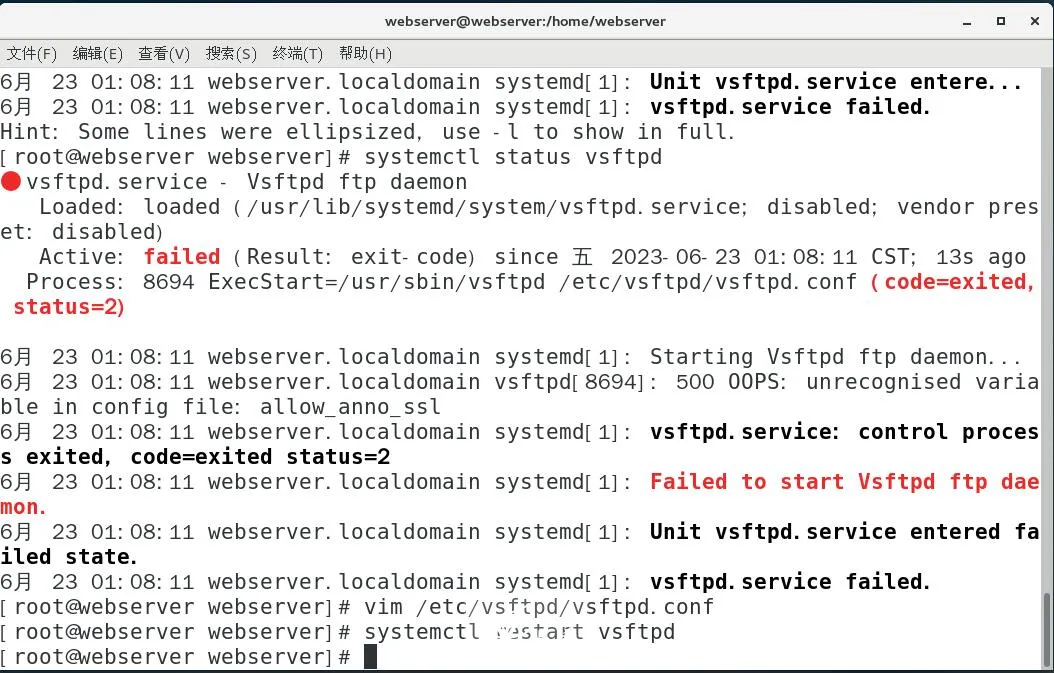
5. Enable SSL/TLS in vsftpd
Edit the main configuration file:
1
vim /etc/vsftpd/vsftpd.conf
Append the following configuration at the end of the file:
1 2 3 4 5 6 7 8 9 10 11 12
ssl_enable=yes ssl_tlsv1=yes ssl_sslv2=no ssl_sslv3=no rsa_private_key_file=/etc/ssl/serverkey/vsftpd.pem rsa_cert_file=/etc/ssl/serverkey/vsftpd.pem allow_anon_ssl=no force_local_logins_ssl=yes force_local_data_ssl=yes pasv_min_port=40000 pasv_max_port=50000 systemctl restart vsftpd //重启
The screenshot for this part also contained an error, so use the text above as the correct configuration.
With these settings:
- SSL/TLS is enabled
- SSLv2 and SSLv3 are disabled
- both login and data connections are forced to use SSL
- passive mode uses ports
40000to50000 - the certificate and private key are read from
/etc/ssl/serverkey/vsftpd.pem
6. Create users, root directories, and virtual user authentication
This step sets up local accounts used for mapping, virtual user credentials, PAM authentication, per-user directories, and write permissions.
1 2 3 4 5 6 7 8 9 10 11 12 13 14 15 16 17 18 19 20 21 22 23 24 25 26 27 28 29 30 31 32 33 34 35 36 37 38 39 40 41 42 43 44 45
[root@webserver webserver]# useradd webadmin -s /sbin/nologin [root@webserver webserver]# useradd admin -s /sbin/nologin [root@webserver webserver]# passwd --stdin webadmin 更改用户 webadmin 的密码 。 root passwd:所有的身份验证令牌已经成功更新。 [root@webserver webserver]# passwd --stdin admin 更改用户 admin 的密码 。 root passwd:所有的身份验证令牌已经成功更新。 [root@webserver webserver]# vim /etc/vsftpd/vusr.txt webadmin root admin root [root@webserver webserver]# mkdir -p /var/ftp/pub/ /webdata [root@webserver webserver]# chmod 777 /webdata [root@webserver webserver]# chown webadmin /var/ftp/pub/ /webdata [root@webserver webserver]# rpm -qf /usr/bin/db_load libdb-utils-5.3.21-24.el7.x86_64 [root@webserver webserver]# db_load -T -t hash -f /etc/vsftpd/vusr.txt /etc/vsftpd/vusr.db [root@webserver webserver]# file /etc/vsftpd/vusr.db /etc/vsftpd/vusr.db: Berkeley DB (Hash, version 9, native byte-order) [root@webserver webserver]# chmod 600 /etc/vsftpd/vusr.* [root@webserver webserver]# cp -p /etc/pam.d/vsftpd /etc/pam.d/vsftpd-vusr [root@webserver webserver]# vim /etc/pam.d/vsftpd-vusr auth sufficient /lib64/security/pam_userdb.so db=/etc/vsftpd/vusr account sufficient /lib64/security/pam_userdb.so db=/etc/vsftpd/vusr [root@webserver webserver]# vim /etc/vsftpd/vsftpd.conf local_enable=yes chroot_local_user=yes pam_service_name=vsftpd-vusr guest_enable=yes guest_username=webadmin user_config_dir=/etc/vsftpd/vconfig virtual_use_local_privs=yes allow_writeable_chroot=yes [root@webserver webserver]# mkdir /etc/vsftpd/vconfig/ [root@webserver webserver]# vim /etc/vsftpd/vconfig/webadmin local_root=/webdata [root@webserver webserver]# vim /etc/vsftpd/vconfig/admin local_root=/webdata write_enable=no [root@webserver webserver]# setsebool -P ftpd_full_access on [root@webserver webserver]# systemctl restart vsftpd
This configuration satisfies several of the task goals:
webadminis mapped to/webdata- users are restricted to their own root directory with
chroot_local_user=yes - virtual user authentication is handled through PAM and the Berkeley DB file
adminis configured withwrite_enable=no, whilewebadmincan writeallow_writeable_chroot=yesavoids conflicts when the user is jailed inside a writable root directory
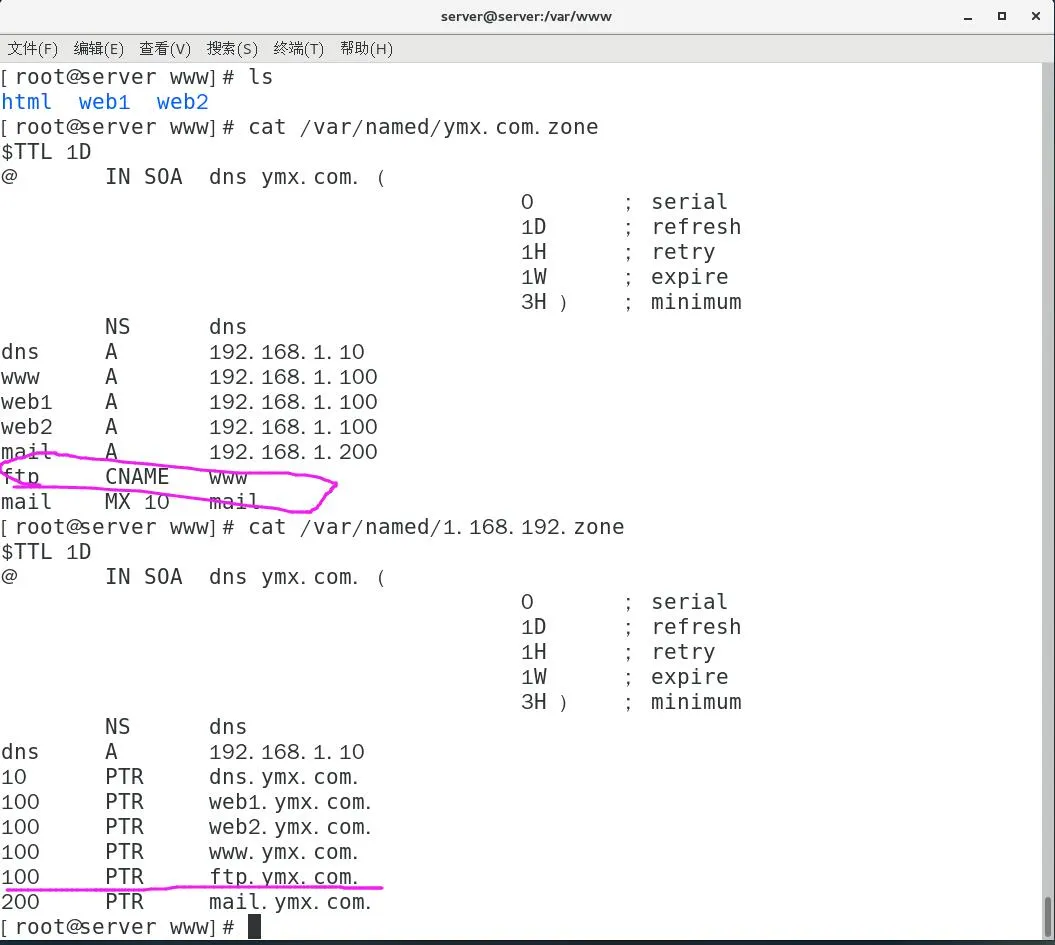
7. Add DNS records for domain-based access
To log in using the FTP domain name, create the required forward and reverse DNS records on the DNS server. The detailed DNS steps are omitted here, but this must be done or the domain-based login test will fail.
8. Apply the remaining control policies
Edit /etc/vsftpd/vsftpd.conf again and add the restrictions required by the task:
1 2 3 4 5 6 7 8 9 10
vim /etc/vsftpd/vsftpd.conf #允许WEB管理员上传和下载文件,但是禁止上传后缀名为.doc .docx .xlsx的文件; deny_file={*.doc,*.docx,*.xlsx} #限制用户的下载最大速度为100kb/s;用于通过工具或者浏览器下载的最大速度不超过100kb/s;人数为2人; local_max_rate=102400 #最大同一IP在线 max_per_ip=2 #一个IP地址同时登陆的用户进程/人数不超过2人。 max_clients=2 systemctl restart vsftpd
These lines implement the last part of the requirements:
- block uploads of
.doc,.docx, and.xlsx - cap transfer speed at
102400bytes per second, which is approximately100KB/s - limit simultaneous sessions from one IP with
max_per_ip=2 - cap total connected clients at
2withmax_clients=2
9. Client-side testing
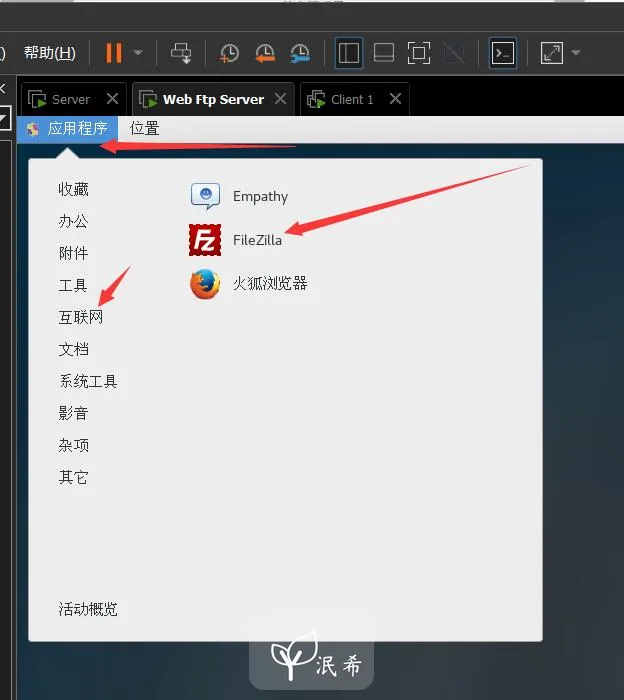
Install FTP tools and FileZilla
On Client1, install the necessary tools:
1 2
yum -y install epel-release yum -y install filezilla
Create test files
Prepare several files with different extensions to verify upload filtering:
1 2 3 4 5 6 7
[root@client server]# mkdir /home/server/test /*server是我的用户名,看情况来*/ [root@client server]# chmod 777 /home/server/test [root@client server]# cd /home/server/test/ [root@client test]# vim test.txt [root@client test]# vim test.doc [root@client test]# vim test.docx [root@client test]# vim test.xlsx
Log in over FTPS using the domain name and certificate
Use FileZilla or another FTPS-capable client to connect to the server through its domain name. The screenshots show certificate-based login succeeding.
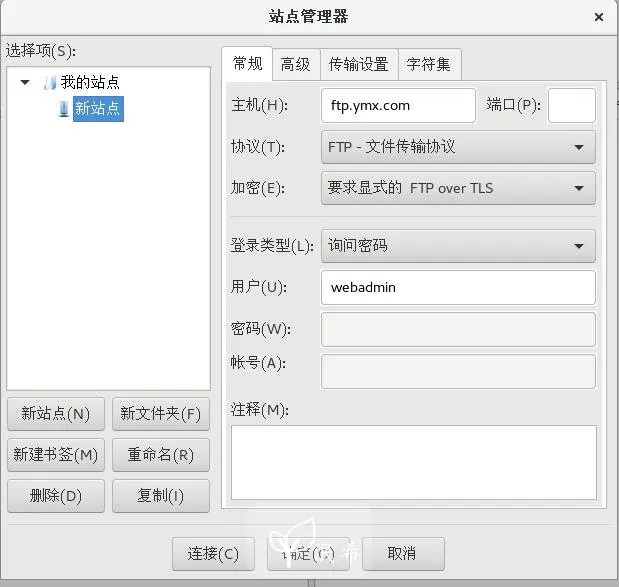
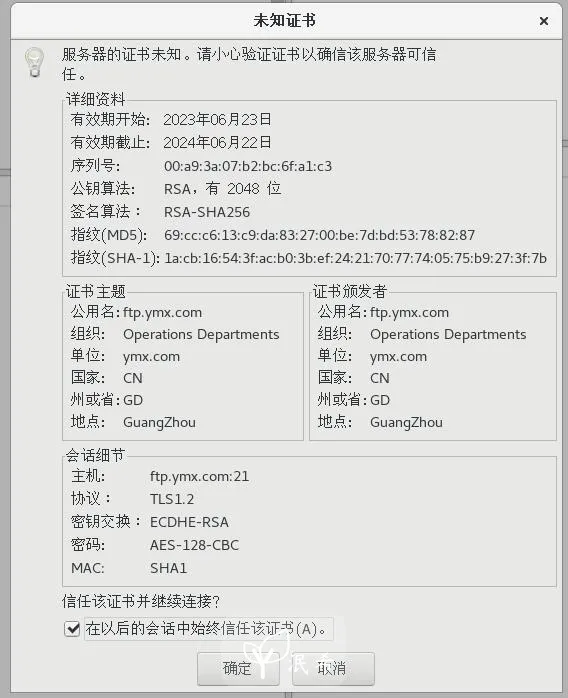
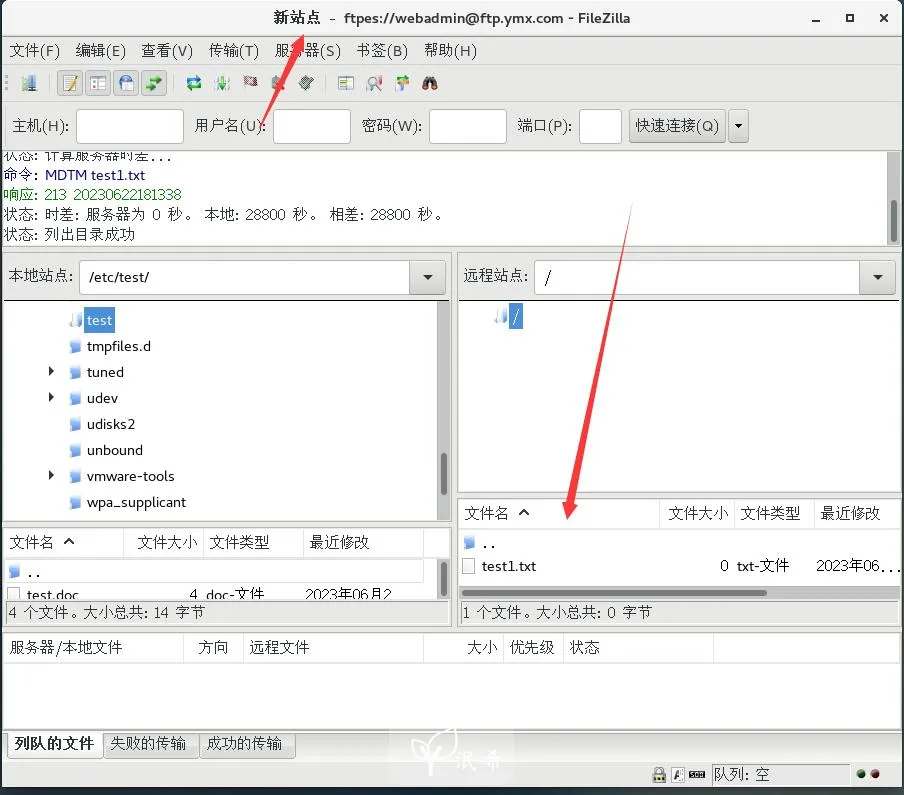
Login succeeded.
Verify blocked file types
Try uploading the prohibited file types.
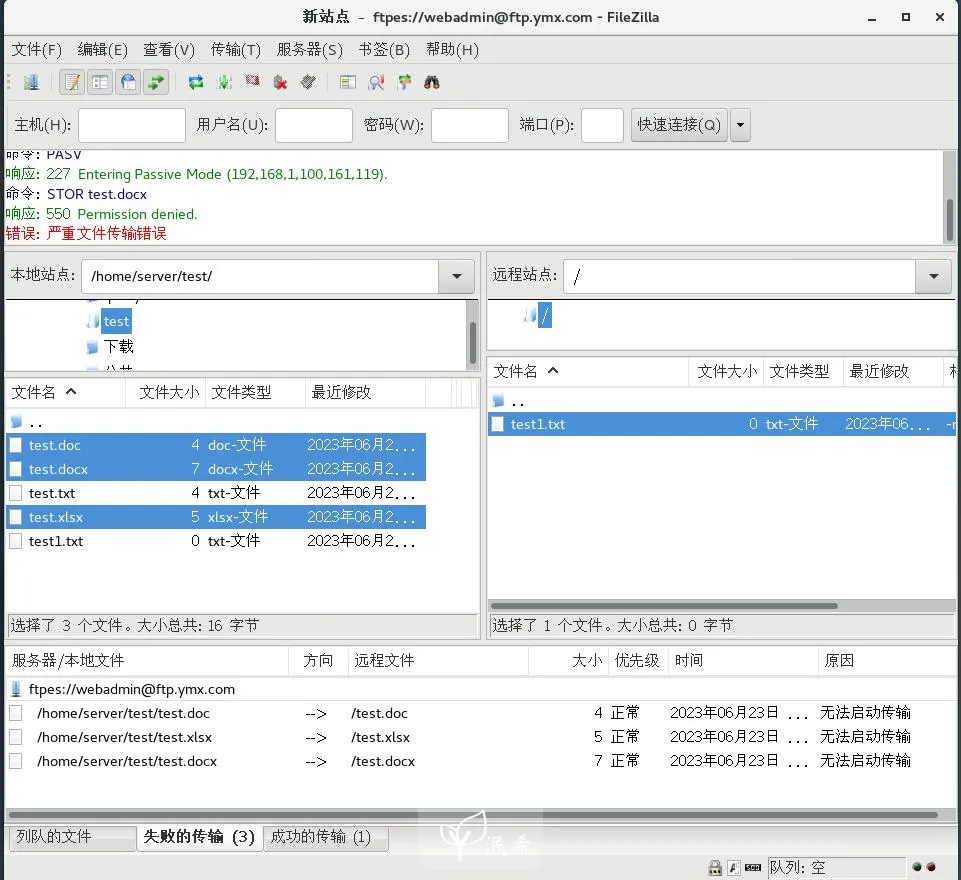
The upload fails as expected.
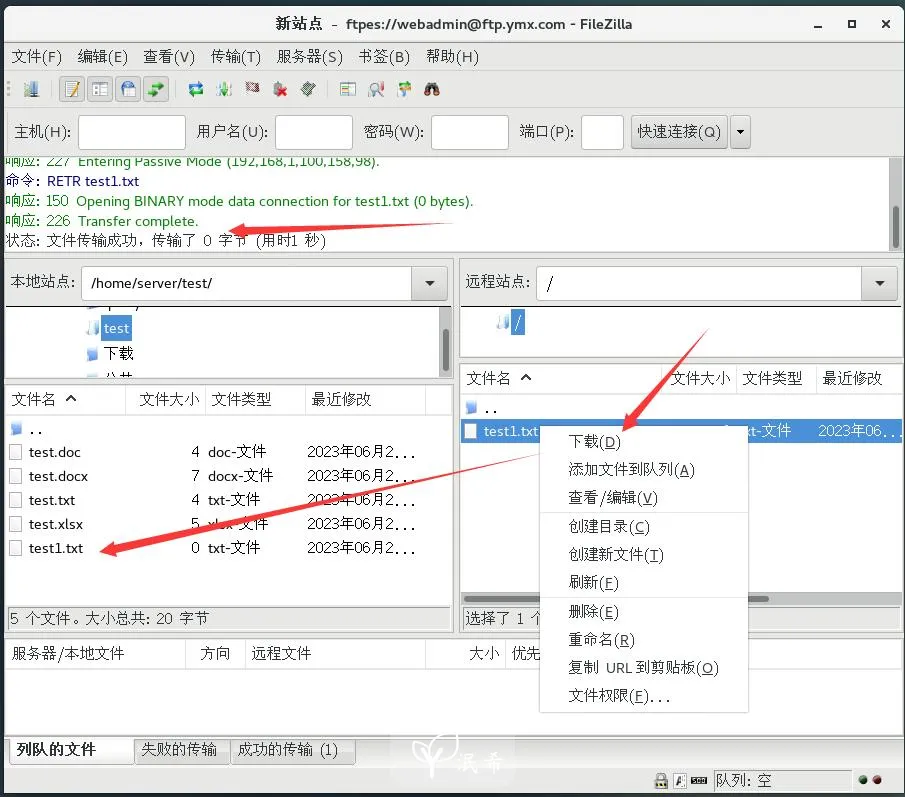
Verify downloads
Try downloading an allowed file.
The download succeeds.
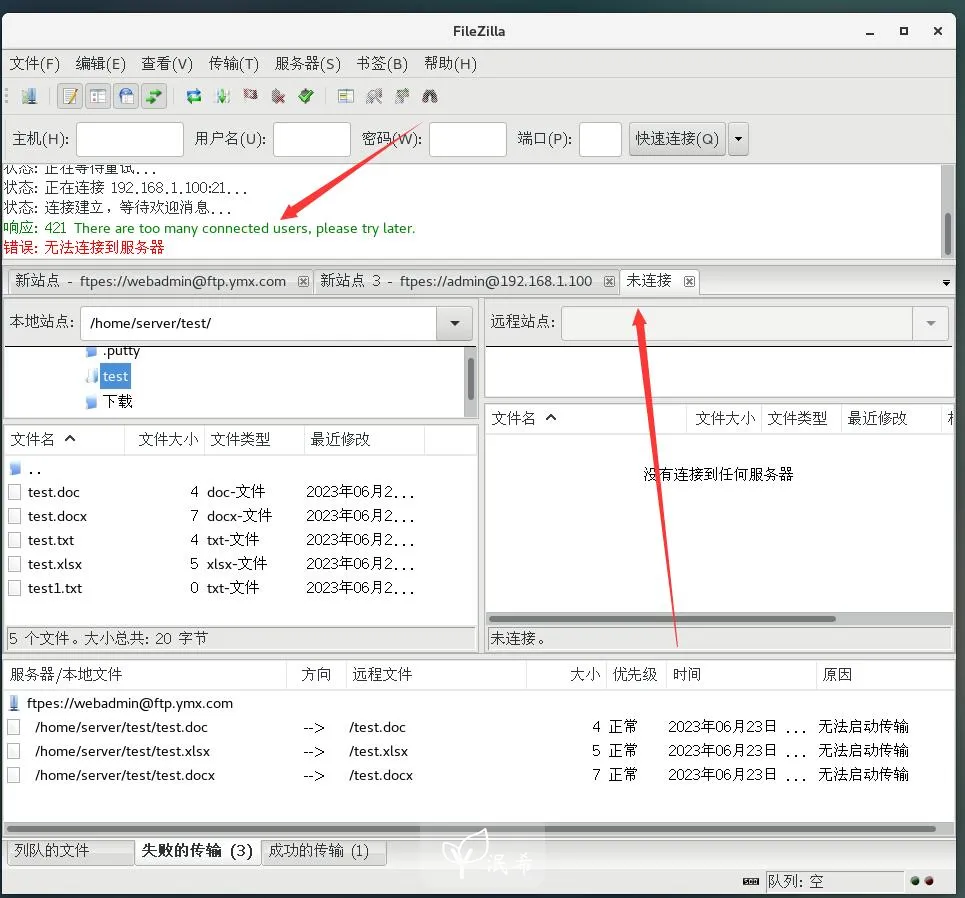
Verify the single-IP session limit
Open multiple sessions from the same client IP and test the connection cap.
At most two sessions can log in at the same time; additional attempts are denied.