Thymeleaf sits in a different part of the Java web stack than Vue. It is a good fit for traditional Java web applications, particularly when Spring is already involved, because it can produce server-rendered pages efficiently. Vue is aimed at modern single-page applications with richer frontend interaction and a more app-like user experience. The decision usually comes down to where the project's weight lies: stronger frontend interaction and dynamism point toward Vue, while backend logic and server-side rendering point toward Thymeleaf.
This walkthrough covers the basics needed to get Thymeleaf working in a Spring Boot project.
Preparing a Spring Boot project
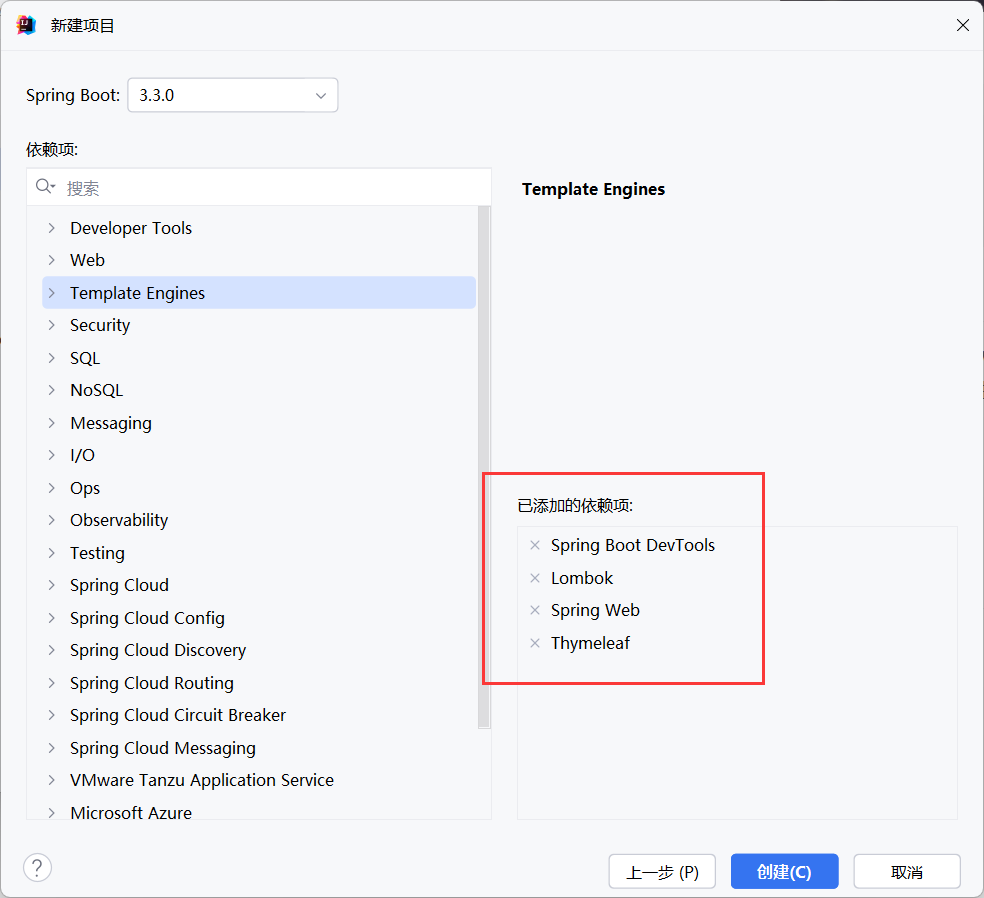
Start with a simple Spring Boot Maven project and include the Thymeleaf template engine when creating it.
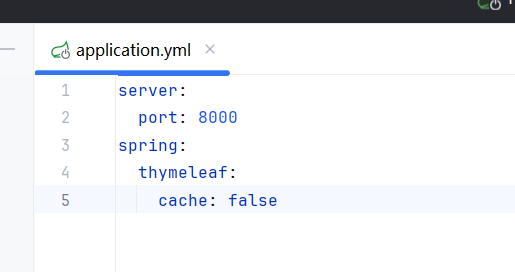
Next, open the configuration file—YAML is used here—and disable Thymeleaf caching. That setting belongs in development only; when the application is deployed, caching should be turned back on. The reason is practical: during development, disabling the cache means template changes can be seen quickly without restarting or waiting for cached output. In production, enabling the cache improves performance and reduces server load. Keeping different settings for those two phases is normal.
Creating an HTML template
In the IDE's Settings, go to File and Code Templates and create a Thymeleaf template. Give it a name and choose HTML as the extension.
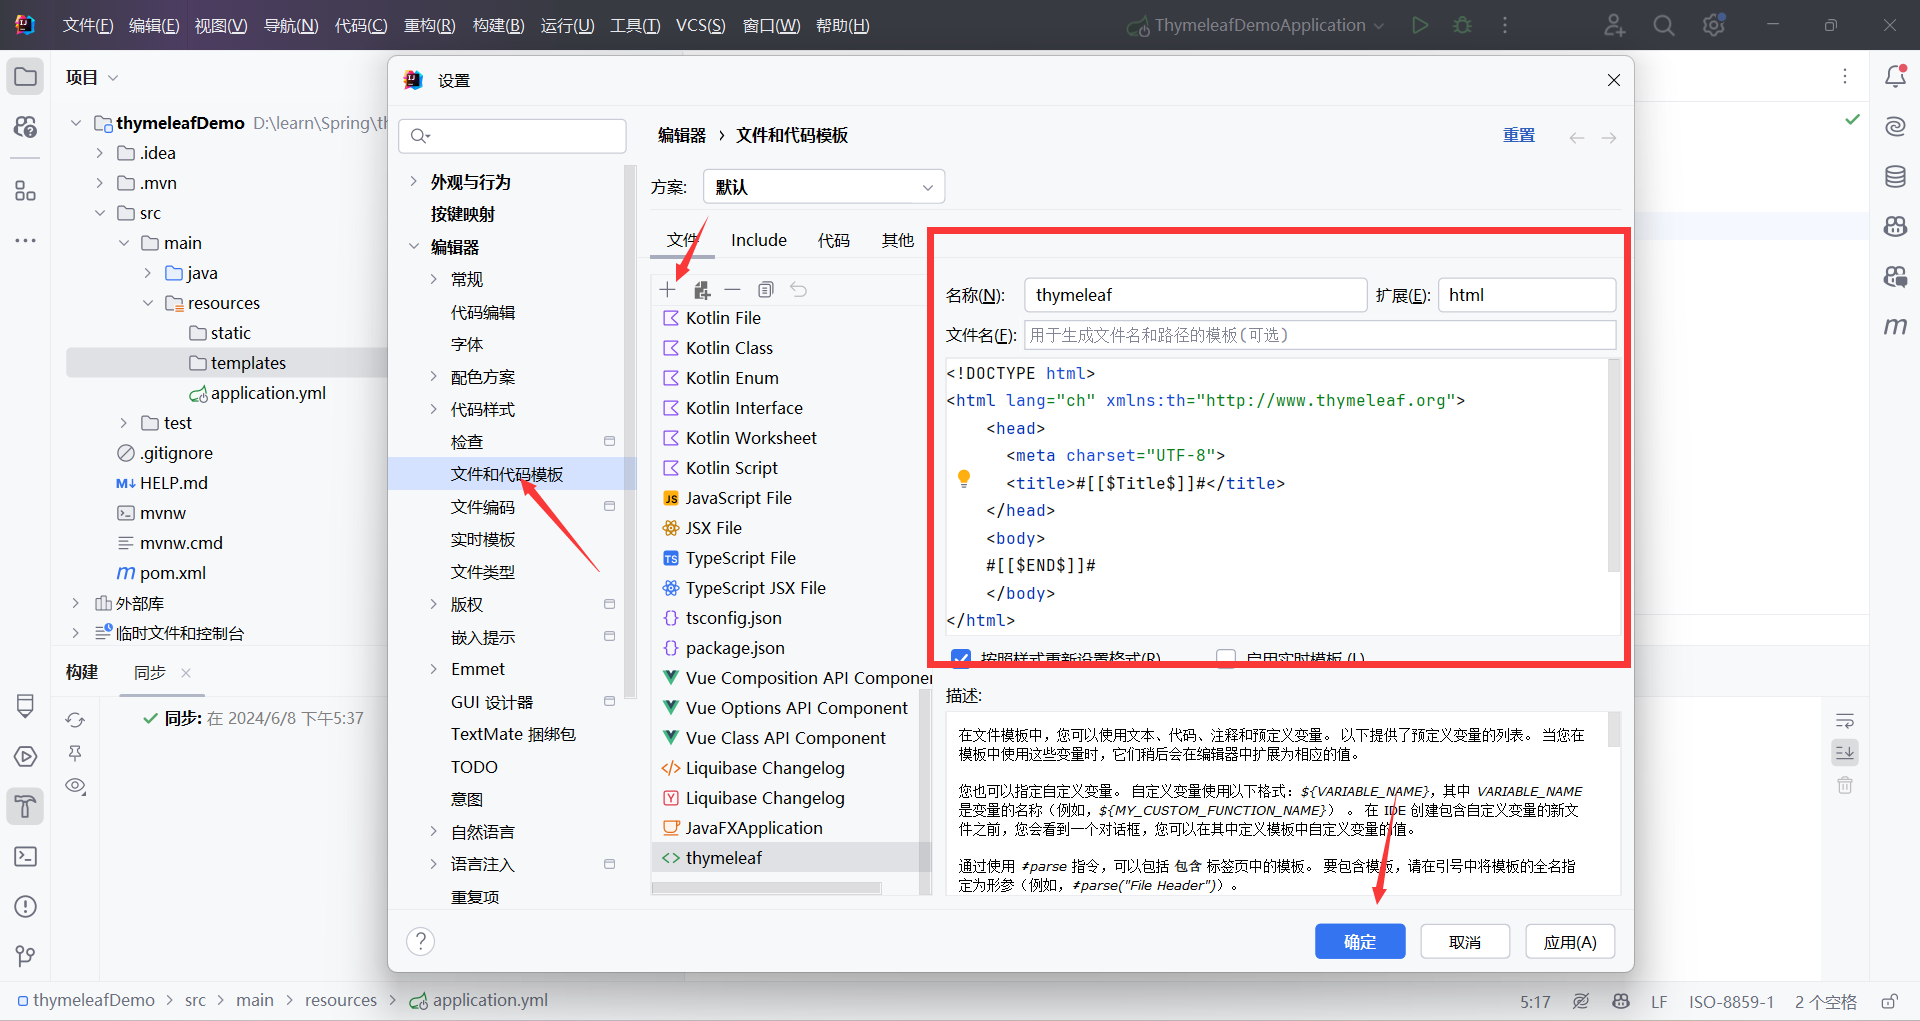
<!DOCTYPE html>
<html lang="ch" xmlns:th="http://www.thymeleaf.org">
<head>
    <meta charset="UTF-8">
    <title></title>
</head>
<body>

</body>
</html>
Inserting text with th:text
The th:text="${}" attribute inserts text into an HTML element dynamically. It is the basic way to bind server-side data to the page. The same approach can be used for metadata such as content or keywords.
Suppose a model object named user has a name property that should appear on the page:
model.addAttribute("user", new User("Alice"));
A Thymeleaf template can bind that value with th:text:
<!DOCTYPE html>
<html xmlns:th="http://www.thymeleaf.org">
<head>
    <title>Thymeleaf 示例</title>
</head>
<body>
    <h1>欢迎,<span th:text="${user.name}">用户</span>!</h1>
</body>
</html>
Here, th:text="${user.name}" replaces the content inside the <span> element, so the rendered heading reads as a welcome message for Alice.
The same idea applies to the page title. An index page can define a fallback title and then replace it with a value from the controller:
<head>
    <meta charset="UTF-8">
    <title th:text="${title}">默认title</title>
</head>
A controller can supply that title:
package org.thymeleafdemo.controller;

import org.springframework.stereotype.Controller;
import org.springframework.ui.Model;
import org.springframework.web.bind.annotation.GetMapping;

@Controller
public class IndexController {

    @GetMapping("/index")
    public String index(Model model){
        model.addAttribute("title","传递过来的titile");
        // Set the title
        return "index";
    }
}
Before the server starts, the page still has the fallback title:

Once the application is running, the controller value replaces it:

String concatenation
To combine a literal string with a dynamic value inside th:text, use the pipe characters ||:
<title th:text="|text-${title}|"></title>
Referencing CSS and JavaScript
Stylesheets and scripts use the th:href and th:inline attributes where needed. A CSS file placed under the static resources can be linked like this:
<head>
    <meta charset="UTF-8">
    <title>title</title>
    <link rel="stylesheet" th:href="@{app.css}">
</head>
For JavaScript, th:inline="javascript" marks the script block so Thymeleaf can process its dynamic values:
<script th:inline="javascript">
    const user=/*[[${user}]]*/{}
    console.log(user)
</script>
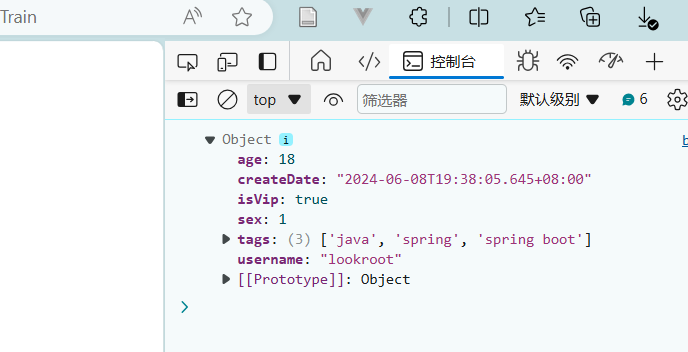
In that example, the inline expression injects the server-side user object into the script, and console.log(user) can then work with it in the browser.